VoiceFlow CRM AI — Documentation
Everything you need to install, set up, use, automate, and resell VoiceFlow CRM AI — written for people, not engineers. Whether you have never run a server before or you are wiring the REST API into your own stack, there is a path here for you.
What is VoiceFlow CRM AI?
VoiceFlow CRM AI is a self-hosted, white-label platform that pairs AI voice calling, lead qualification, a built-in CRM, and multi-channel messaging (WhatsApp, SMS, Telegram, email) in one stack that runs on your server. It calls new leads within seconds, qualifies them with your questions, updates their records, follows up across every channel, and hands your team a ranked shortlist — around the clock. You can even run it as an online store's autopilot: a shopper checks out on WooCommerce and the platform confirms the order over WhatsApp and by AI phone call, with zero clicks from you.
📞 AI voice calling
Autonomous agents call & qualify leads 24/7, then log a recording, transcript, summary, and score.
💬 Team inbox
Two-way WhatsApp, SMS & Telegram in one shared inbox with AI reply suggestions.
⚙️ Automation
Sequences, visual workflows, and conversation flows that run your follow-up for you.
🛒 Store autopilot
Connect WooCommerce and confirm every cash-on-delivery order over WhatsApp buttons and AI calls.
🏷️ White-label & resell
Brand it as your own, sign up clients, and bill them — a full SaaS business in a box.
🌍 Multilingual
English, Spanish & Arabic interface with full right-to-left support; calls in Hindi, Bengali & more.
Pick your path
You do not need to read this cover to cover. Jump to the path that fits you:
🚀 I just installed it
Get from a fresh install to your first AI call.
Start here →🐣 I'm brand new
Follow a hand-held, 15-minute tutorial with checkpoints.
First AI call →🧭 I use it day to day
One clear guide per menu and feature.
Feature guides →🛒 I sell online (COD)
Put your WhatsApp order confirmations on autopilot.
Store autopilot →💼 I want to resell it
Run your own branded SaaS and bill your own clients.
Reseller guide →👩💻 I'm a developer
REST API, webhooks, and the workflow expression language.
Developer & API →Requirements & installation
The product ships as a single Docker Compose stack, so installation is the same on any server that can run Docker. You can be signed in to a live instance in about fifteen minutes.
What you need
| Requirement | Details |
|---|---|
| A server | A Linux machine (a cloud VPS is perfect) with Docker and Docker Compose v2. 2 vCPU / 4 GB RAM is a comfortable starting point; 4 vCPU / 8 GB is roomy. |
| A domain optional | A domain name pointed at your server, for a public HTTPS install. Not needed for local testing on localhost. |
| Provider accounts added later | Accounts for the features you want — telephony, AI, speech, messaging. You add these keys after install from inside the app. See Connect a provider. |
docker compose, v2). Nothing else needs to be installed on the host — the database, cache, and app all run inside the stack.Install in ~15 minutes
- Upload or copy the product files to your server and open a terminal in that folder.
- Run the guided installer:
It checks Docker, asks a few plain questions (your public address, your admin login, whether to load demo data, and whether to enable one-click self-update), writes your./install.sh.env, builds the images, and starts everything. - When it finishes, open your address in a browser and sign in with the admin email & password you chose.
You should land on the Dashboard with a "Get your platform live" checklist. That means the stack is healthy and you are running.
.env.example → .env, docker compose up -d, migrations run automatically) is in Operate ▸ Installation. The installer just automates those steps..env safe It holds your secrets. Never commit it to a public place, and back it up. Everything runs on your infrastructure — no data leaves your server unless you connect an external provider.Your first AI call in 15 minutes
This is the hand-held path from a fresh install to hearing your AI agent qualify a real lead. No jargon — just do each step and watch for the ✅ checkpoints. Tick the boxes as you go; your progress is saved.
- Sign in as your admin
- Connect a telephony provider (to dial)
- Connect an AI provider (to think)
- Connect speech-to-text and text-to-speech (to hear & speak)
- Add a lead you can safely call (your own phone)
- Pick a ready-made voice agent
- Place the call and read the result
1. Sign in
Open your instance's web address and sign in with the admin email and password you set during install. You land on the Dashboard.
2. Connect the four things a call needs
A phone call needs four services connected. Go to Settings → Providers (in the sidebar, under the Calling group) and add one of each. For each card, pick a provider, paste the key, click Save credentials, then Validate — a green Verified badge means it works.
| Card | What it does | Easiest option |
|---|---|---|
| Telephony | Places the phone call | Twilio |
| AI / LLM | Thinks & writes the summary | OpenAI or Google Gemini |
| Speech-to-Text | Transcribes what the caller says | Deepgram (or OpenAI) |
| Text-to-Speech | Gives the agent its voice | Sarvam, ElevenLabs, or OpenAI |
Exact fields and where to find each key are in Connect a provider.
3. Add a lead you can safely call
Go to Leads → New lead. Put in your own name and phone number (international format, e.g. +14155550100) so your first call rings your pocket. Save.
4. Pick a voice agent (one is already written for you)
Go to Voice Agents. Five ready-made agents ship with every workspace — Lead Qualifier is a perfect first call. You do not have to write anything.
5. Place the call
Open your lead's row menu and choose Call now (or run a one-lead campaign). In a few seconds your phone rings — answer it and talk to your agent.
6. Read the result
Open Calls and click your call. At the top is the recording player; below it, tabs for Transcript, AI Summary, Qualification (interest, budget, timeline, intent score), Intelligence, and Score. This is exactly what your team sees for every lead the AI calls — at scale.
Your first automation
Let's make the CRM do work by itself: the moment a new lead arrives, tag it and send a welcome message — no human involved. You will use the visual Workflows Studio, and you will not write a line of code.
- Open Workflows and insert a ready-made recipe
- Understand the trigger → action shape
- Validate the workflow
- Activate it
- Create a test lead and watch it fire
1. Start from a recipe, not a blank page
Open Workflows (Pro mode — see Finding your way around if you don't see it). Click Templates and insert New-Lead Tag, Enroll & Welcome. The canvas fills with a small graph.
2. Read the shape: trigger → action
Every workflow starts with one trigger (an event, like "a lead was created") and flows into actions (things to do, like "send a message" or "set a field"), optionally through conditions that branch the path. Click any node to configure it in the right-hand panel. Full detail lives in Workflows Studio.
3. Validate, then activate
- Click Validate. A green "Definition is valid" confirms the graph is wired correctly.
- Click Activate. The engine now watches for the trigger event.
4. Make it fire
Go to Leads → New lead, add a test contact, and save. Within moments the workflow runs — check the lead's tags and message history, and the workflow's run history for a step-by-step log.
Who does what (roles)
Three kinds of people use VoiceFlow CRM AI. Find yours, then follow that path — the sidebar is organised the same way.
| Role | Who they are | Start at |
|---|---|---|
| Owner / Admin | You installed the product and run the instance. You connect providers, package plans, and (optionally) sell access. | Set up |
| Team member | You use the CRM day to day — leads, calls, the inbox, automations. | Use it |
| Reseller / Agency | You run your own branded SaaS on top of the product and bill your own clients. | Resell |
Inside the app, roles are enforced too
Every workspace has four member roles — Owner, Admin, Agent, and Viewer — that control who can change settings, handle live call handoffs, or only read. The same roles apply to the REST API, so an integration can never do more than the member behind its key. Add and manage members under Settings → Members.
First login & the live checklist
You just installed VoiceFlow and you are the instance owner — the person who runs the whole self-hosted platform. This is the first of six setup pages that take you from your very first login to a live, ready-to-sell instance. No technical background is assumed.
Settings) and a platform administrator hat (the whole instance and every customer on it — under the Admin menu, the System Admin Console). Most of this section is about the second hat.Your owner account already exists
When the product is installed, your owner account is created automatically from the details you set during installation — you do not register it yourself. Open your instance's web address in a browser and sign in with that email and password.
BOOTSTRAP_ADMIN_* was never configured, the first person who registers on a brand-new instance is automatically promoted to system admin — so you can always reach the Admin console.The welcome screen
On your first sign-in you land on a screen titled "You're the platform administrator." You get three cards:
- Set up your platform — takes you straight to the
Adminconsole (payment gateways, plans, providers, your public website). This is the path this section follows. - Continue as a workspace user — the same onboarding your customers see: pick a persona (My business, My agency, or My SaaS) and follow a checklist. Useful for seeing the product as a customer would.
- Skip for now — goes straight to the dashboard. This screen won't nag you again.
The "Get your platform live" checklist
However you continue, your Dashboard shows a card called "Get your platform live" with a progress bar and a short checklist: Connect a voice provider, Connect WhatsApp, Load starter templates, Create a voice agent, Import leads, Make your first AI call or send a template, and Configure payments. Each item is a live link — click it to jump to the right screen. The card ticks steps off by itself as you complete them and disappears once everything is done.
Where credentials live: your keys vs. platform keys
VoiceFlow talks to outside services — a phone carrier to place calls, an AI service to write summaries, speech services to transcribe and speak, WhatsApp, Telegram. Each needs a credential. There are two places those credentials can live, and understanding the difference is the single most important concept for an owner.
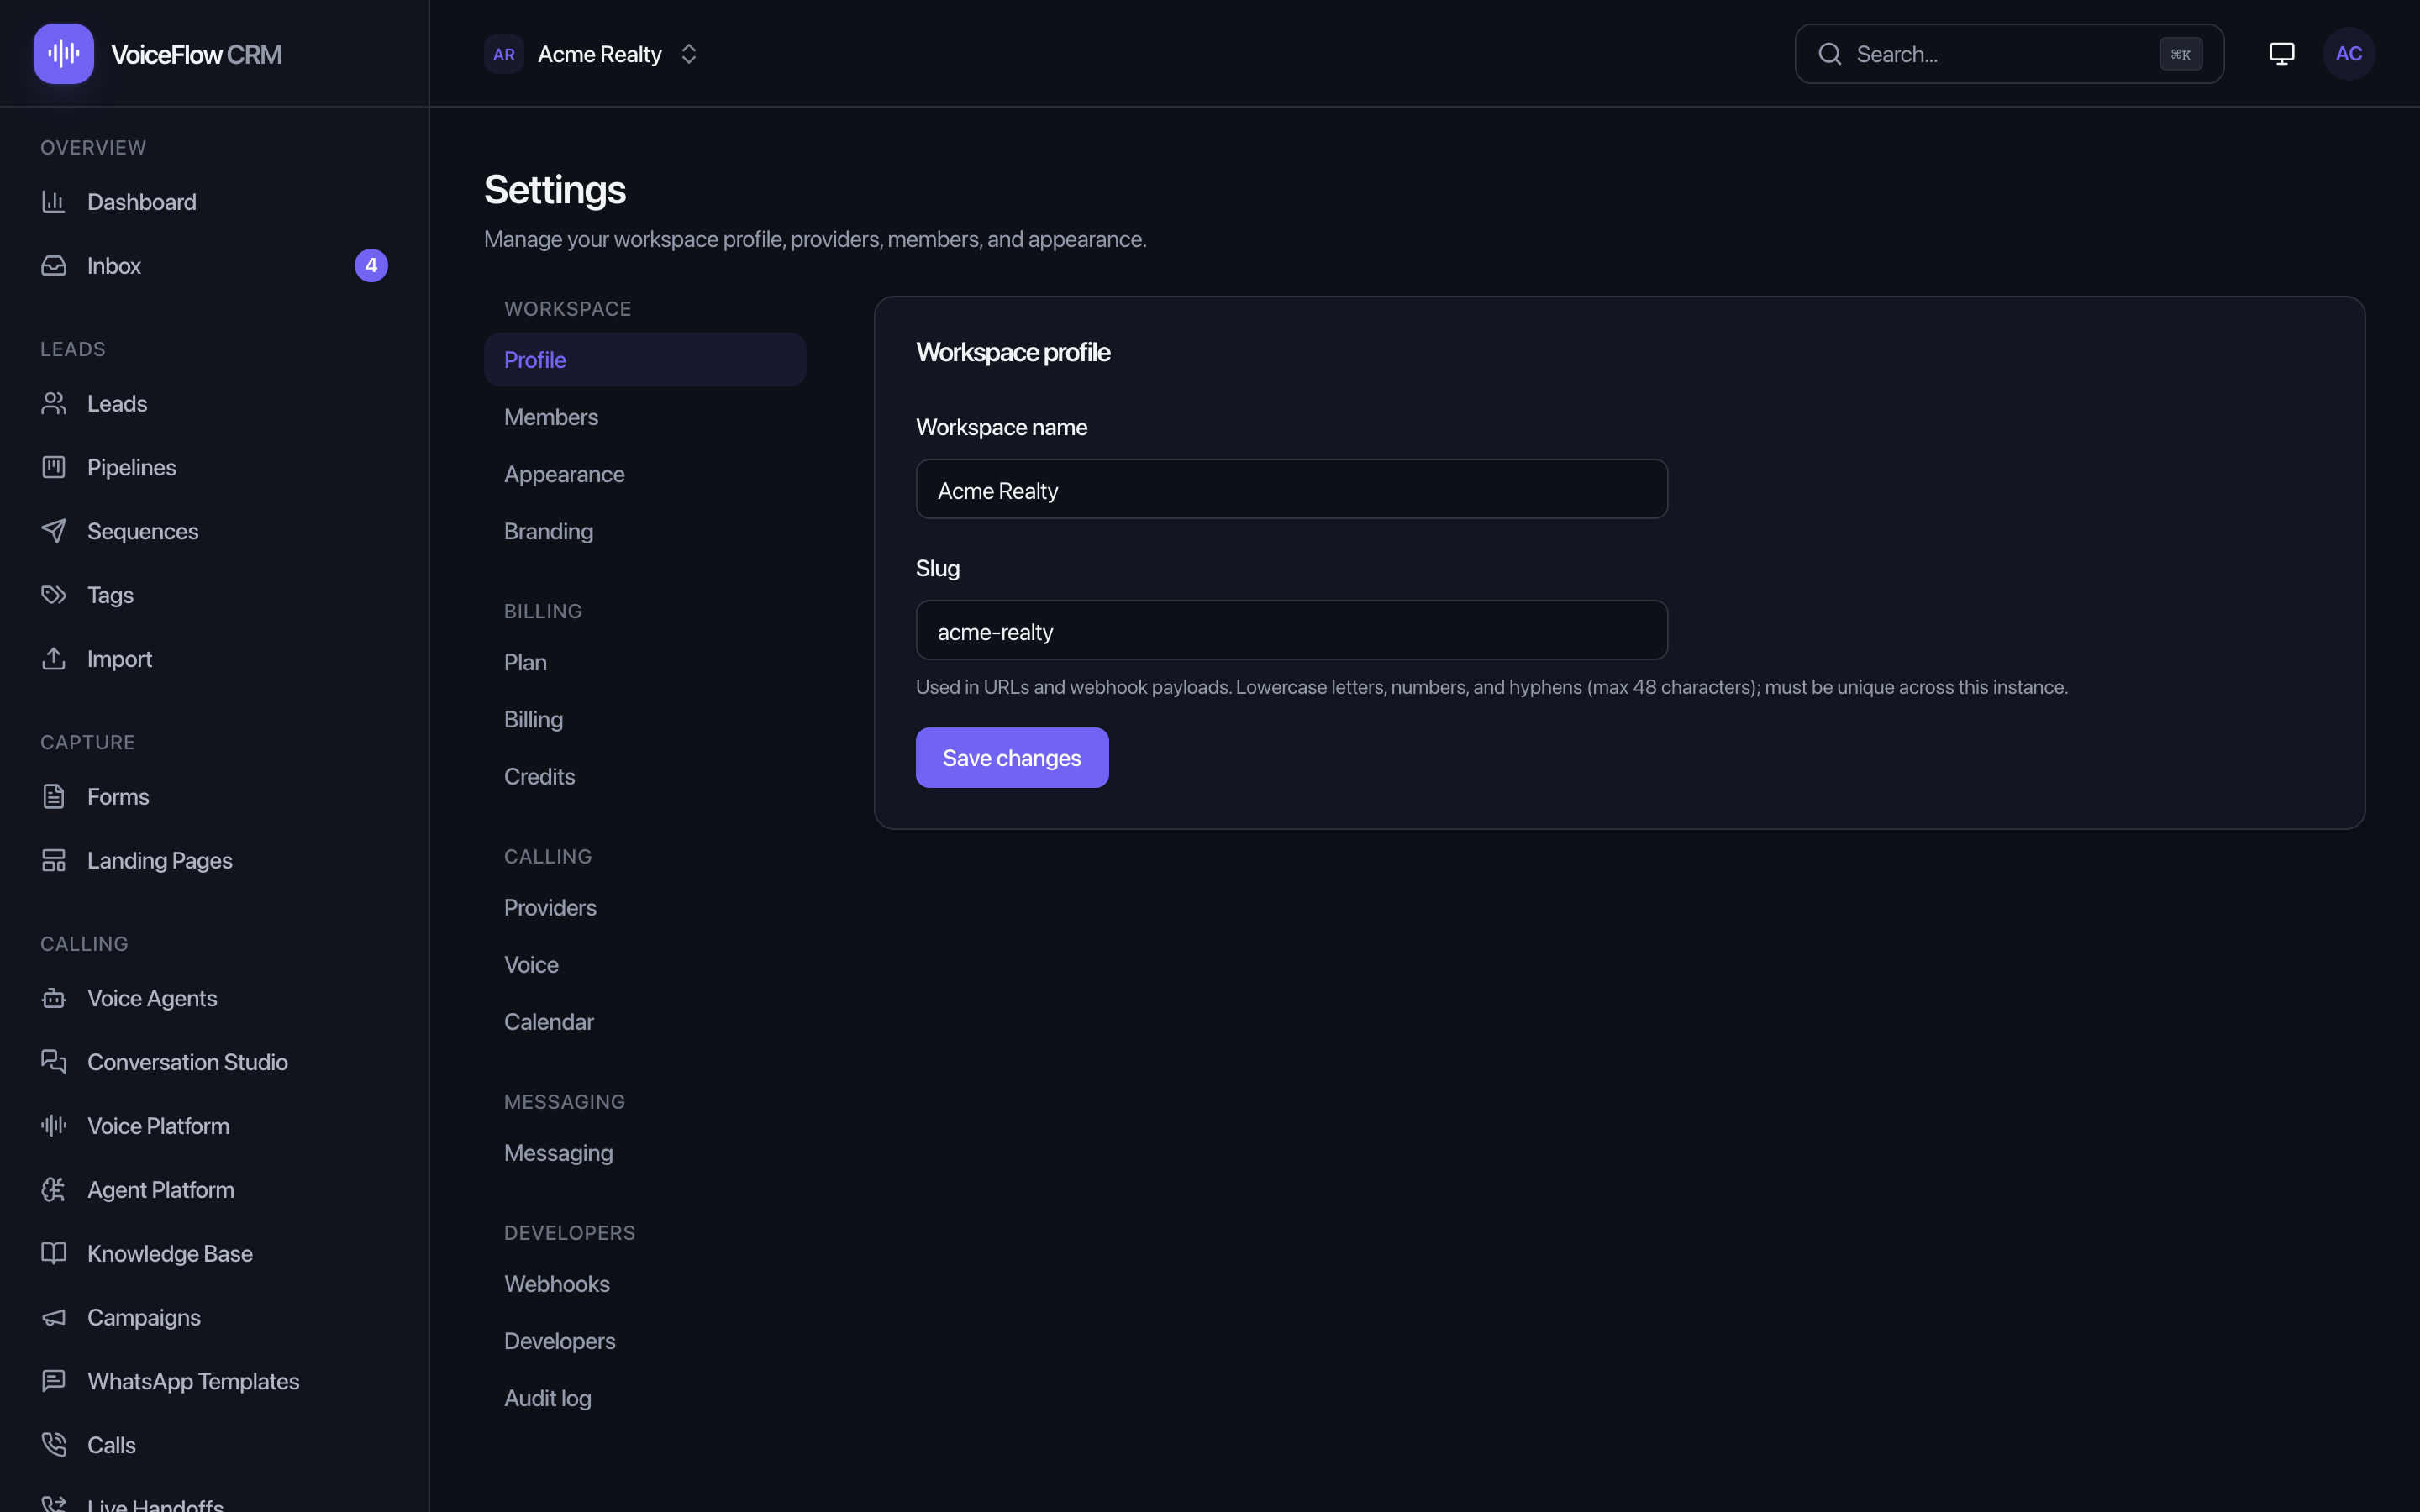
Settings → Providers — "bring your own keys"
This is your own workspace's set of keys. Anything you enter here is used only for your workspace's calls and messages, billed directly to your accounts at those providers. Find it in the sidebar: Settings → under the Calling group → Providers.
Admin → Platform keys — instance-wide fallback keys
These are instance-wide keys you configure once as the owner. Any customer workspace whose plan grants Platform keys + credits, and that has not entered its own keys, automatically falls back to these — and every call it places is metered against a prepaid credit balance you sell. This is how you resell access without your customers ever needing a Twilio or OpenAI account. Find it under Admin → Platform keys tab.
- Running the platform just for yourself, or want the simplest path? Put your keys in Settings → Providers and ignore Platform keys.
- Reselling to customers who shouldn't bring their own accounts? Configure Platform keys, set a per-minute credit rate, and sell them credits.
- Both can coexist. If a customer adds their own key in Settings → Providers, it always wins; the platform key is only the fallback. A per-type banner ("Platform keys active") tells a customer when they're running on your keys and drawing down credits.
Connecting each provider
The steps below are written for Settings → Providers (your own keys), but the Platform keys tab works identically — same cards, same fields, same help boxes — except its save button reads Save platform credential.
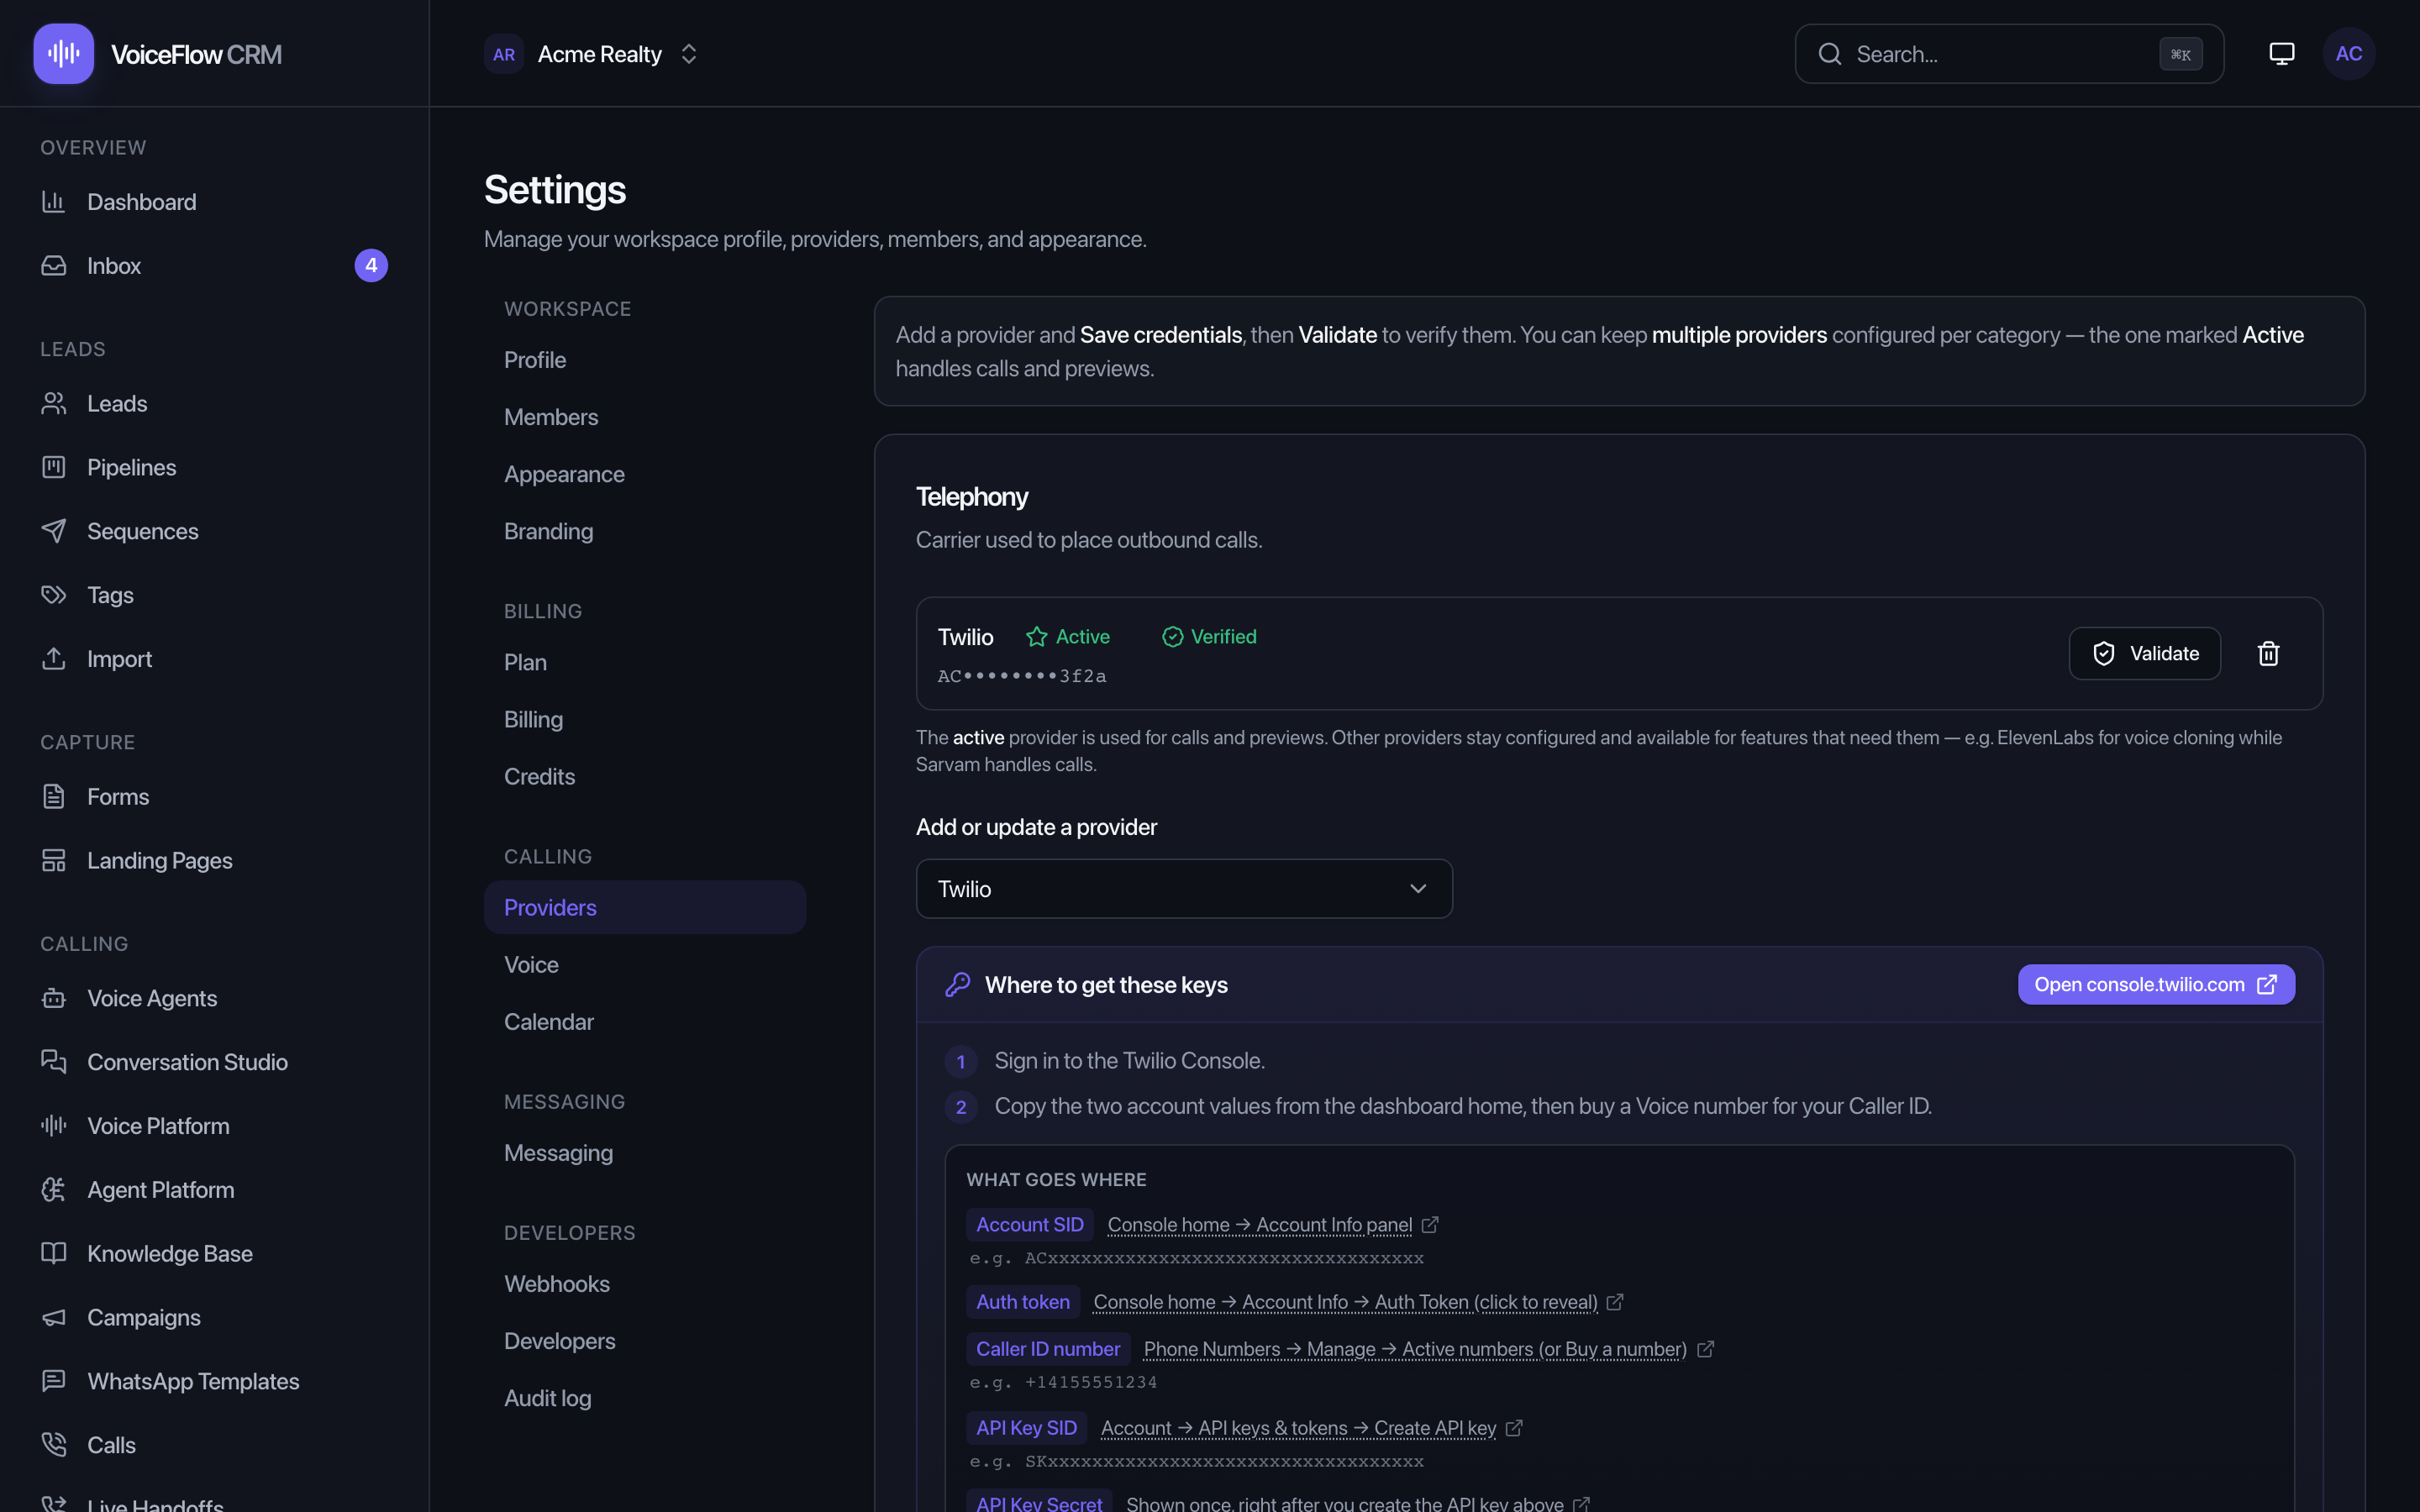
How every provider card works
- Each provider type has its own card: Telephony, AI / LLM, Speech-to-Text, Text-to-Speech, WhatsApp, Telegram.
- Use the Provider dropdown to pick which service you're using. Options marked "— not available in V1" can't be selected yet.
- A blue "Where to get these keys" help box appears with an Open button that deep-links to that provider's dashboard, numbered steps, and a "What goes where" map.
- Fill the fields, then click Save credentials. The values are encrypted immediately.
- The saved credential appears with an Unverified badge. Click Validate to check it live — the badge turns Verified (green) or Invalid (red).
- You can keep several providers per type. Click Make active to choose which one handles calls and previews; the active one carries a green Active star. The trash icon removes one.
Telephony — Twilio
The carrier that places your outbound calls. Get everything from console.twilio.com.
| Field | Where to find it |
|---|---|
Account SID | Console home → Account Info. Starts with AC…. |
Auth token | Console home → Account Info → Auth Token (click to reveal). |
Caller ID number | A Twilio Voice number (Phone Numbers → Manage → Active numbers) in E.164, e.g. +14155551234. |
API Key SID optional | Account → API keys & tokens → Create API key. Starts with SK…. Recommended for production. |
API Key Secret optional | Shown once, right after you create the API key. Required only if you set an API Key SID. |
AI / LLM — OpenAI or Google Gemini
Generates call summaries and lead-qualification results. Pick one provider; the field is a single API key.
- OpenAI — platform.openai.com/api-keys → Create new secret key (starts with
sk-…, shown once). Requires a paid billing method. - Google Gemini — Google AI Studio → Create API key. Generous free tier; no billing to start.
Speech-to-Text — Deepgram or OpenAI
Transcribes call audio. Single API key field.
- Deepgram (primary) — console.deepgram.com → API Keys → Create a Key. Free sign-up includes trial credit.
- OpenAI (fallback) — the same OpenAI key also works here (Whisper).
Text-to-Speech — Sarvam, ElevenLabs, or OpenAI
Synthesizes the agent's voice. Single API key field.
- Sarvam AI — best pronunciation for Bengali and Hindi. Key from dashboard.sarvam.ai. In the app the option reads "Sarvam (Indian-native · Hindi/Bengali)".
- ElevenLabs — profile → API Keys at elevenlabs.io → Settings → API Keys. Also powers voice cloning.
- OpenAI — the same OpenAI key works across features.
WhatsApp — Meta Cloud API, Twilio, or one-click Connect
Send WhatsApp messages to leads. Three routes on the WhatsApp card.
Route A — one-click Connect (easiest)
If you (as owner) have configured Embedded Signup on the instance (see System Admin Console ▸ Platform keys), you and your customers see a blue Connect WhatsApp via Facebook button above the manual form. Click it, complete Meta's popup — choosing a WhatsApp Business Account and phone number — and the credential is saved for you (with a long-lived token).
localhost is not supported.Route B — Meta Cloud API (manual)
Choose Meta Cloud API in the Provider dropdown. From your app at developers.facebook.com/apps (add the WhatsApp product first):
| Field | Where |
|---|---|
Phone number ID | App → WhatsApp → API Setup → the "From" number's Phone number ID. |
Access token | Use a permanent System-User token (Business Settings → System Users → Generate). The API-Setup "Temporary token" expires in 24 hours. |
App secret | App Settings → Basic → App secret → Show. Verifies inbound webhooks. |
WhatsApp Business Account ID optional | WhatsApp → API Setup. Needed to manage message templates. |
Receiving replies (Routes A and B)
For incoming WhatsApp messages and delivery ticks to reach your inbox, Meta needs a webhook — a one-time step for the whole instance. As owner, open Admin → Platform keys → WhatsApp → Webhook (incoming messages) and copy the Callback URL and Verify token (click Generate token first if none exists — it's created once and then stays fixed). Then in your Meta app go to WhatsApp → Configuration, paste both, click Verify and save, leave "Attach a client certificate" off, and subscribe to the messages field. Done once, it covers every workspace.
The other half — routing your number's messages to that webhook — happens by itself: whenever a Meta Cloud API credential is saved or validated, the product auto-subscribes your WhatsApp Business Account. So if replies ever stop appearing, open the WhatsApp credential row and click Validate — that re-checks the token and repairs the subscription.
https://your-domain/privacy and https://your-domain/terms. They're white-label (they carry your product and company name) and satisfy Meta's and Twilio's sign-up forms.Route C — Twilio WhatsApp
Reuses your existing Twilio account — no separate Meta app. Choose Twilio WhatsApp and enter your Account SID, Auth token, and a WhatsApp-enabled Twilio sender number (Messaging → Senders → WhatsApp senders) in E.164.
Telegram
Message leads who have started your Telegram bot. Choose Telegram Bot and enter a Bot token from @BotFather (send /newbot, pick a name/username, copy the token). An optional Webhook secret is any value you choose.
Email (SMTP)
Every email the product sends — password resets, notifications, and team invitations — goes over SMTP. Until you set this up, those emails are silently not delivered. Configure it under Admin → Platform keys → Email (SMTP) — no server restart, no editing files. Any SMTP provider works (Brevo's free 300/day: host smtp-relay.brevo.com, port 587; Gmail with an App password; Amazon SES). Enter Host, Port, Username, Password, and a From address, then Save email settings and click Send test email — if it arrives, outgoing email works. The password is write-only; leave it blank on later edits to keep the stored one.
A tour of the System Admin Console
Open it from the sidebar: Admin. The page is titled System Admin Console and marked Instance-wide — these controls affect the whole self-hosted instance and every workspace. A row of thirteen tabs runs across the top.
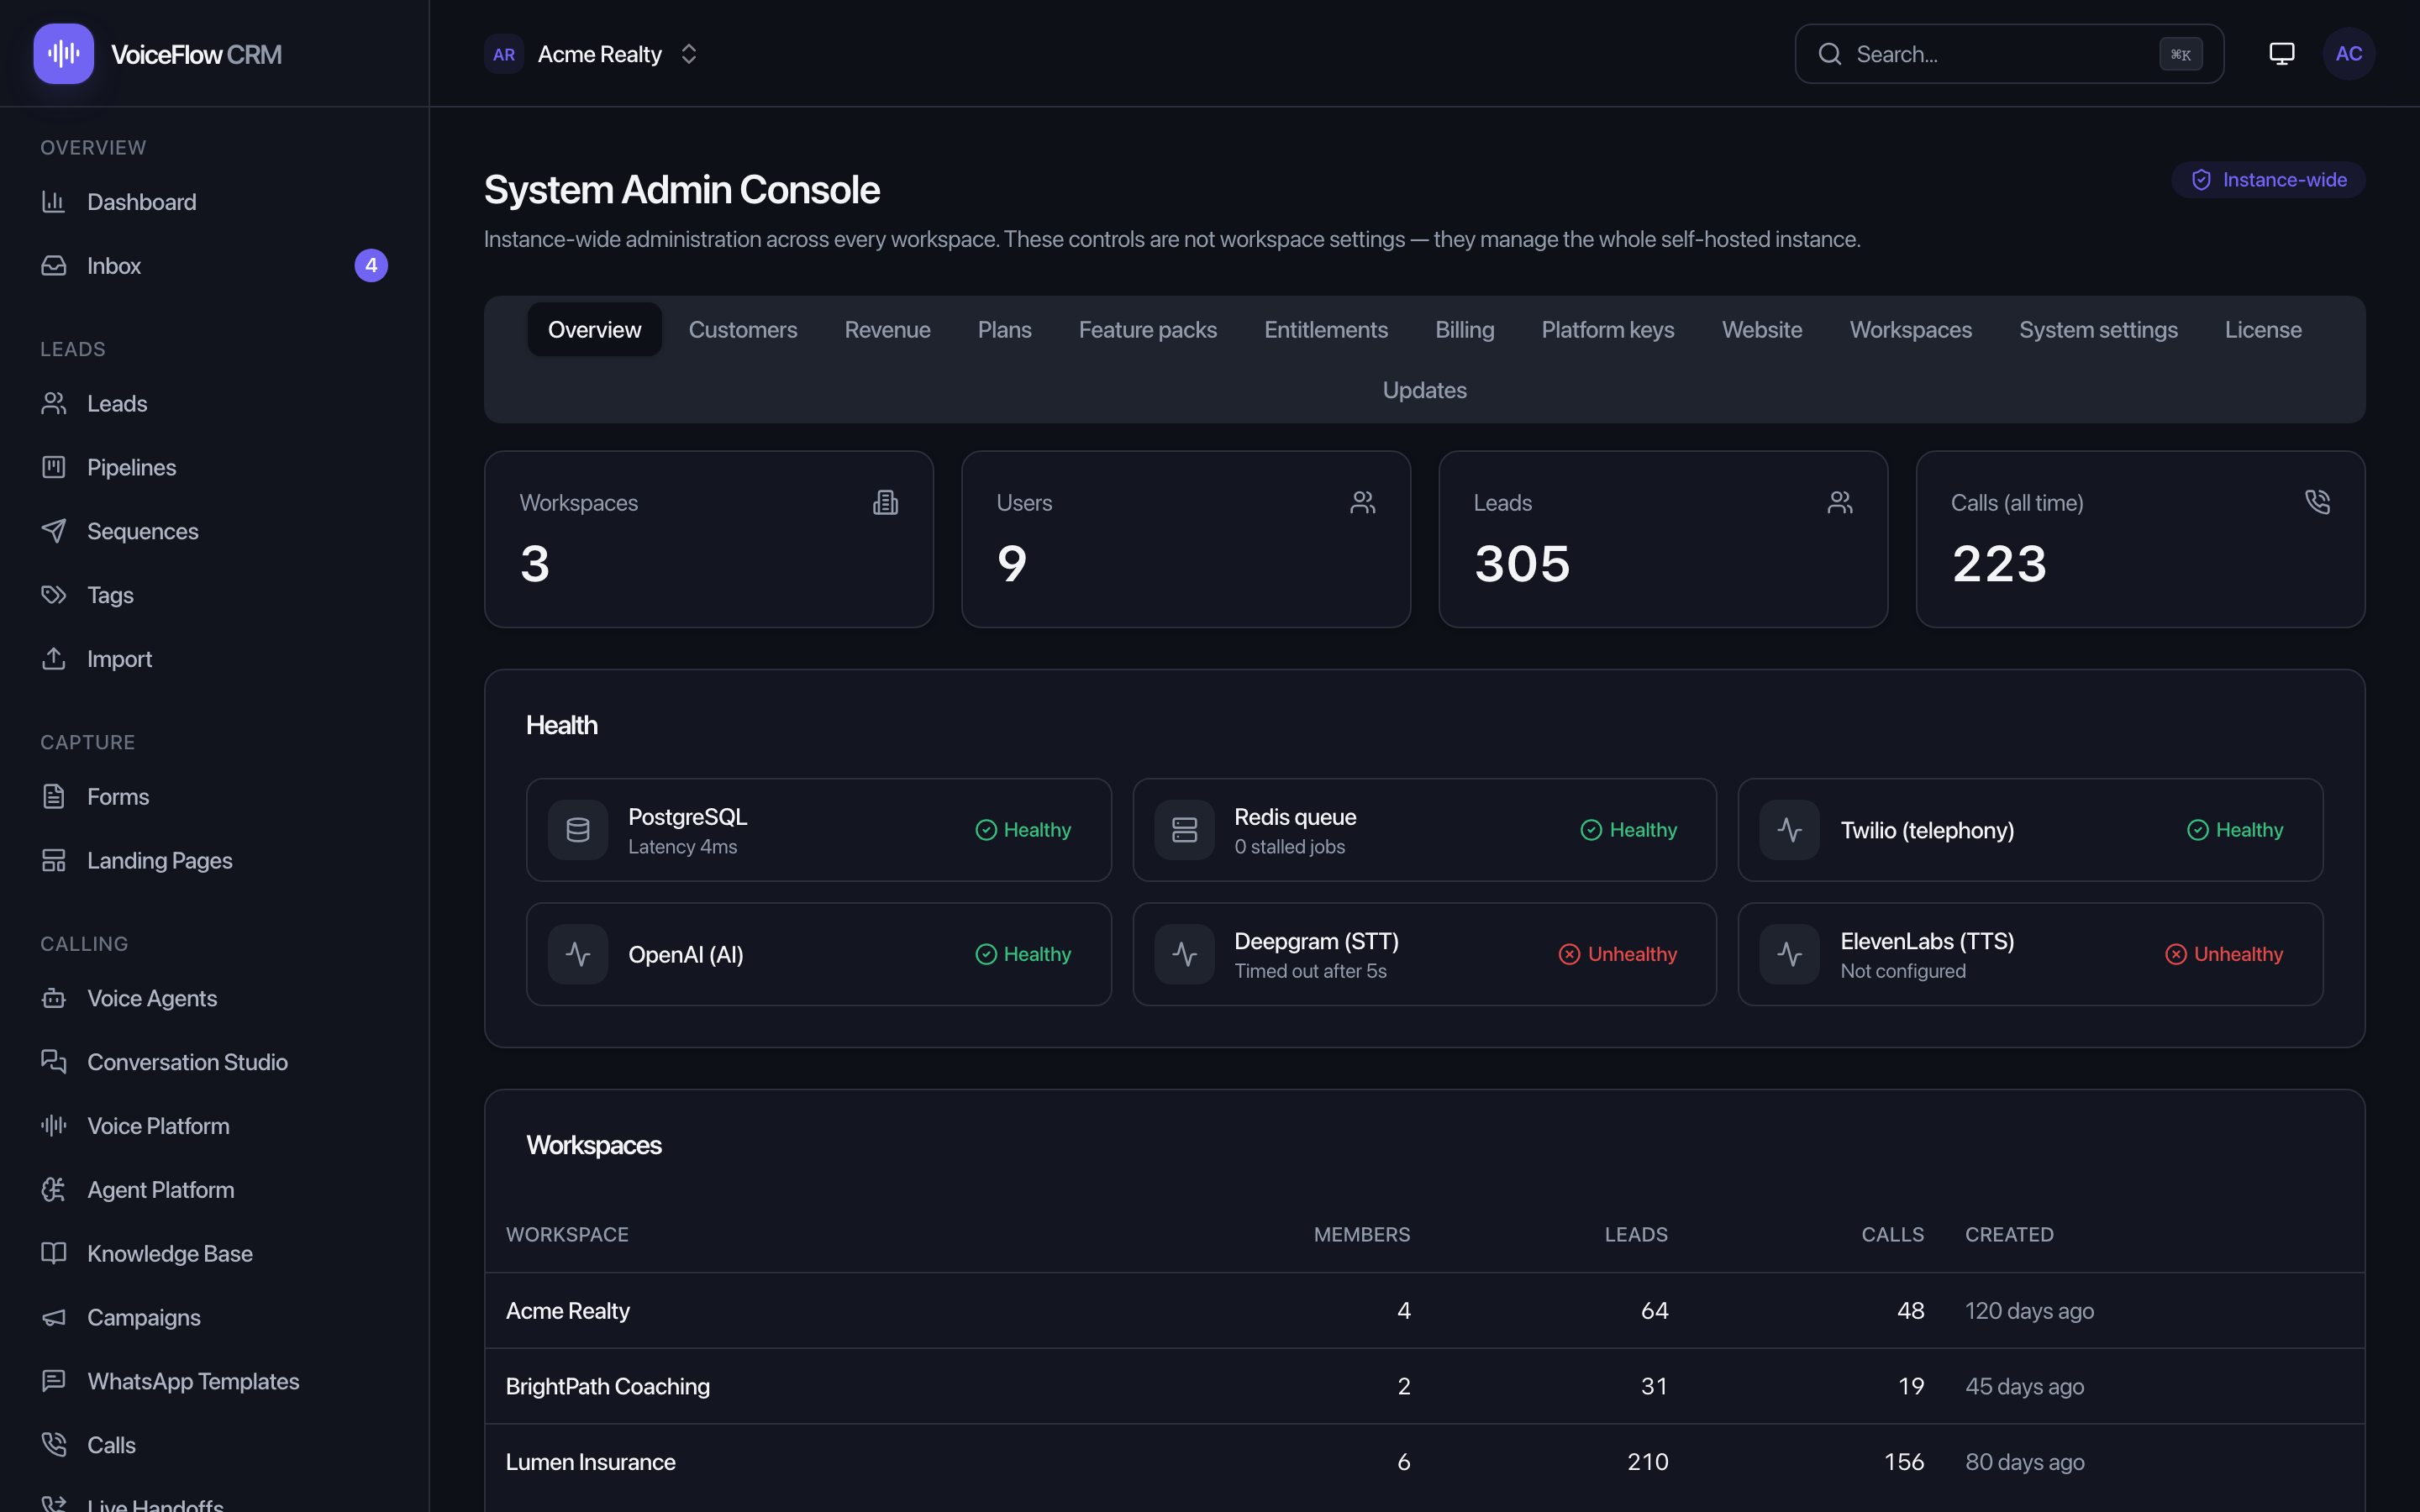
Overview
Your instance at a glance: aggregate counts (Workspaces, Users, Leads, Calls), a Health panel showing each dependency (database, queue, providers) as Healthy or Unhealthy, and a read-only table of every workspace.
Customers
Your commercial roster: every workspace with owner email, current plan and status, billing provider, member count, credit balances, calls this month, and last activity. Search by name/slug/owner email and filter by plan. Row actions: View entitlements, Assign plan, Grant credits.
Revenue
Read-only per-reseller-org revenue: subscription income plus credit-pack sales, totalled by currency. Populates as resellers subscribe and buy credits.
Plans, Feature packs & Entitlements — how you package and sell
These three tabs are your product catalog — a layer cake:
- Entitlements are the build-defined switches and limits wired into the code. This tab is a read-only reference: each key's type, default value, whether it's system-critical, and which plans/packs grant it. You set their values via plans and packs, not here.
- Feature packs bundle a set of entitlement values you can reuse. Create feature pack, then set its values. Packs layer onto plans.
- Plans are what customers actually get. Create plan → name, price, Public (self-serve) or Private. Per plan: edit Entitlements, attach Feature packs, view Usage, Set default, and Archive / Restore / Delete. A warning badge flags a public paid plan that isn't yet purchasable.
Billing
Configure Stripe, Razorpay, or PayPal in-app without redeploying — paste credentials, test the connection, enable/disable, set the default gateway, copy the webhook URL, and map each plan to the gateway's native price id. Secrets are write-only. (Stripe, Razorpay, PayPal are implemented; Paddle is shown as planned and not available in this build.)
Platform keys
The instance-wide fallback provider keys. It holds: Call pricing (set Credits per minute; per-call cost is ceil(minutes) × rate), WhatsApp Connect (Embedded Signup) config (App ID, Configuration ID, App secret — from developers.facebook.com), the Webhook (incoming messages) card, the Email (SMTP) card, and a card per provider type (saved with Save platform credential).
Website
The editor for your public marketing site — home page, /resellers page, tab title, footer. Copy-level (not drag-and-drop). Each section is its own card (Brand, Hero, Stats, Testimonials, FAQ, Footer, SEO, Sections, Resellers page) with its own Save and Reset. Changes go live immediately.
Workspaces
The all-workspaces table for cross-workspace admin actions: View entitlements, Assign plan, Grant credits. This is the only place a system admin assigns plans or grants credits to another workspace.
System settings
Base domain — set a domain so every organization gets a free address at <org-slug>.your-domain with automatic HTTPS and no DNS setup. System settings — instance-wide tunables shown as labelled toggles and fields; changes apply within ~5 seconds.
License
Your instance license and edition. The platform always runs — with no license it gracefully uses the free community edition (a calm banner says so). To activate a commercial edition, paste your signed license key and click Activate license. Online activation/transfer are optional and off by default for self-hosted installs — pasting a key is the normal path.
Updates
The offline-first, non-destructive update surface. Shows your current version and release channel, and — only if you configure an update source — whether a newer release exists. Click Check for updates anytime; nothing is ever applied automatically. When enabled, One-click update backs up your database, installs the new version, and restarts with live progress. See Operate ▸ Updating.
Branding your instance (white-label)
Make the product look like yours. Go to Settings → under the Workspace group → Branding. A live preview on the right updates as you type.
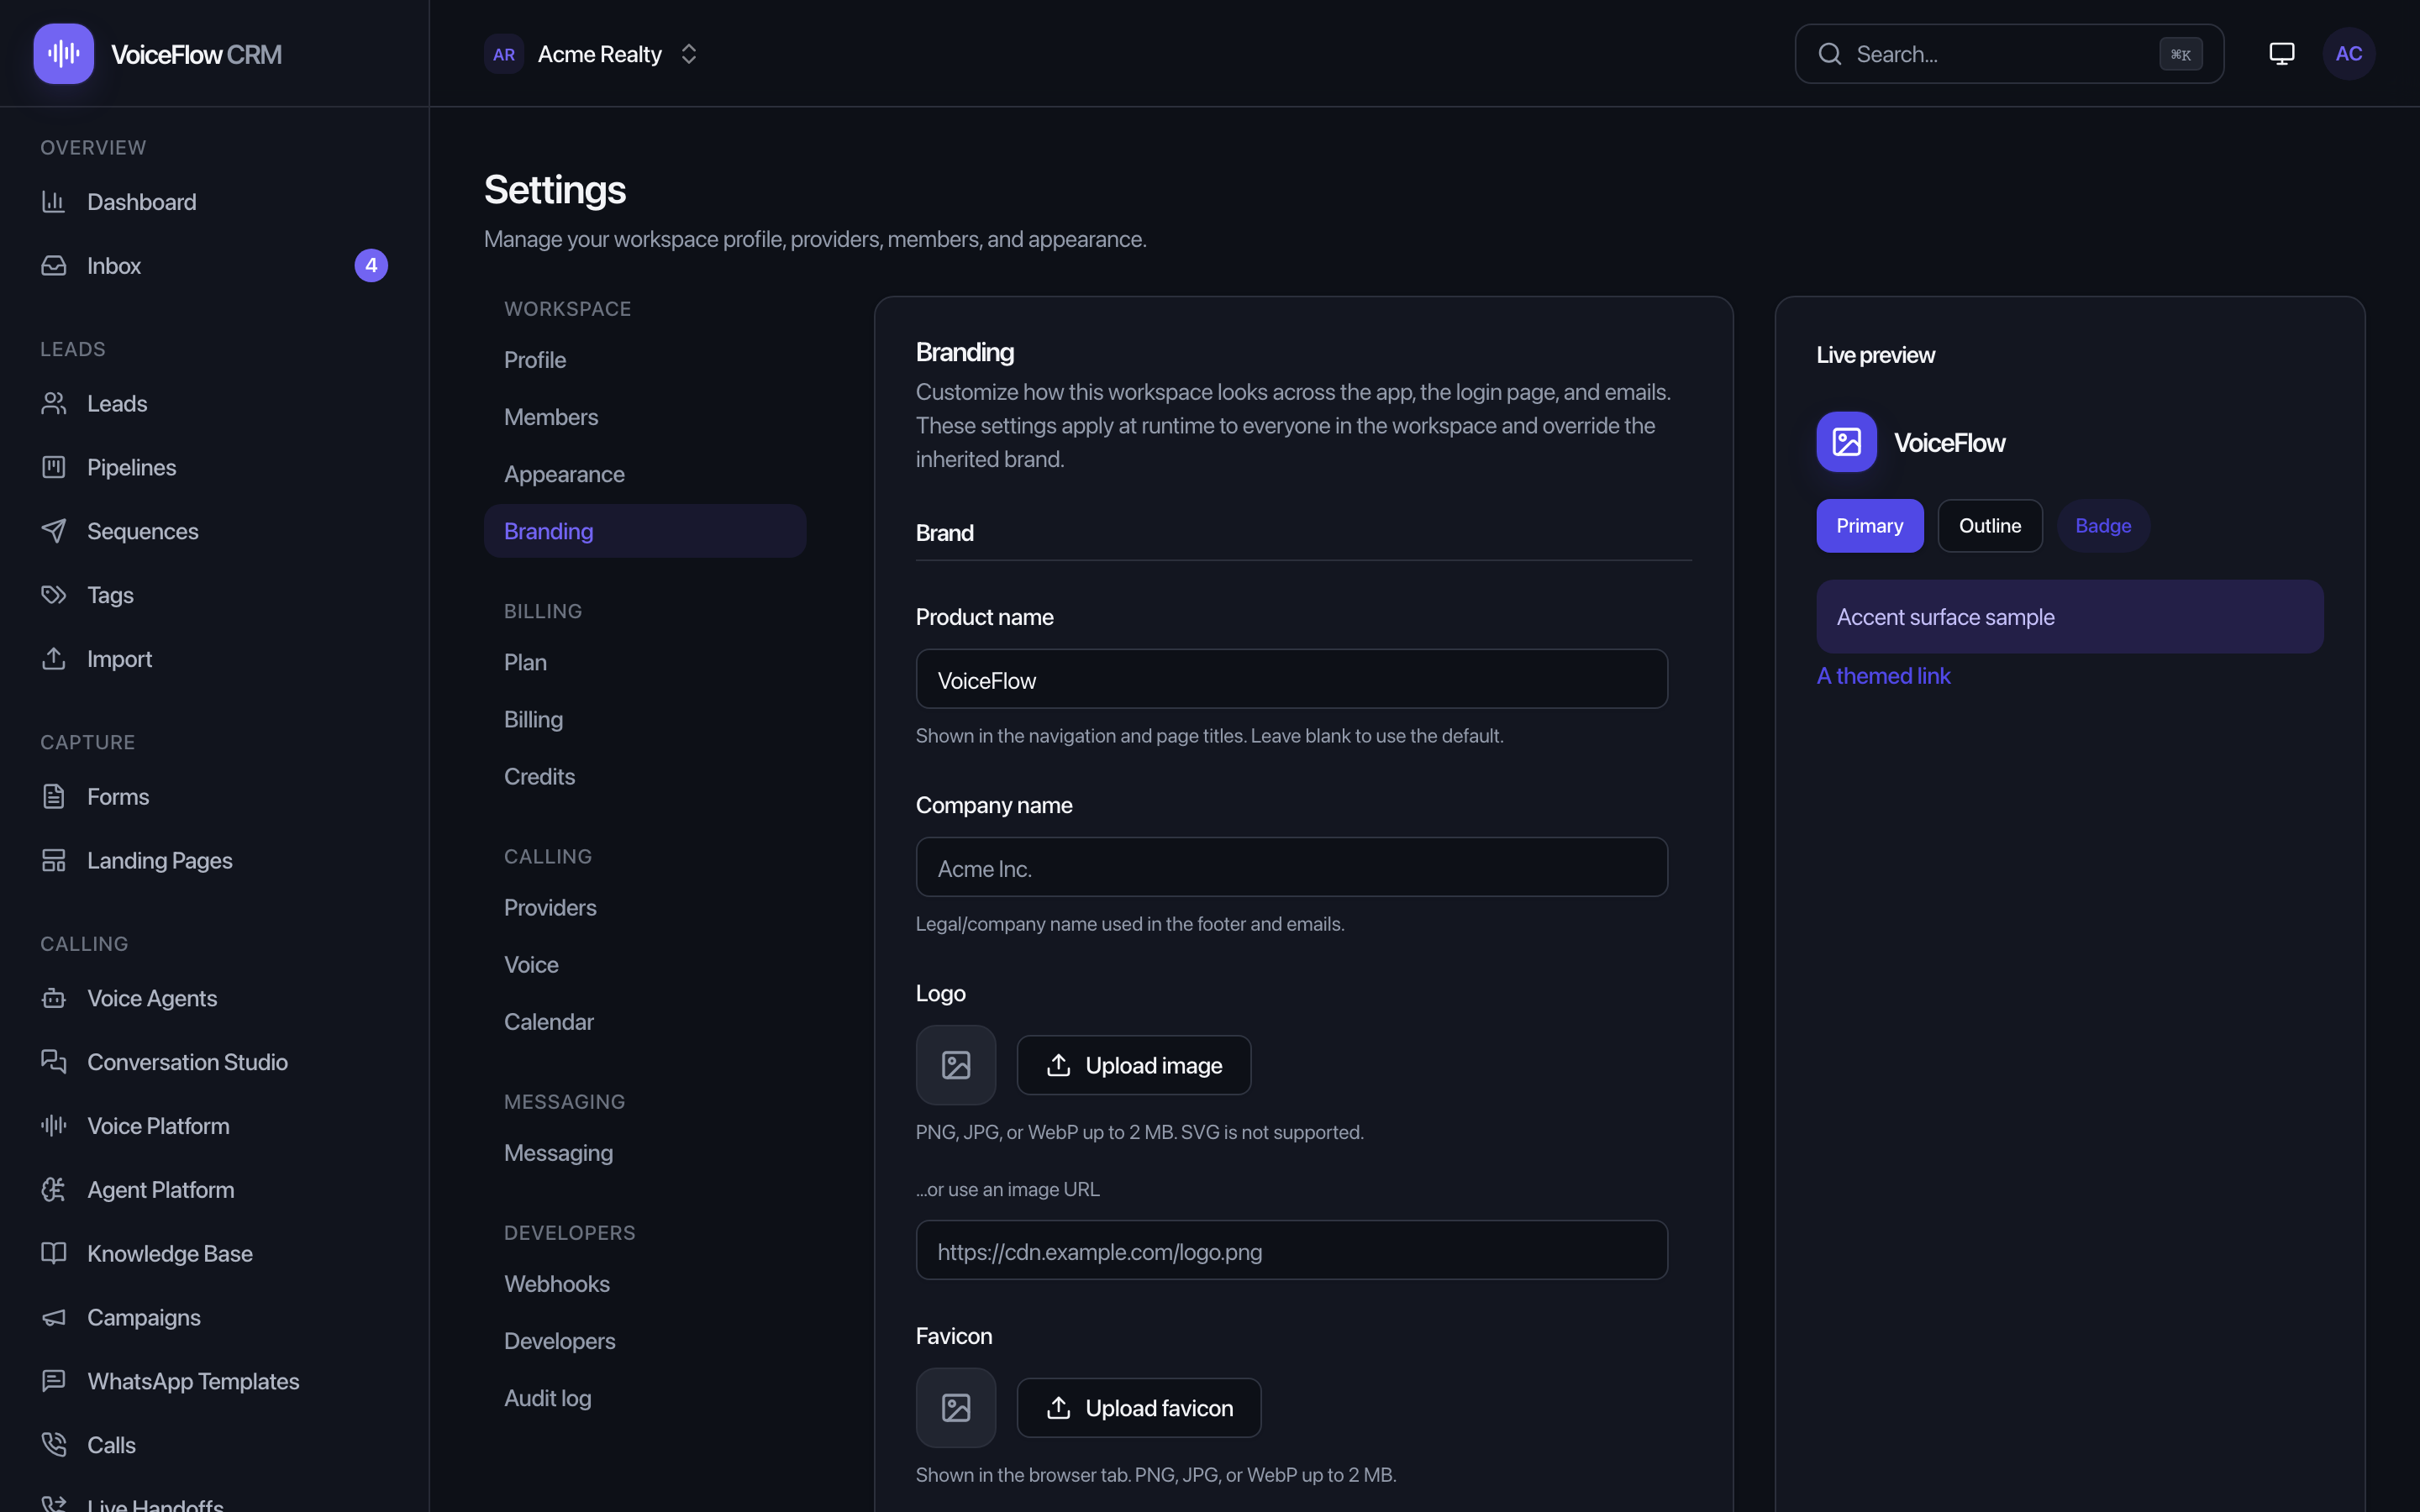
These settings apply to everyone in your workspace and override the inherited brand. Sections:
- Brand —
Product name(nav and page titles),Company name(footer and emails), Logo and Favicon (upload a PNG/JPG/WebP up to 2 MB, or paste anhttps://URL — SVG isn't supported). - Colors & typography — a
Primary colorpicker, an optional Customize accent color toggle, and aFont familyfrom a safe allowlist. - Login page — a
Login taglineand an optional custom login background color. - Emails —
From name,Header logo URL, andFooter textfor transactional emails. - Footer & support —
Footer text,Copyright,Support URL, andSupport email.
Click Save changes. Use Reset to default to clear all overrides.
The shortest path to going live
If you just want to make your first AI call and start charging, do exactly this. Tick as you go.
- Connect telephony (Twilio) and Validate
- Connect AI, Speech-to-Text, and Text-to-Speech, and Validate each
- Pick a ready-made voice agent (or write your own)
- Import a few leads
- Make your first call (single call or a campaign)
- To charge: configure a payment gateway and create a purchasable plan
- Connect telephony. Settings → Providers → Telephony (Twilio). Save and Validate. This alone unlocks calling.
- Connect AI, STT, and TTS. On the same screen, add an AI key (OpenAI or Gemini), an STT key (Deepgram or OpenAI), and a TTS key (Sarvam, ElevenLabs, or OpenAI). Validate each.
- Pick a voice agent. Five ready-made starter agents ship with every workspace (sidebar → Voice Agents).
- Import a few leads. Sidebar → Import → upload a CSV.
- Make your first call. Launch a campaign or place a single AI call. Your dashboard checklist ticks over to "live."
- To charge customers, go to Admin → Billing and configure one gateway (Stripe, Razorpay, or PayPal), then Admin → Plans to create at least one purchasable plan.
Using the CRM — feature guides
This section is your day-to-day handbook: one page per menu item, in the same order they appear in the app's sidebar. Every field is explained in plain terms. Use the sidebar or press / to jump to any feature.
The menu map
The app's sidebar groups pages by purpose. Here's the whole map, so you always know where you are:
| Sidebar group | Pages |
|---|---|
| Overview | Dashboard, Inbox |
| Leads | Leads, Pipelines, Sequences, Tags, Import |
| Capture | Forms, Landing Pages |
| Calling | Voice Agents, Conversation Studio, Voice Platform, Agent Platform, Knowledge Base, Campaigns, WhatsApp Templates, Calls, Live Handoffs, Conversation Intelligence, Transcript Search |
| Scheduling | Meetings |
| Automation | Workflows, Integrations & Event Inspector |
| Workspace | Organizations (see Resell), Settings (see Set up), Scorecards, Admin, License |
Ready-made starters — working examples on every page
The first time you open almost any page, it is already populated with professionally written examples. Instead of staring at an empty screen wondering what a "sequence" or a "scorecard" looks like, you open the page and see a finished one. Use them as-is, edit them, or delete them — they're ordinary items, not locked demos.
| Page | What's waiting for you | Until you act, it… |
|---|---|---|
| Voice Agents | 5 agents (Lead Qualifier, Appointment Setter, Real Estate Qualifier, Customer Win-back, Feedback & Review Collector) | never dials — agents only call when you launch a campaign. |
| Campaigns | One draft, My first calling campaign, wired to your first agent with zero leads | cannot call anyone — pressing Start dispatches nothing until leads are added. |
| WhatsApp Templates | 15 template drafts — from a welcome greeting to a product carousel and the COD kit | stays a private draft until you submit it to Meta for review. |
| Sequences | 3 follow-up drips (New lead follow-up, Missed call recovery, Long-term nurture), all drafts | never sends — a sequence runs only after you Activate it and enroll leads. |
| Workflows | A Templates menu of 14 ready automations (COD-first, then Speed-to-Lead, Missed-Call Rescue…) | does nothing until you Validate and Activate one. |
| Pipelines | A Sales Pipeline board, created automatically — every new lead lands in its first stage | just displays your leads; dragging cards is always up to you. |
| Forms / Landing Pages | 3 forms (Contact us, Get a quote, Book a call) and 2 pages (Lead magnet, Special offer), live at their links | only ever collects leads — a capture page can't send anything, so live is safe. |
| Tags | 5 labels: Hot lead, Warm lead, Cold lead, VIP, Follow up | sits there until you tag someone. |
| Knowledge Base | A Load a sample FAQ button (a button on purpose) | does nothing until clicked, because ingesting content uses a little AI credit. |
| Scorecards | 3 QA scorecards (Lead Qualification, Appointment Setting, Customer Service) | the default one quietly grades each finished call — that's all. |
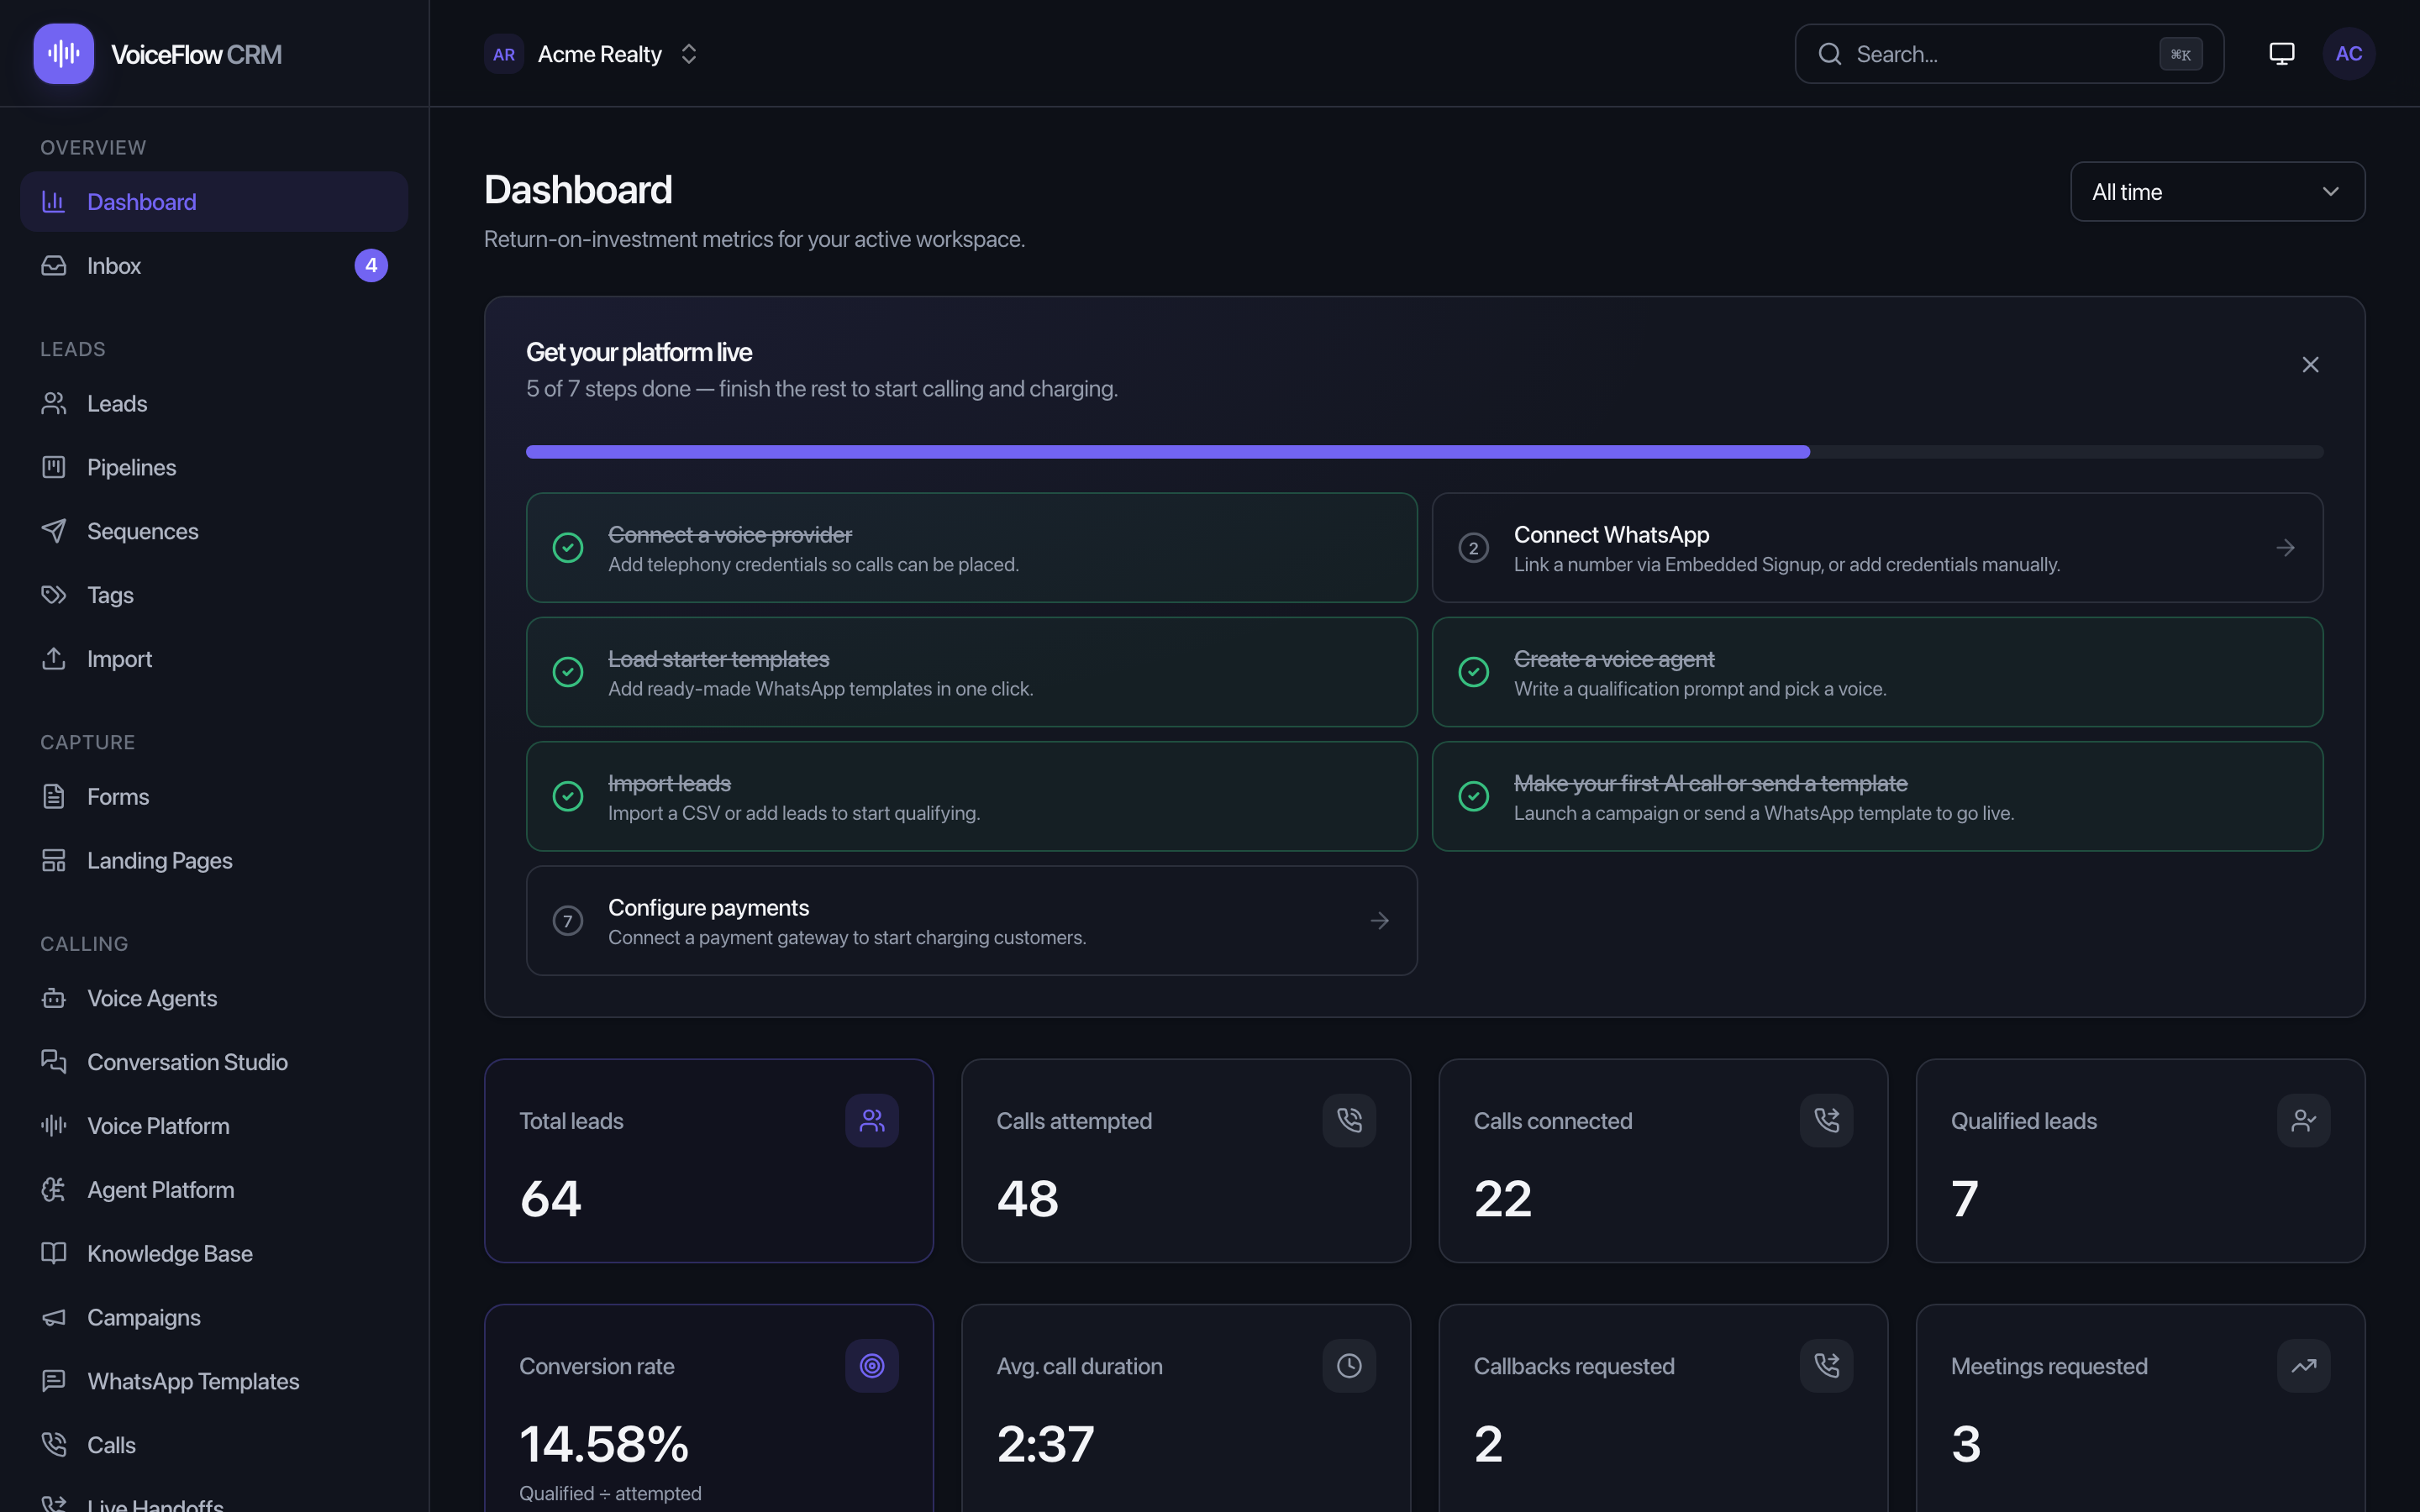
The Dashboard
Your return-on-investment view — the numbers that tell you the AI is earning its keep.
The Dashboard shows total leads, calls attempted/connected, qualified leads, conversion rate, average call duration, and callbacks/meetings requested — filterable by All time / 7 / 30 / 90 days. Below the KPIs, a Call activity chart and Campaign & Agent performance tables show what's working. On a new instance, the "Get your platform live" checklist guides setup and ticks itself off as you go.
Leads — your contact database
Everything starts with leads. Open Leads from the sidebar to see, add, and organise the contacts your AI will qualify.
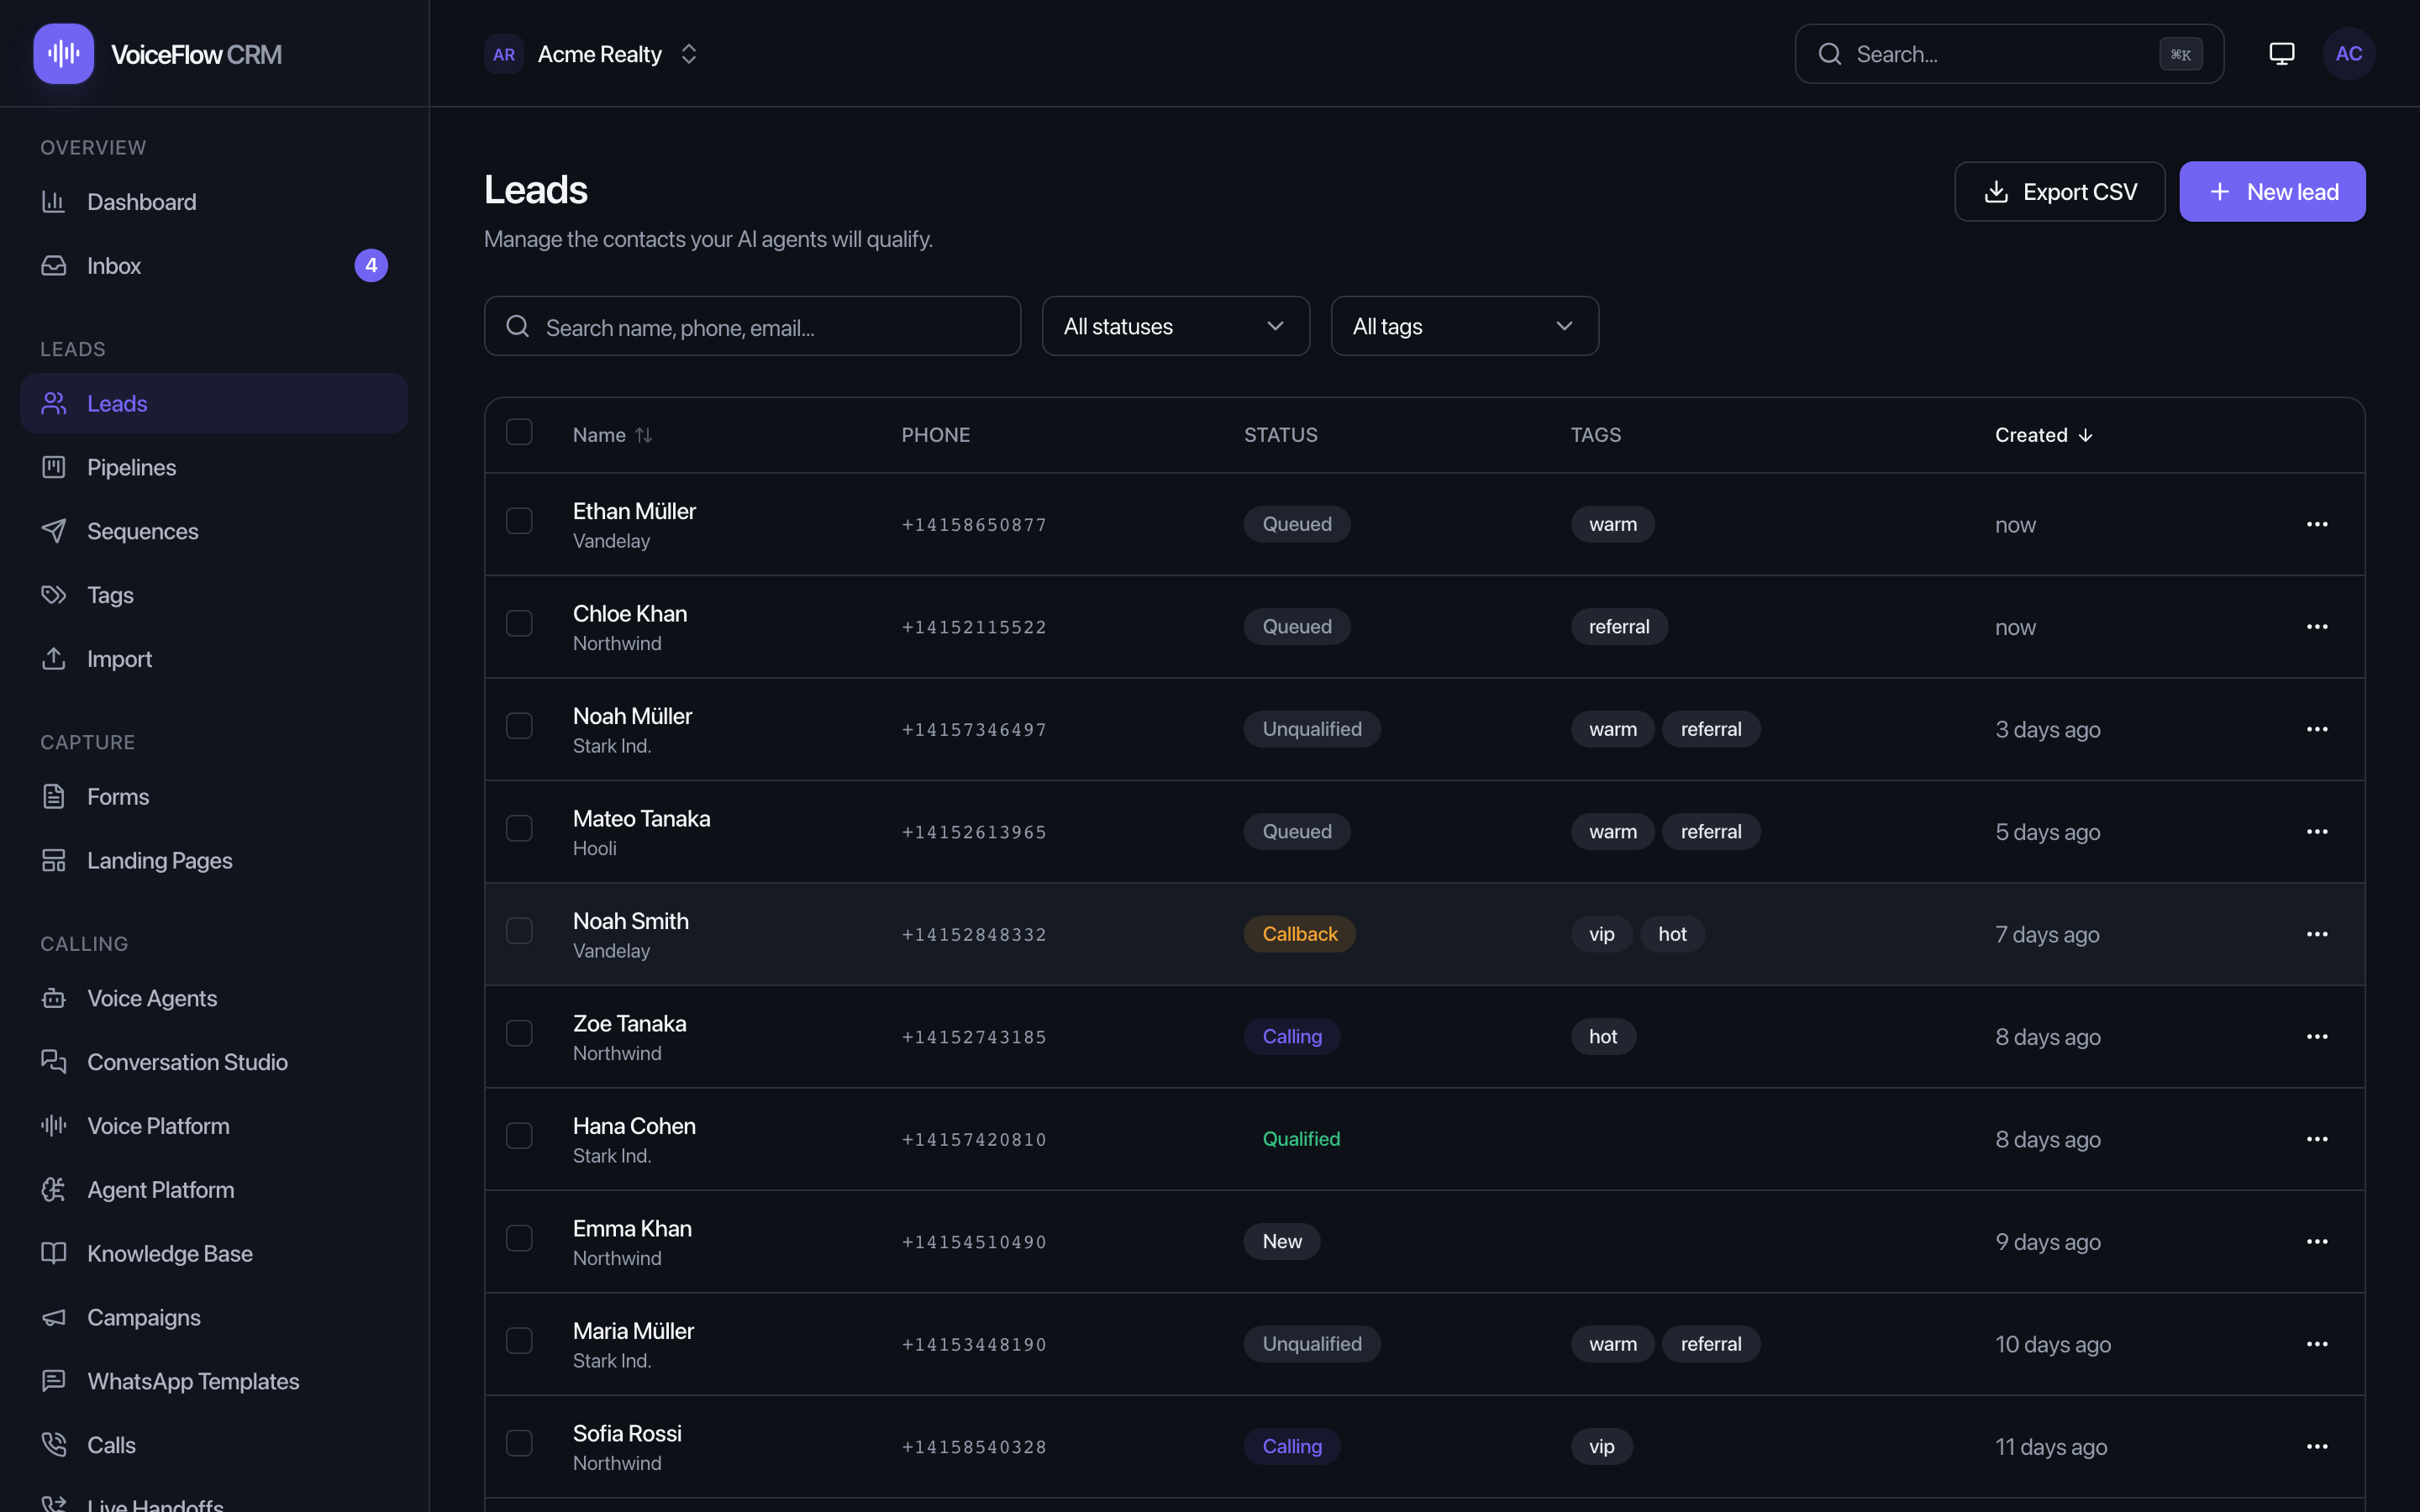
- Add one by hand: click New lead, fill in
NameandPhone(email, company, and status are optional), and save. Phone numbers use international format, e.g.+14155550100. - Import a CSV in bulk: click Import CSV (or open Import). Drag your file, map columns, review sample rows, and get a report of Created / skipped-invalid / skipped-duplicate, with a downloadable error report.
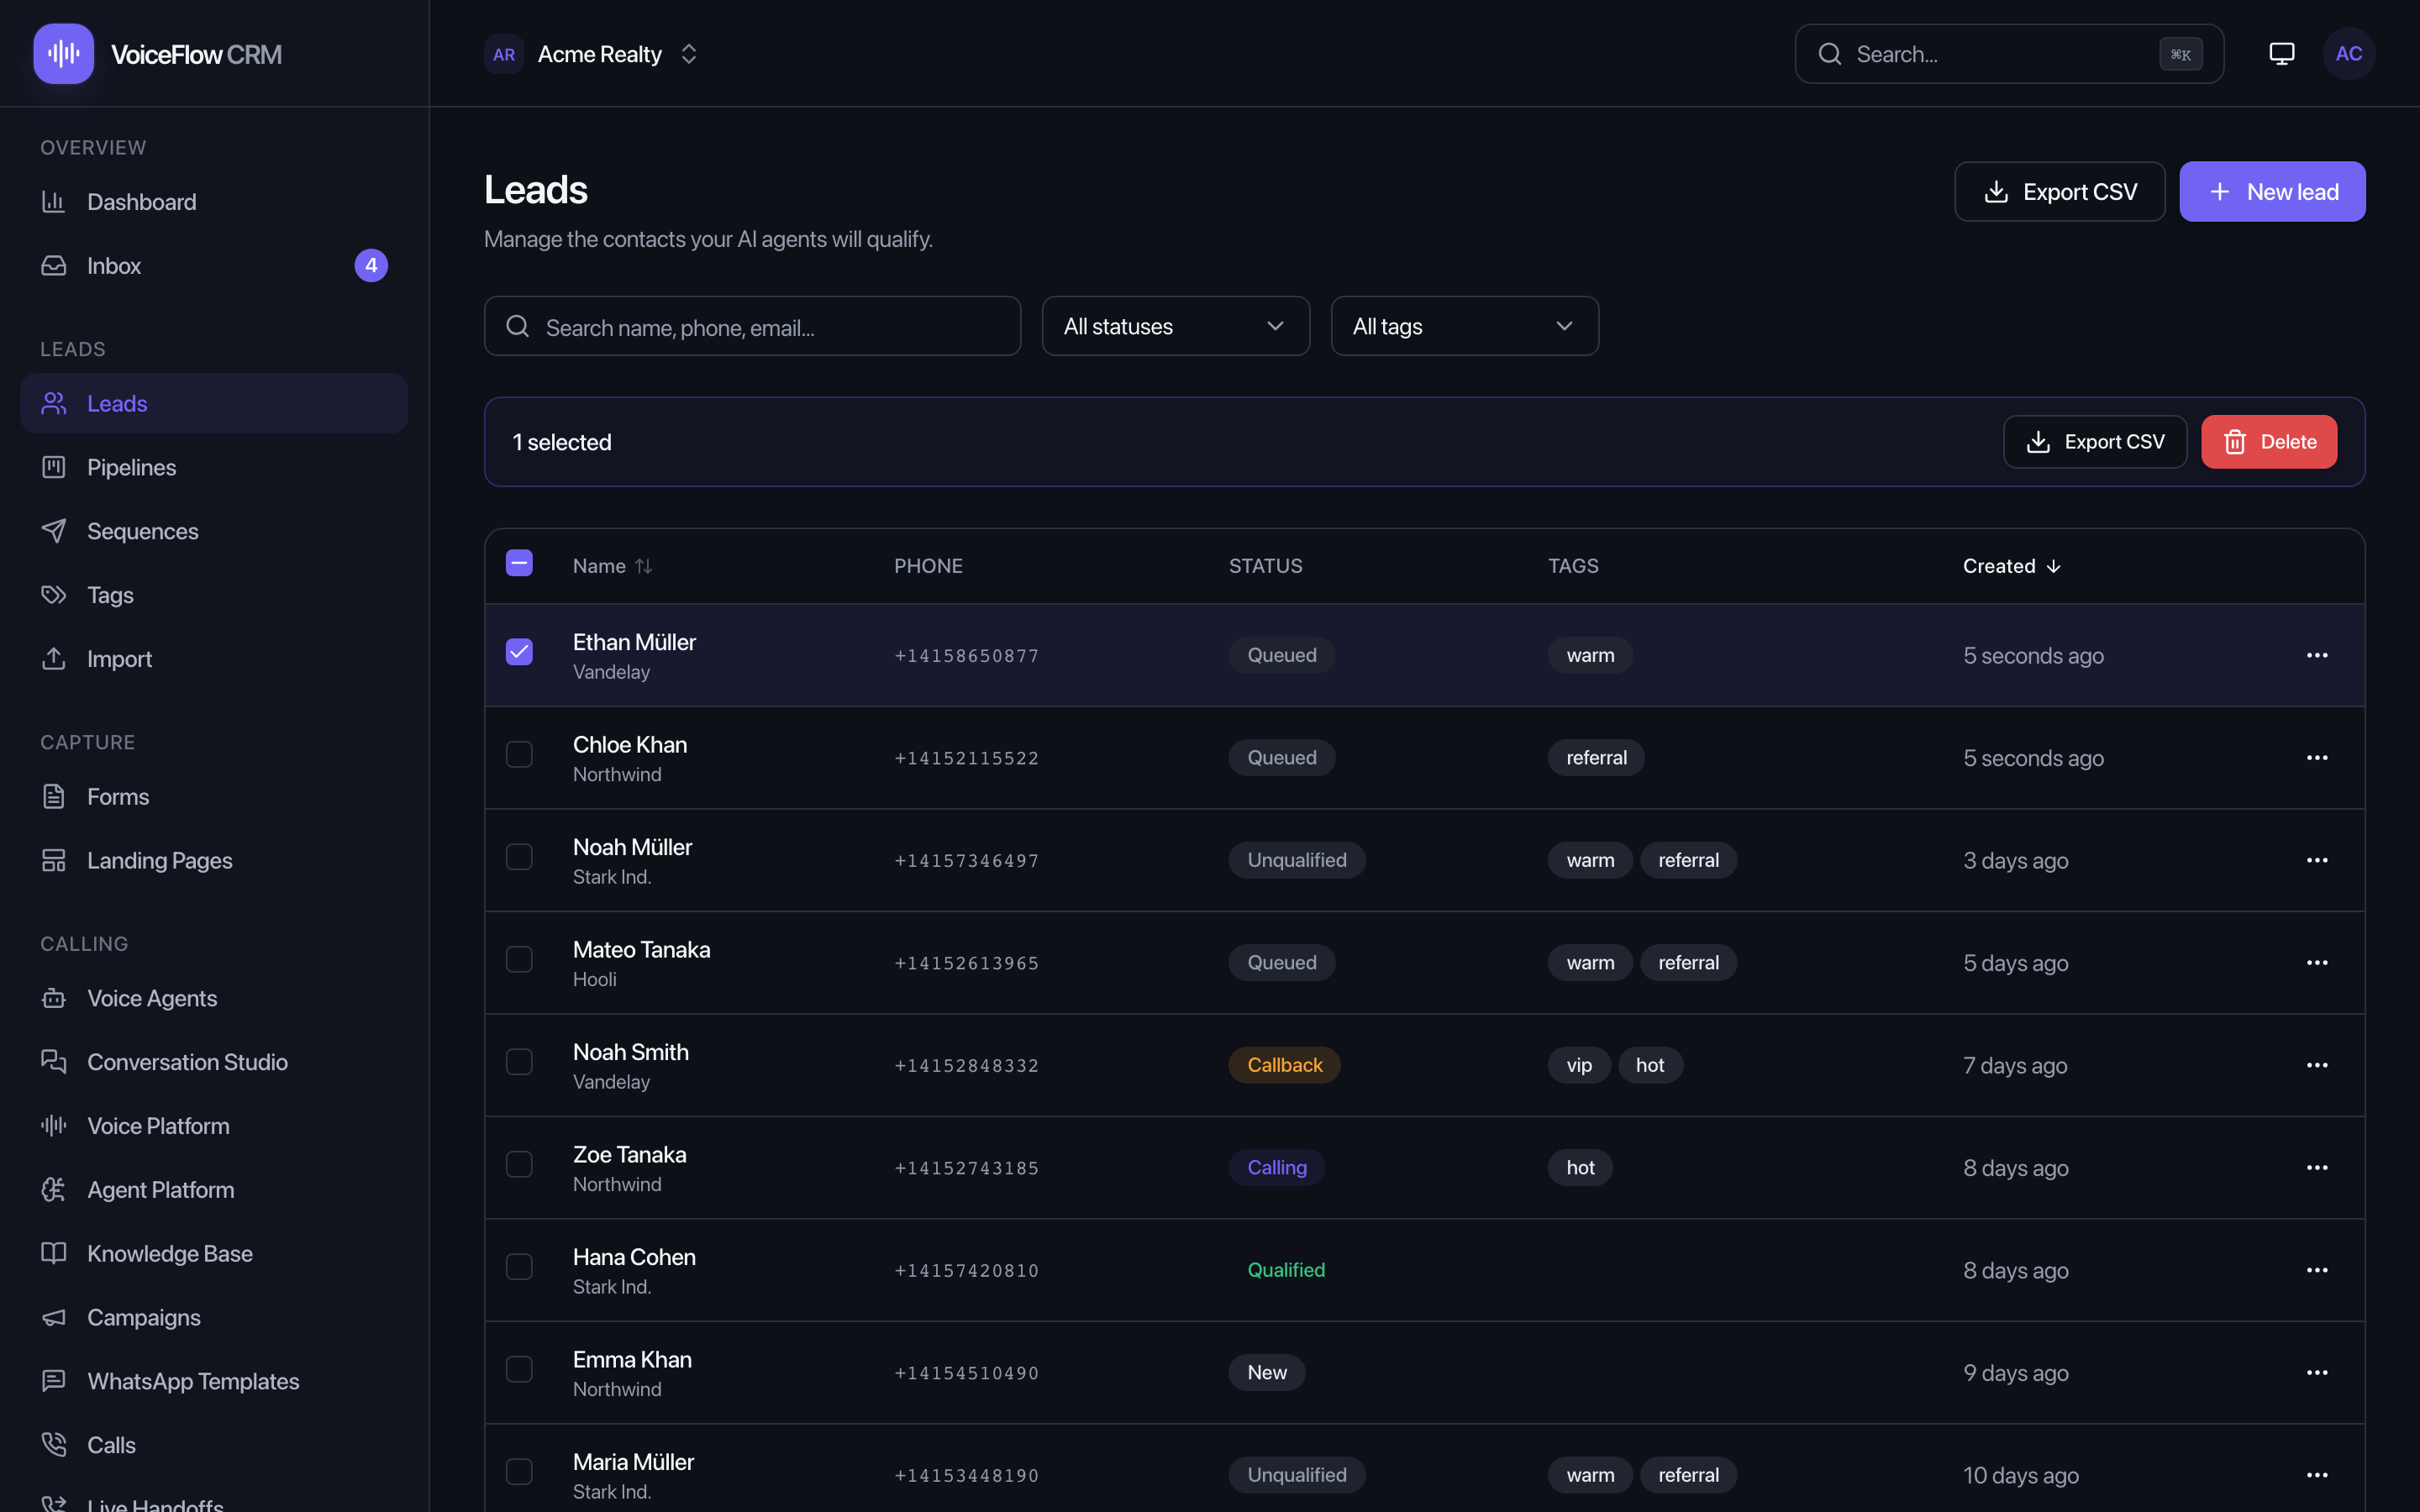
- Find & filter: search by name, phone, or email, and filter by status or tag. Select multiple rows to export or delete in bulk.
The lead panel
Click a lead's name to open its side panel. Edit its details, place it on a pipeline stage, add free-form custom fields, and manage tags (click a tag to add or remove it). The panel also shows the lead's full message history across email/SMS/WhatsApp/Telegram, the sequences it's enrolled in, and its meetings.
Pipelines — your sales board
A Kanban board of your sales stages, entirely separate from a lead's call status.
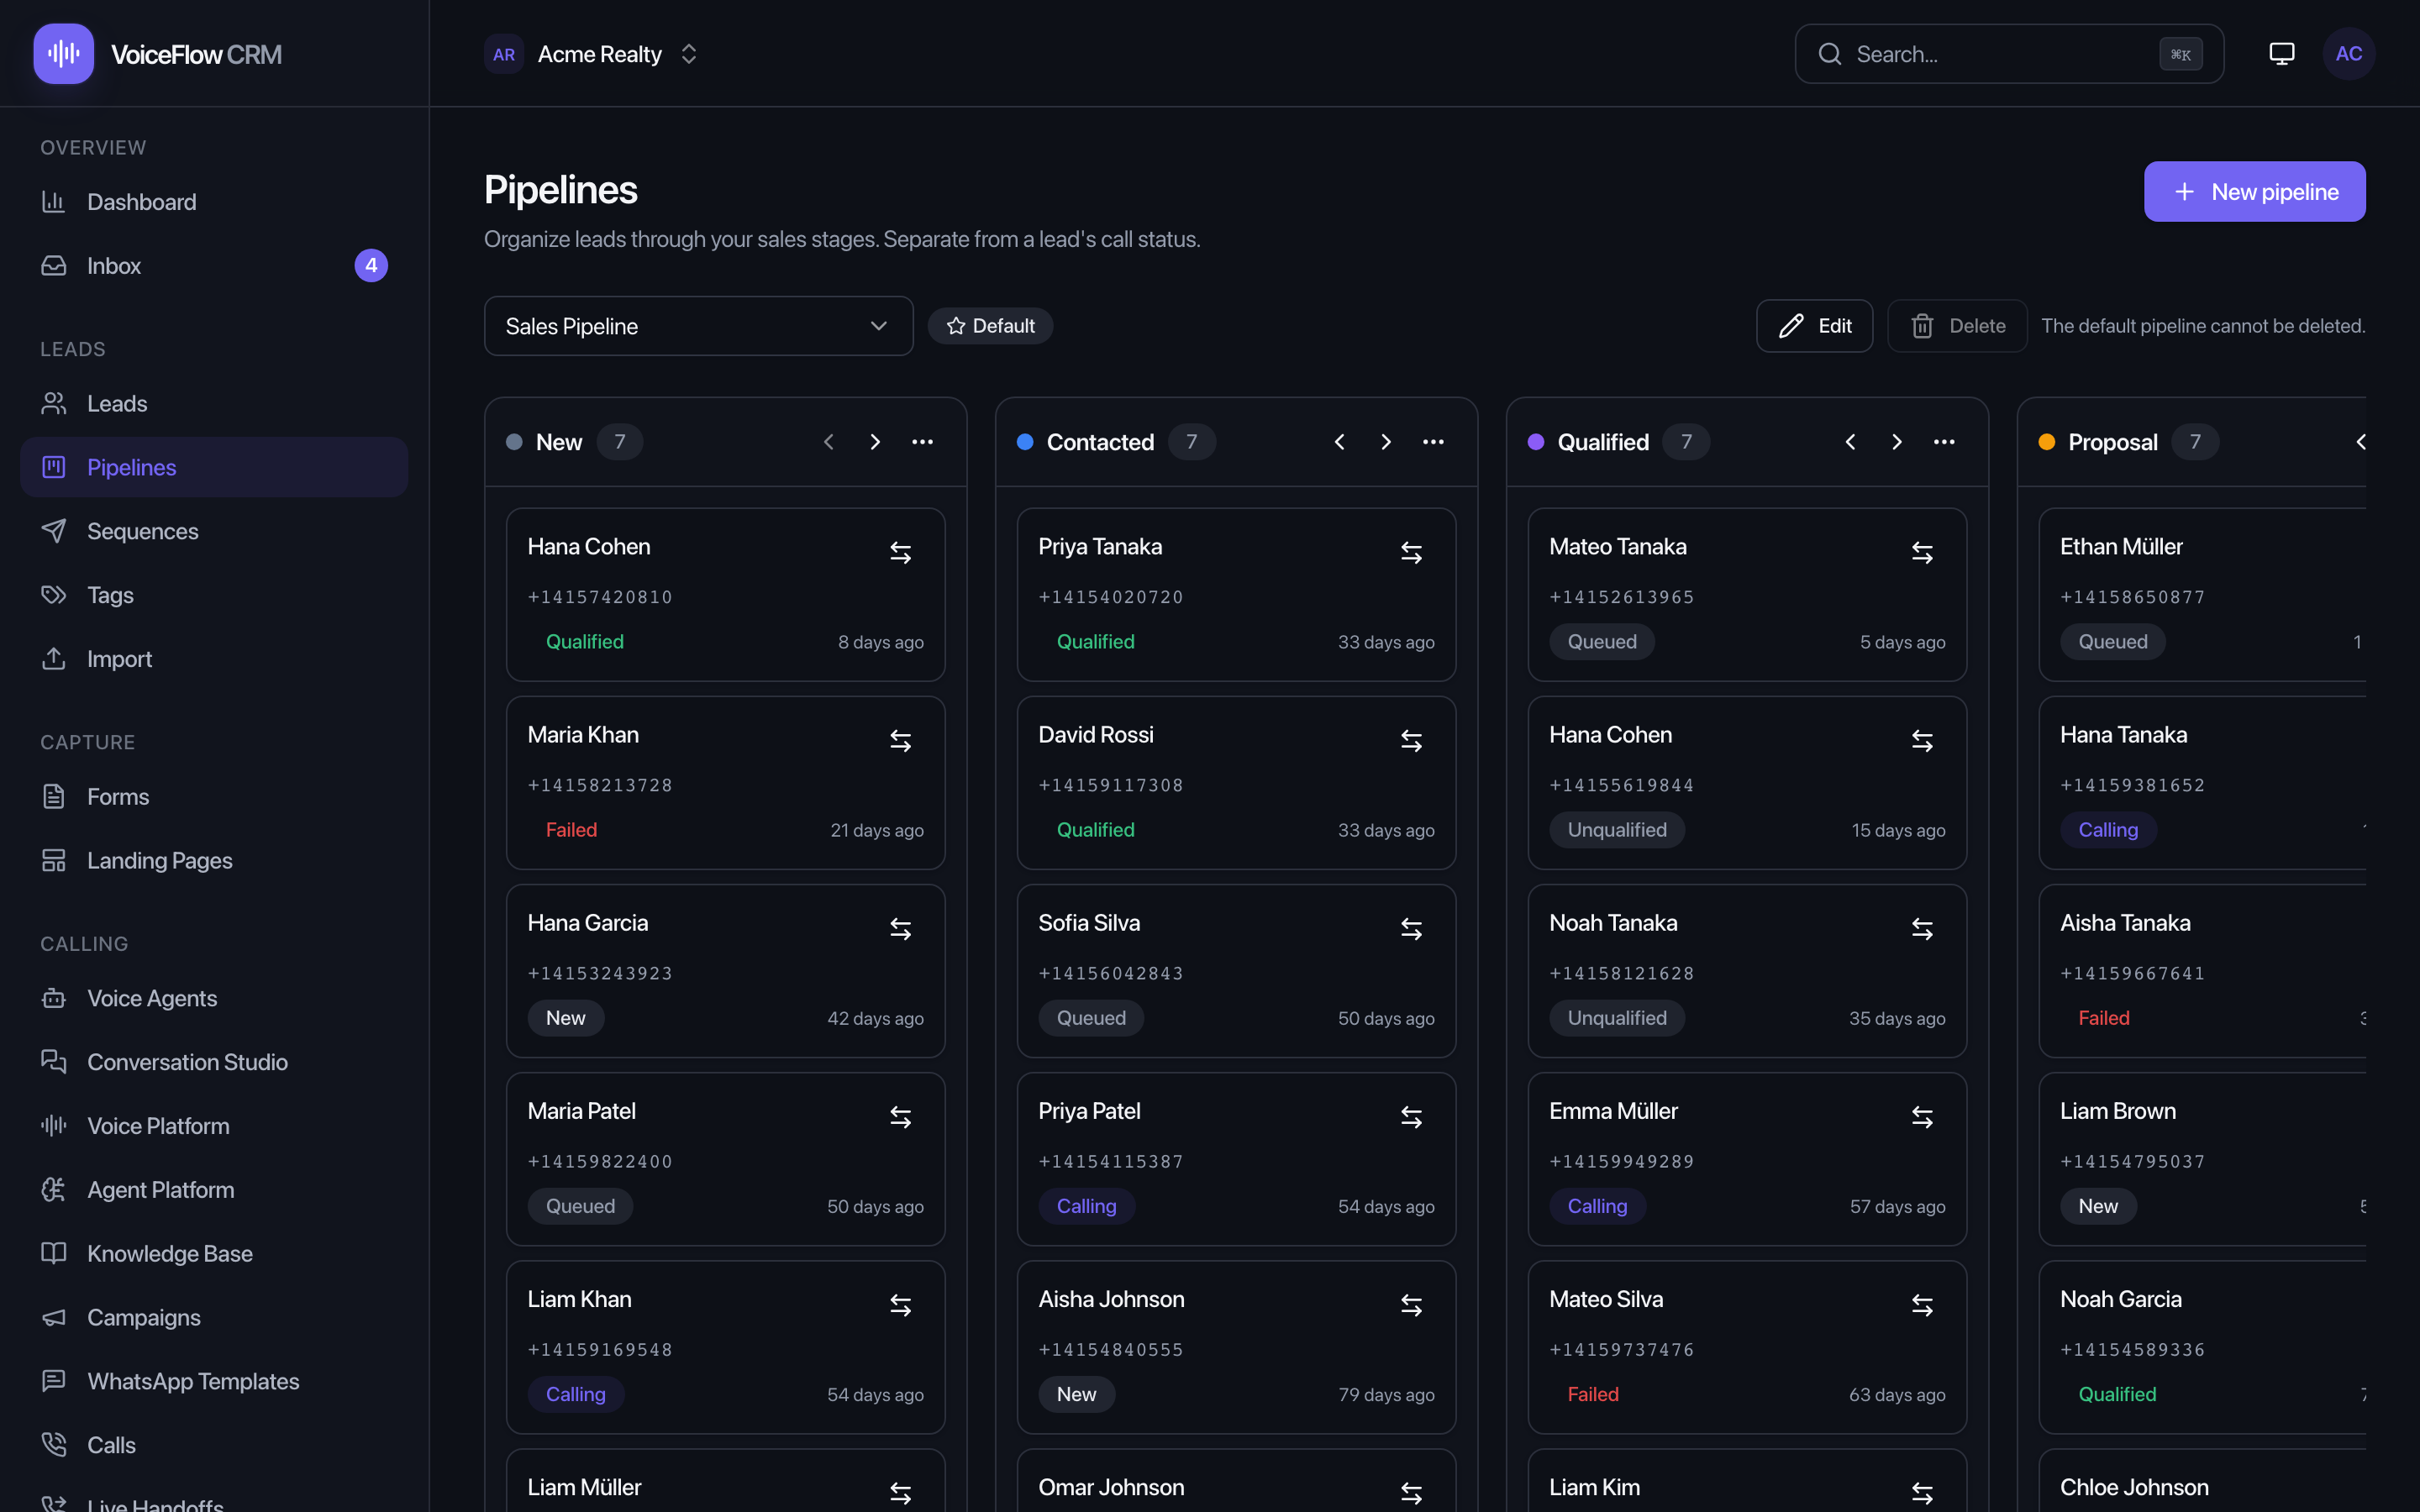
A pipeline called Sales Pipeline is created for you automatically with the standard stages (New → Contacted → Qualified → Proposal → Won / Lost), and every new lead is placed in its first stage by itself — whether you typed it in, imported a CSV, or captured it from a form. Open Pipelines and your leads are already on the board; drag a card to move it.
Create more boards with New pipeline (one field — it starts with the standard stages, which you can rename or reorder).
Tags — reusable labels
Tags are colour labels you attach to leads to segment and filter them.
Open Tags (Pro mode) to manage them. Five starters are already there — Hot lead, Warm lead, Cold lead, VIP, Follow up. Rename them or add your own, then click a tag on any lead to apply it, and filter the Leads list by tag. Tags also drive automation: a workflow can add a tag, and you can enroll everyone with a tag into a sequence.
Import — bulk-load leads from a CSV
A guided four-step wizard: Upload, Map columns, Import, Report.
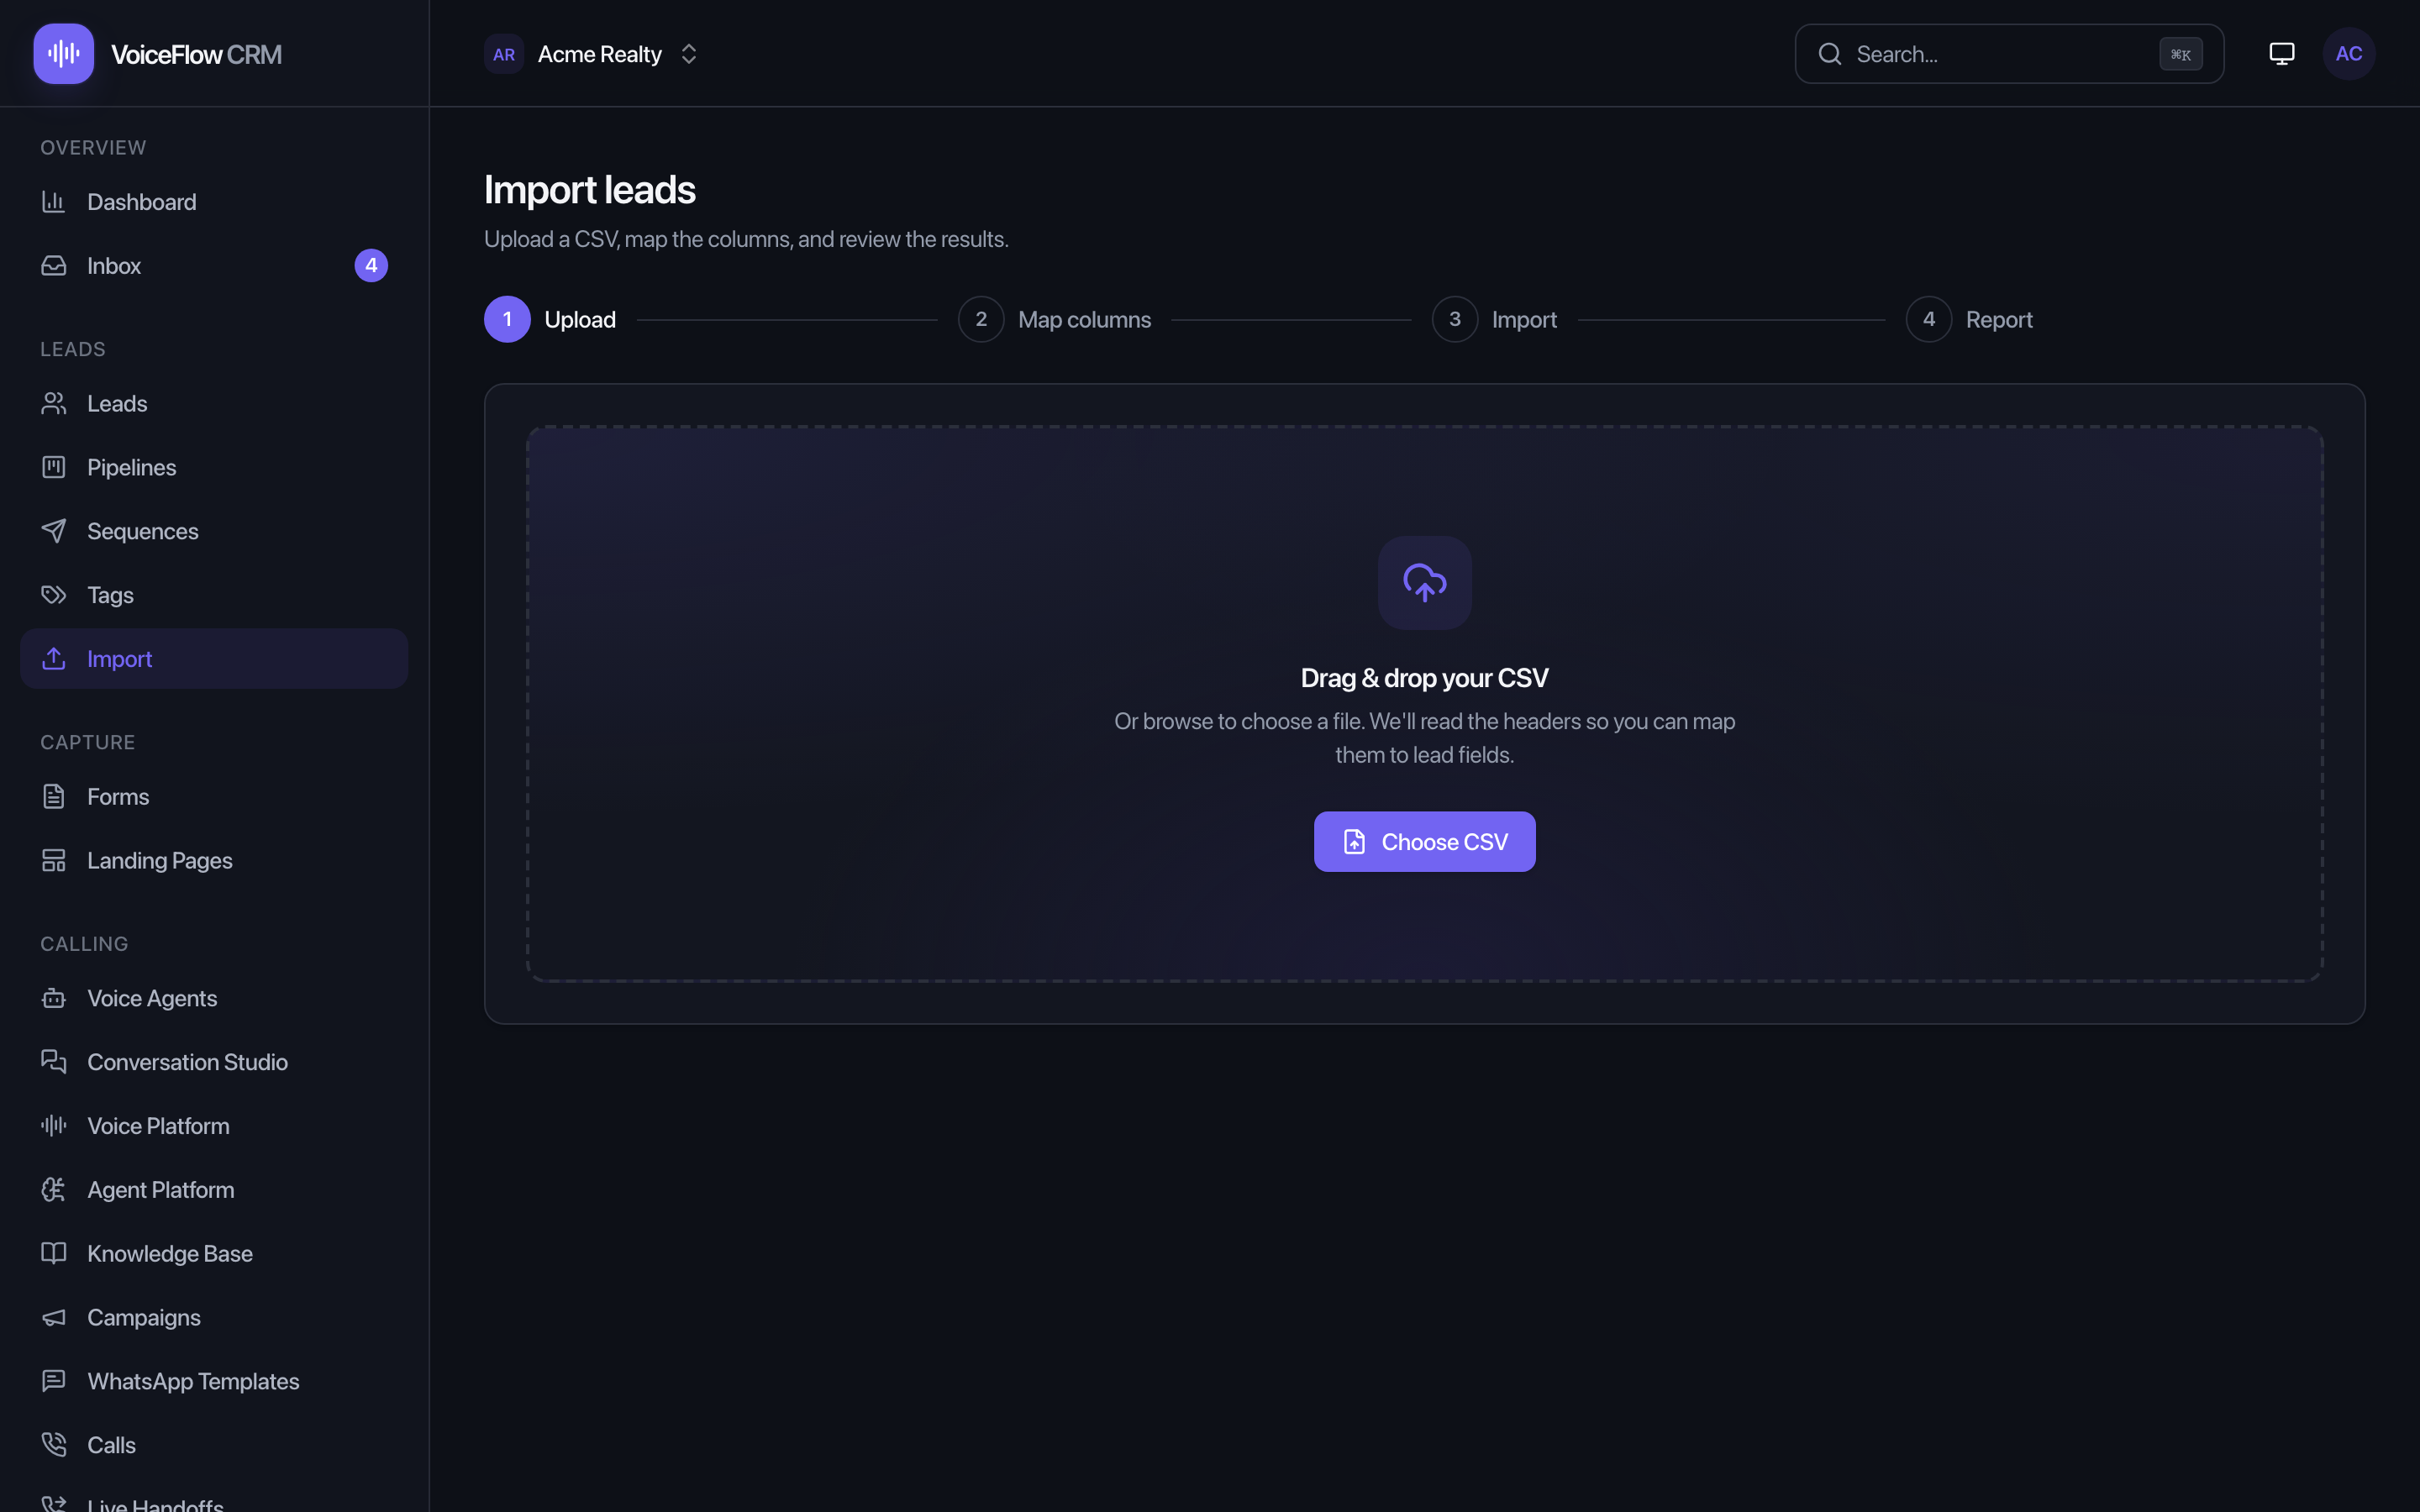
- Upload — drag in your
.csvfile. - Map columns — match each column in your file to a lead field.
NameandPhoneare required; email, company, and status are optional. Anything else can map to a custom field. - Import — review the sample rows, then run it.
- Report — see how many were Created, skipped as invalid, or skipped as duplicates, with a downloadable error report for anything that didn't import.
Every imported lead lands on your Sales Pipeline board automatically, just like a hand-typed one.
The team inbox — two-way messaging
One shared, two-way inbox across WhatsApp, SMS, and Telegram — with delivery ticks, AI reply help, and team tools.
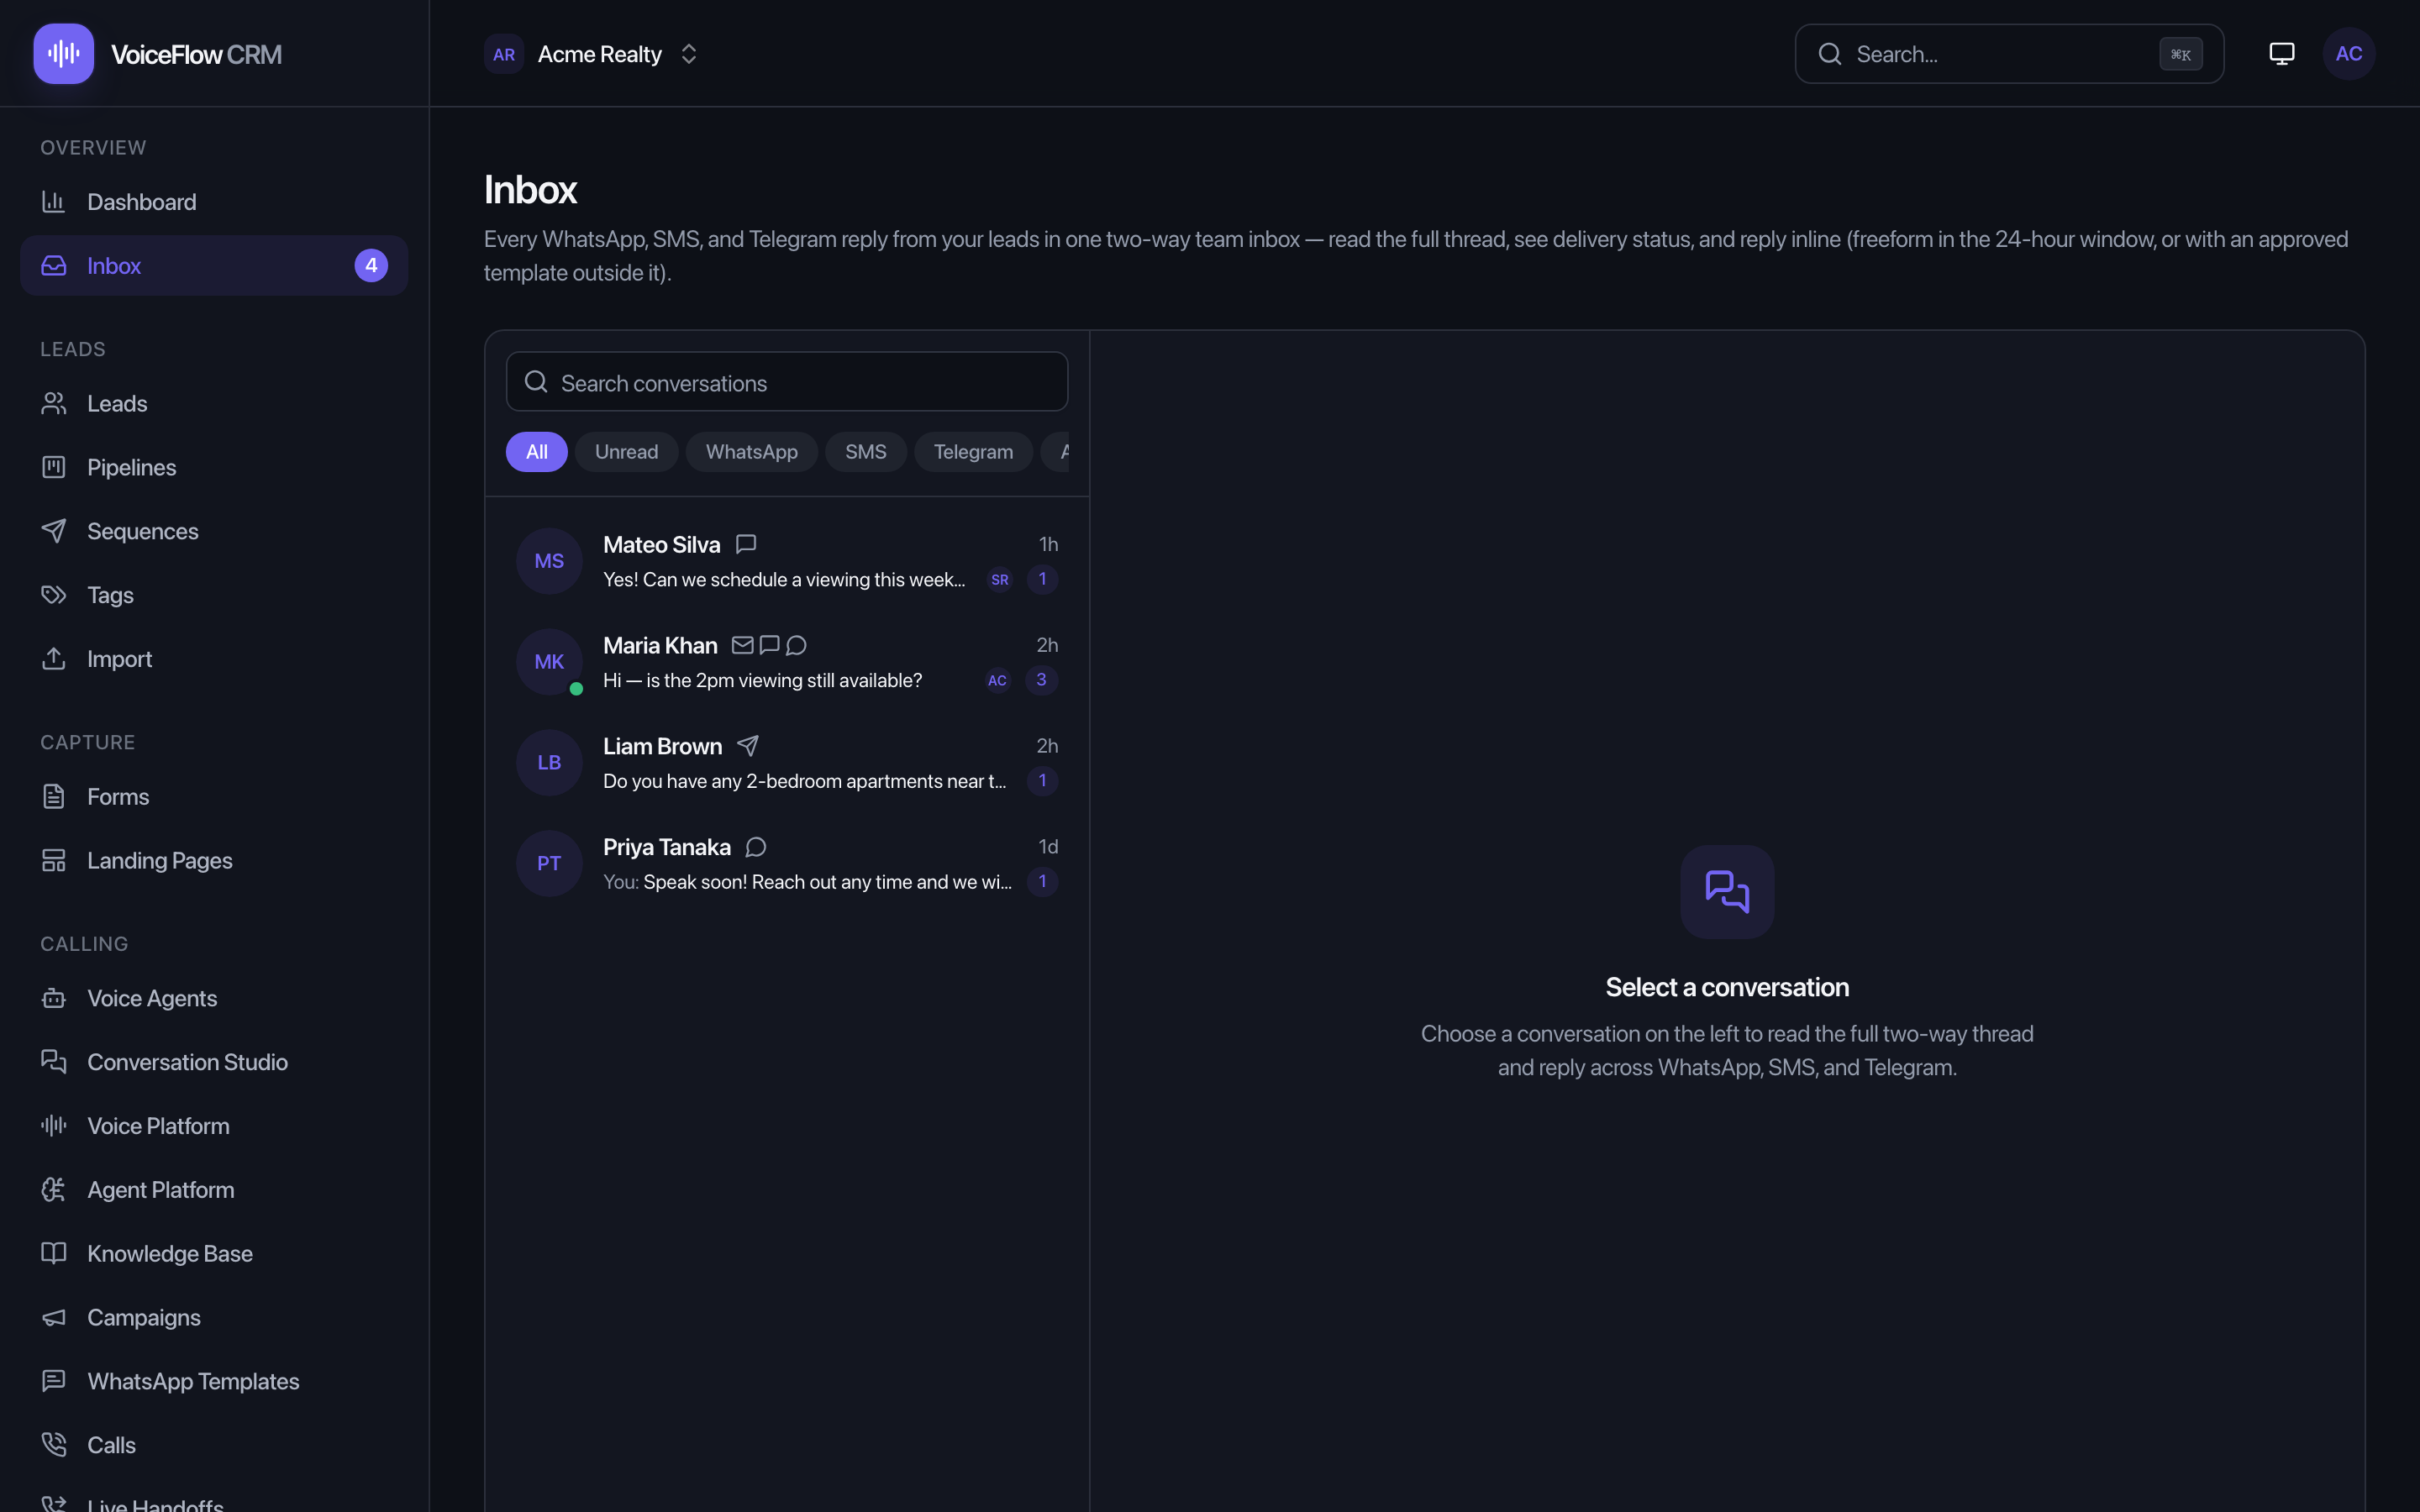
The left pane lists conversations (filter by All, Unread, WhatsApp, SMS, Telegram, or Assigned to me); the right pane is the full thread with delivery ticks (Sent → Delivered → Read).
- Reply inline — pick a channel and type. On WhatsApp you can reply freely inside the 24-hour customer-service window (it restarts every time the customer messages you); outside it, send an approved template — a banner tells you which applies.
- Rich composer — attach files (WhatsApp + Telegram), record and send voice notes, drop in emoji from a built-in picker, and get automatic link-preview cards. The lead-detail composer and the inbox composer are at full parity.
- AI help — Suggest reply drafts a response that greets the customer by name, speaks as your brand, and pulls facts from your Knowledge Base — landing in the reply box for you to edit (never auto-sent). Summarize condenses a long thread.
- Team tools — Assign a conversation to a teammate, add colour Labels, and leave internal notes only your team can see.
STOP (or unsubscribe, cancel…) on SMS or WhatsApp, they're marked opted out automatically; START opts them back in. You can also flip per-channel opt-out switches on any lead by hand.Capture forms
Build hosted or embeddable lead-capture forms that drop submissions straight into your CRM.
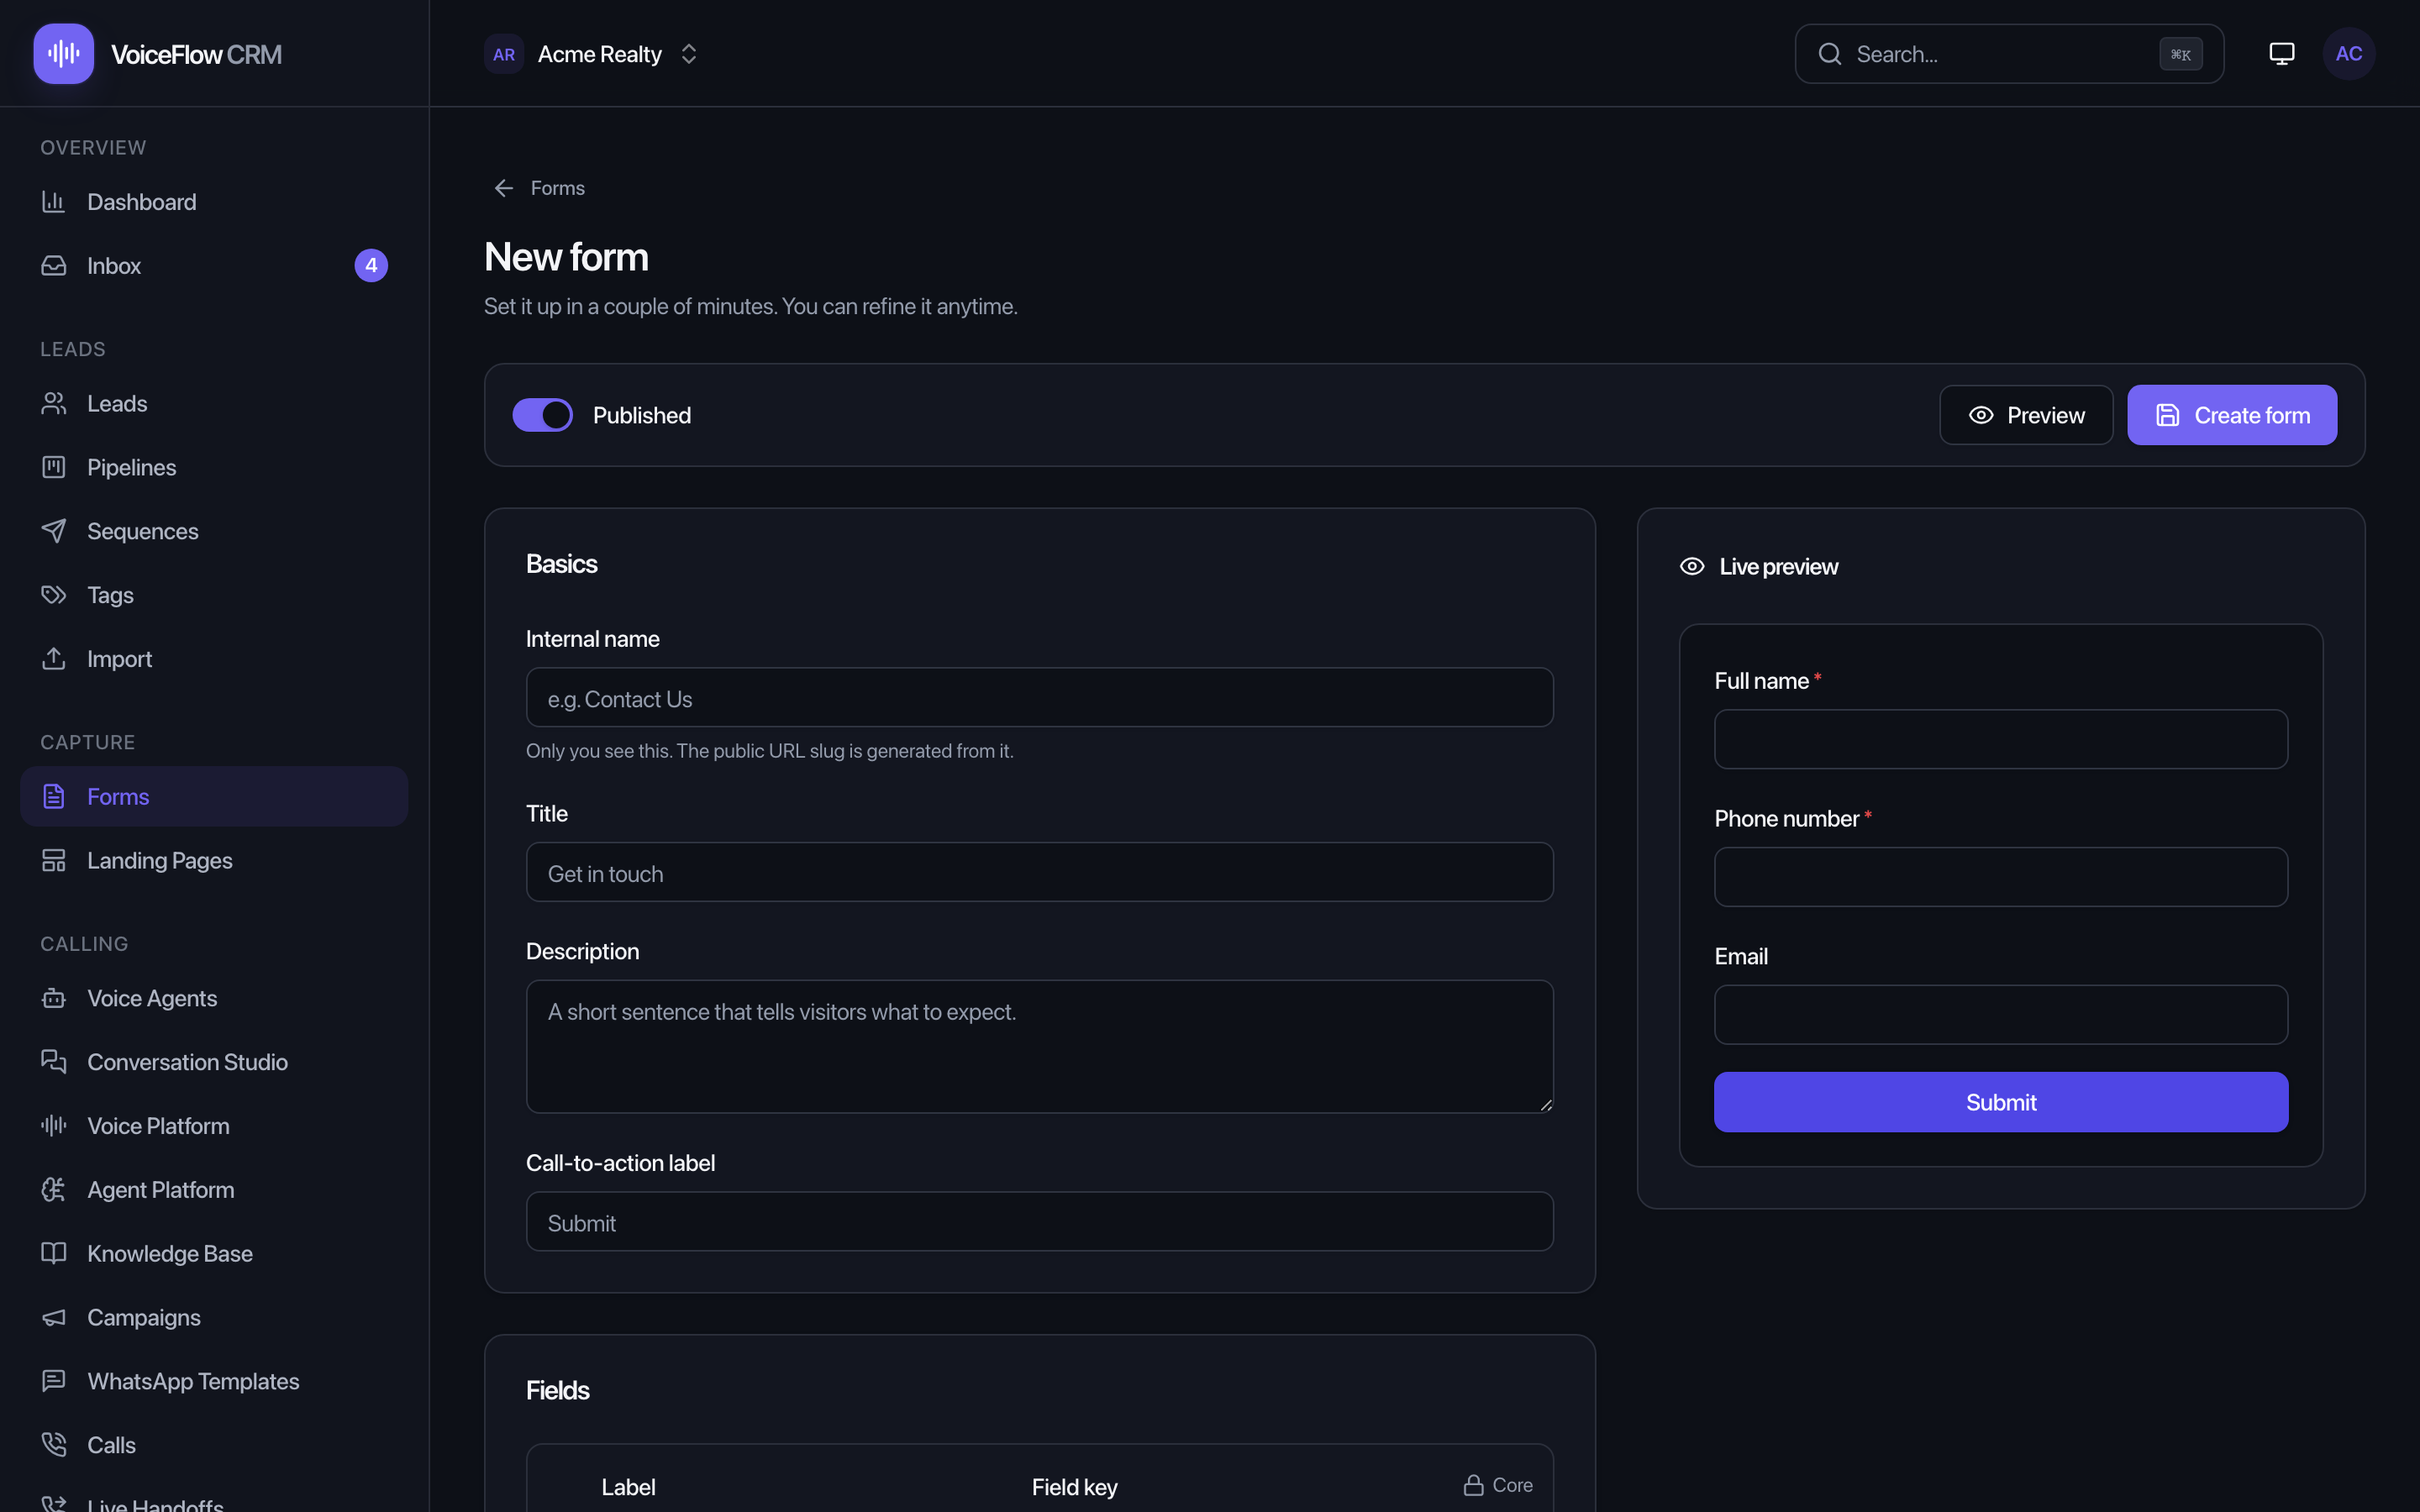
- Set the Basics (internal name, title/headline, description, button label) and add Fields (text, email, phone, dropdown, consent checkbox, file upload, and more).
- Optionally add Branding (logo, accent colour), spam protection, and automation — auto-assign captured leads to a campaign or tag, and even auto-call them.
- Publish, then use Share & embed to copy the hosted URL or an embed snippet.
Where the public link is — and embedding it
Every form lives at your-domain/f/its-name. In the Share & embed panel, click Copy for the hosted link, or pick a Display mode — inline (sits in the page), popup (opens from a button), or launcher bubble (floats in the corner) — and copy the snippet. Paste it into any website that accepts HTML; on WordPress use a Custom HTML block. No plugin, no code.
Every submission becomes a lead automatically (no separate submissions inbox) and lands on your pipeline board. If you set auto-call, your AI phones them while their interest is warm.
Landing pages
Full branded pages with SEO fields — built with the same simple builder as forms.
Open Landing Pages → New and pick a template (classic, spark, trust, or offer), then edit its sections (hero, features, testimonials, FAQ, call-to-action) and SEO fields. Publish, and the page lives at your-domain/p/its-name. Two starters — Lead magnet download and Special offer — are live from day one.
Like forms, every submission becomes a lead and lands on your pipeline. Use Share & embed to copy the public link for ads, emails, QR codes, or your bio.
Sequences — scheduled follow-up
An automated drip of email/SMS/WhatsApp/Telegram steps sent on a schedule.
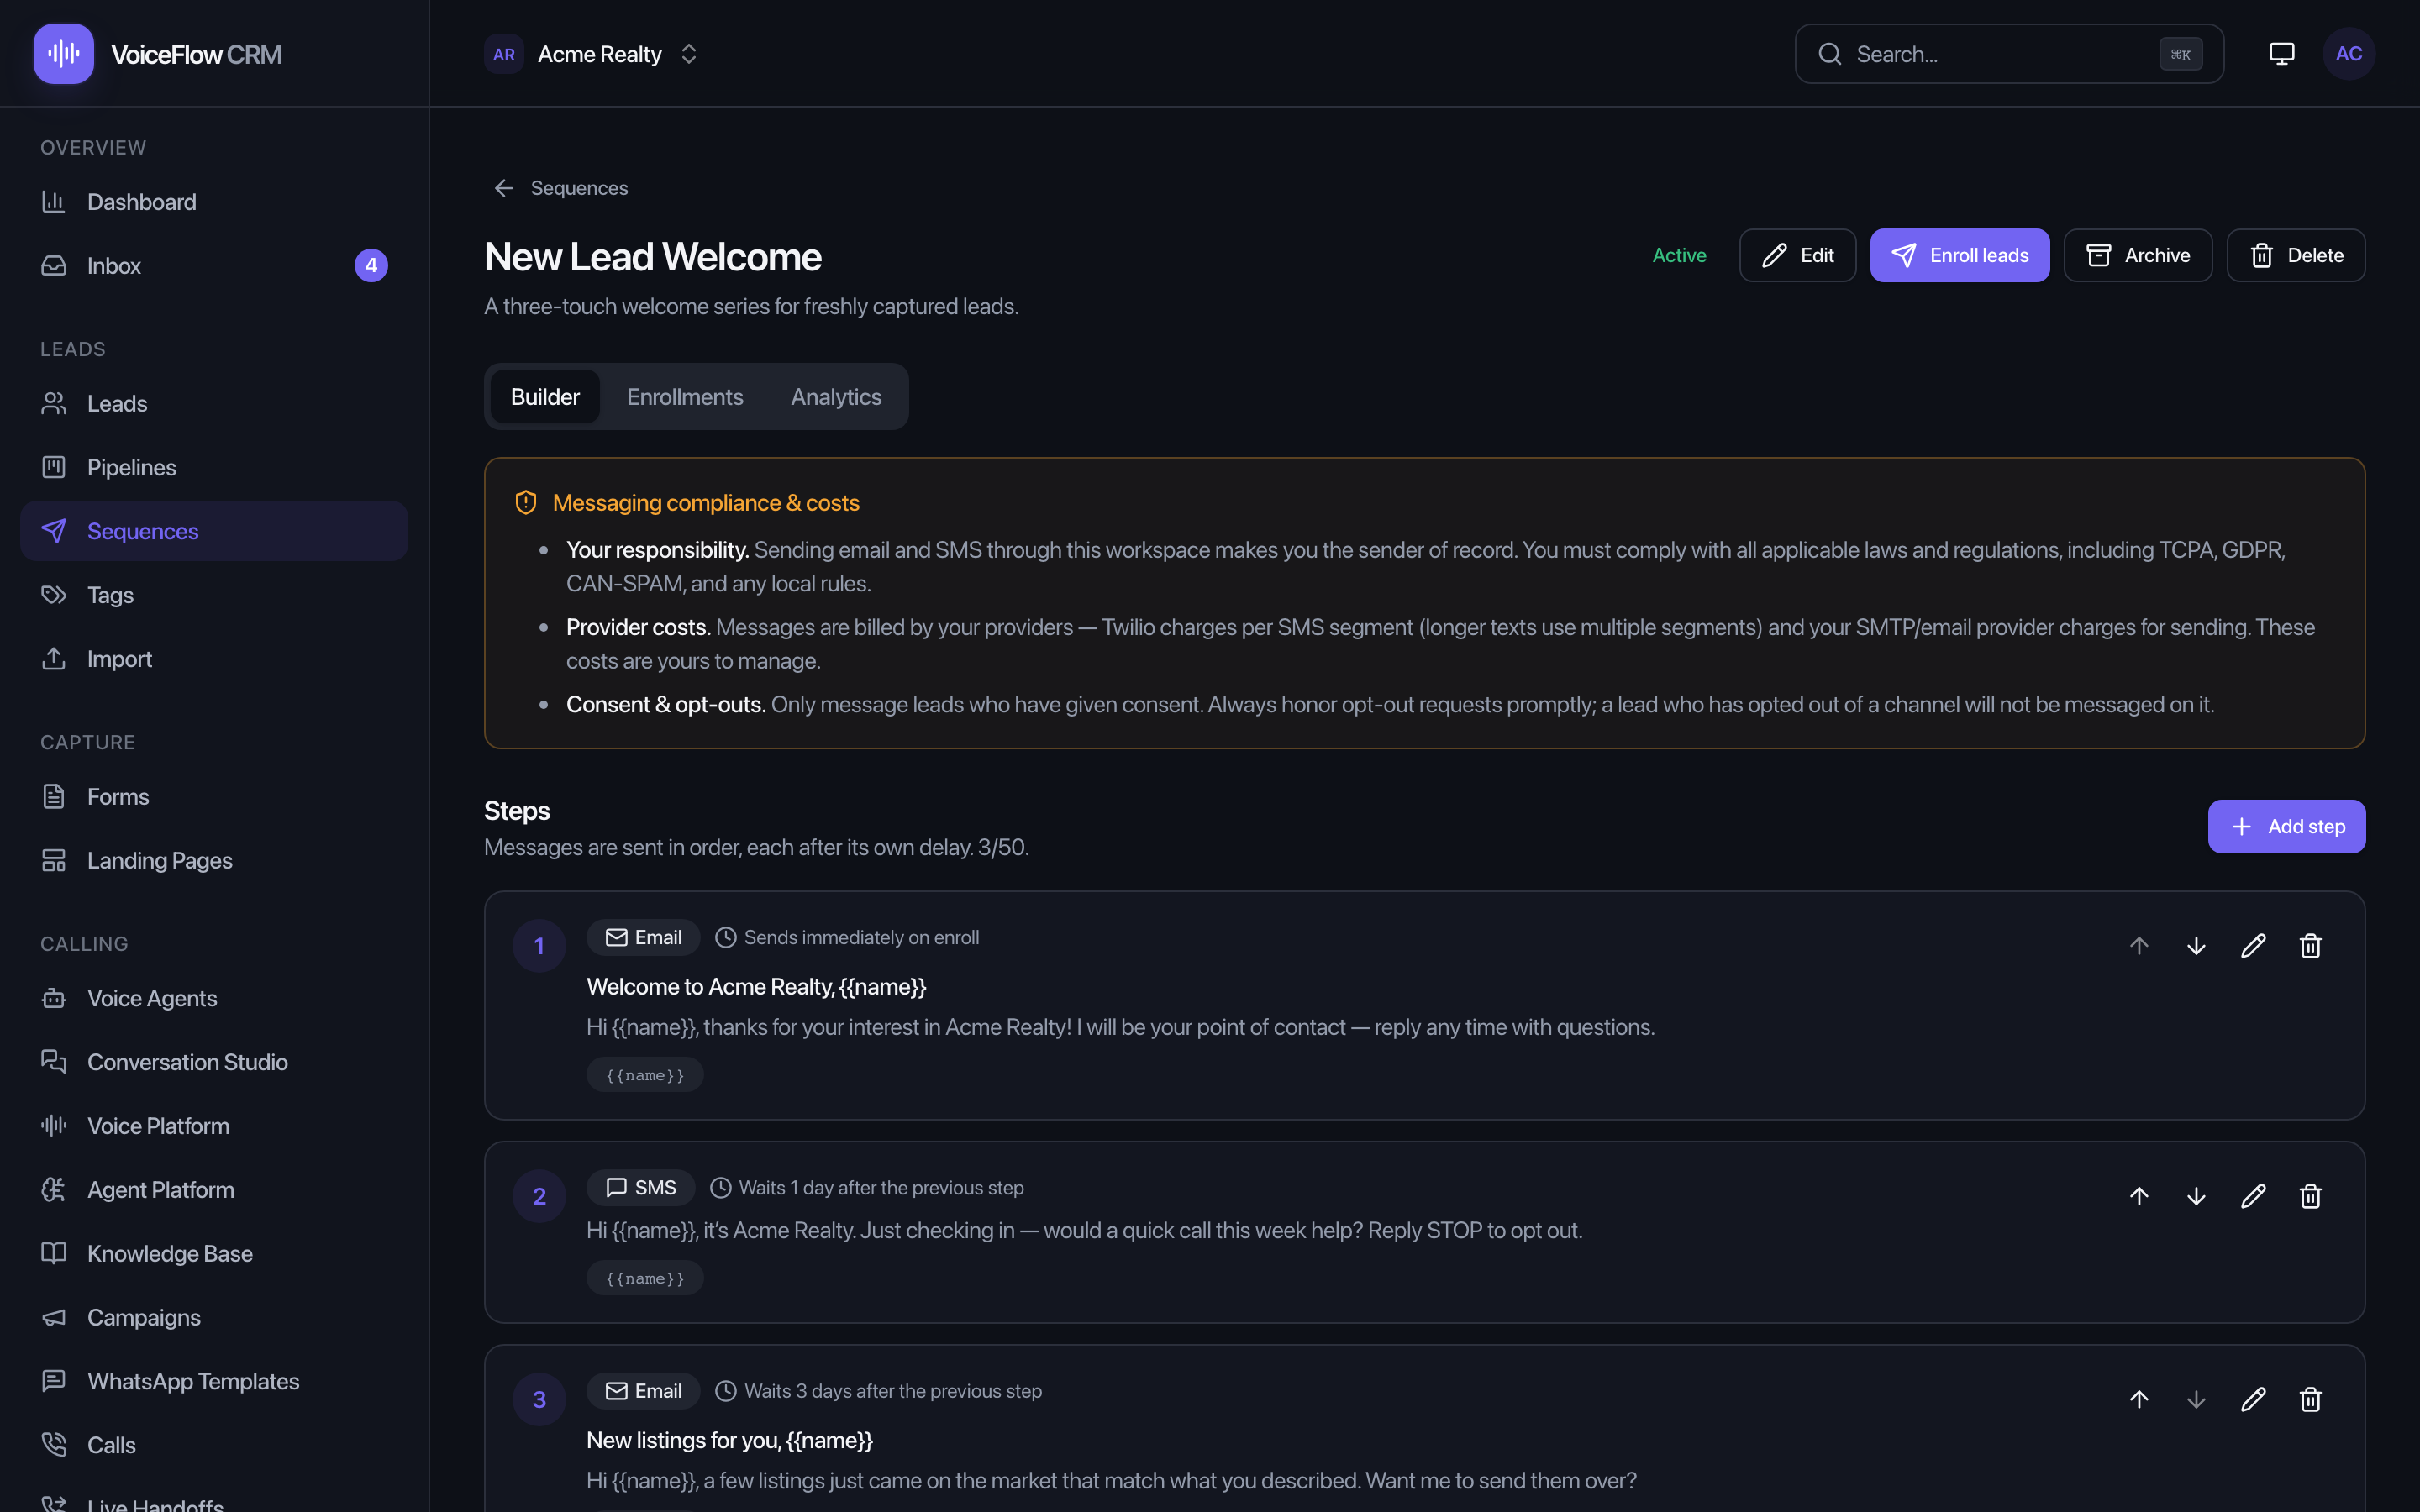
Open Sequences → New sequence, then in the Builder add steps — each with a channel, a delay (minutes/hours/days after the previous step), and a message. Personalise with {{name}}-style tokens. Activate the sequence, then Enroll leads. Enrollments stop automatically when a lead opts out, is deleted, the sequence is archived, or the final step is sent. The Enrollments and Analytics tabs show who's in it and how it's performing.
Three drips are already written for you
- New lead follow-up — a text right away, an email next day, a final text on day 3.
- Missed call recovery — a text right away, another next day, an email on day 2.
- Long-term nurture — an email now, another after two weeks, a text after four.
All three are drafts — a draft never sends. Edit the wording, then Activate and Enroll when you mean it. They use SMS and email only, because a WhatsApp step needs an approved template first.
WhatsApp templates — message anyone beyond the 24-hour window
Once 24 hours have passed since a customer's last message, you can only send a template that Meta has reviewed and approved. Templates are how you start WhatsApp conversations: reminders, order updates, offers, follow-ups.
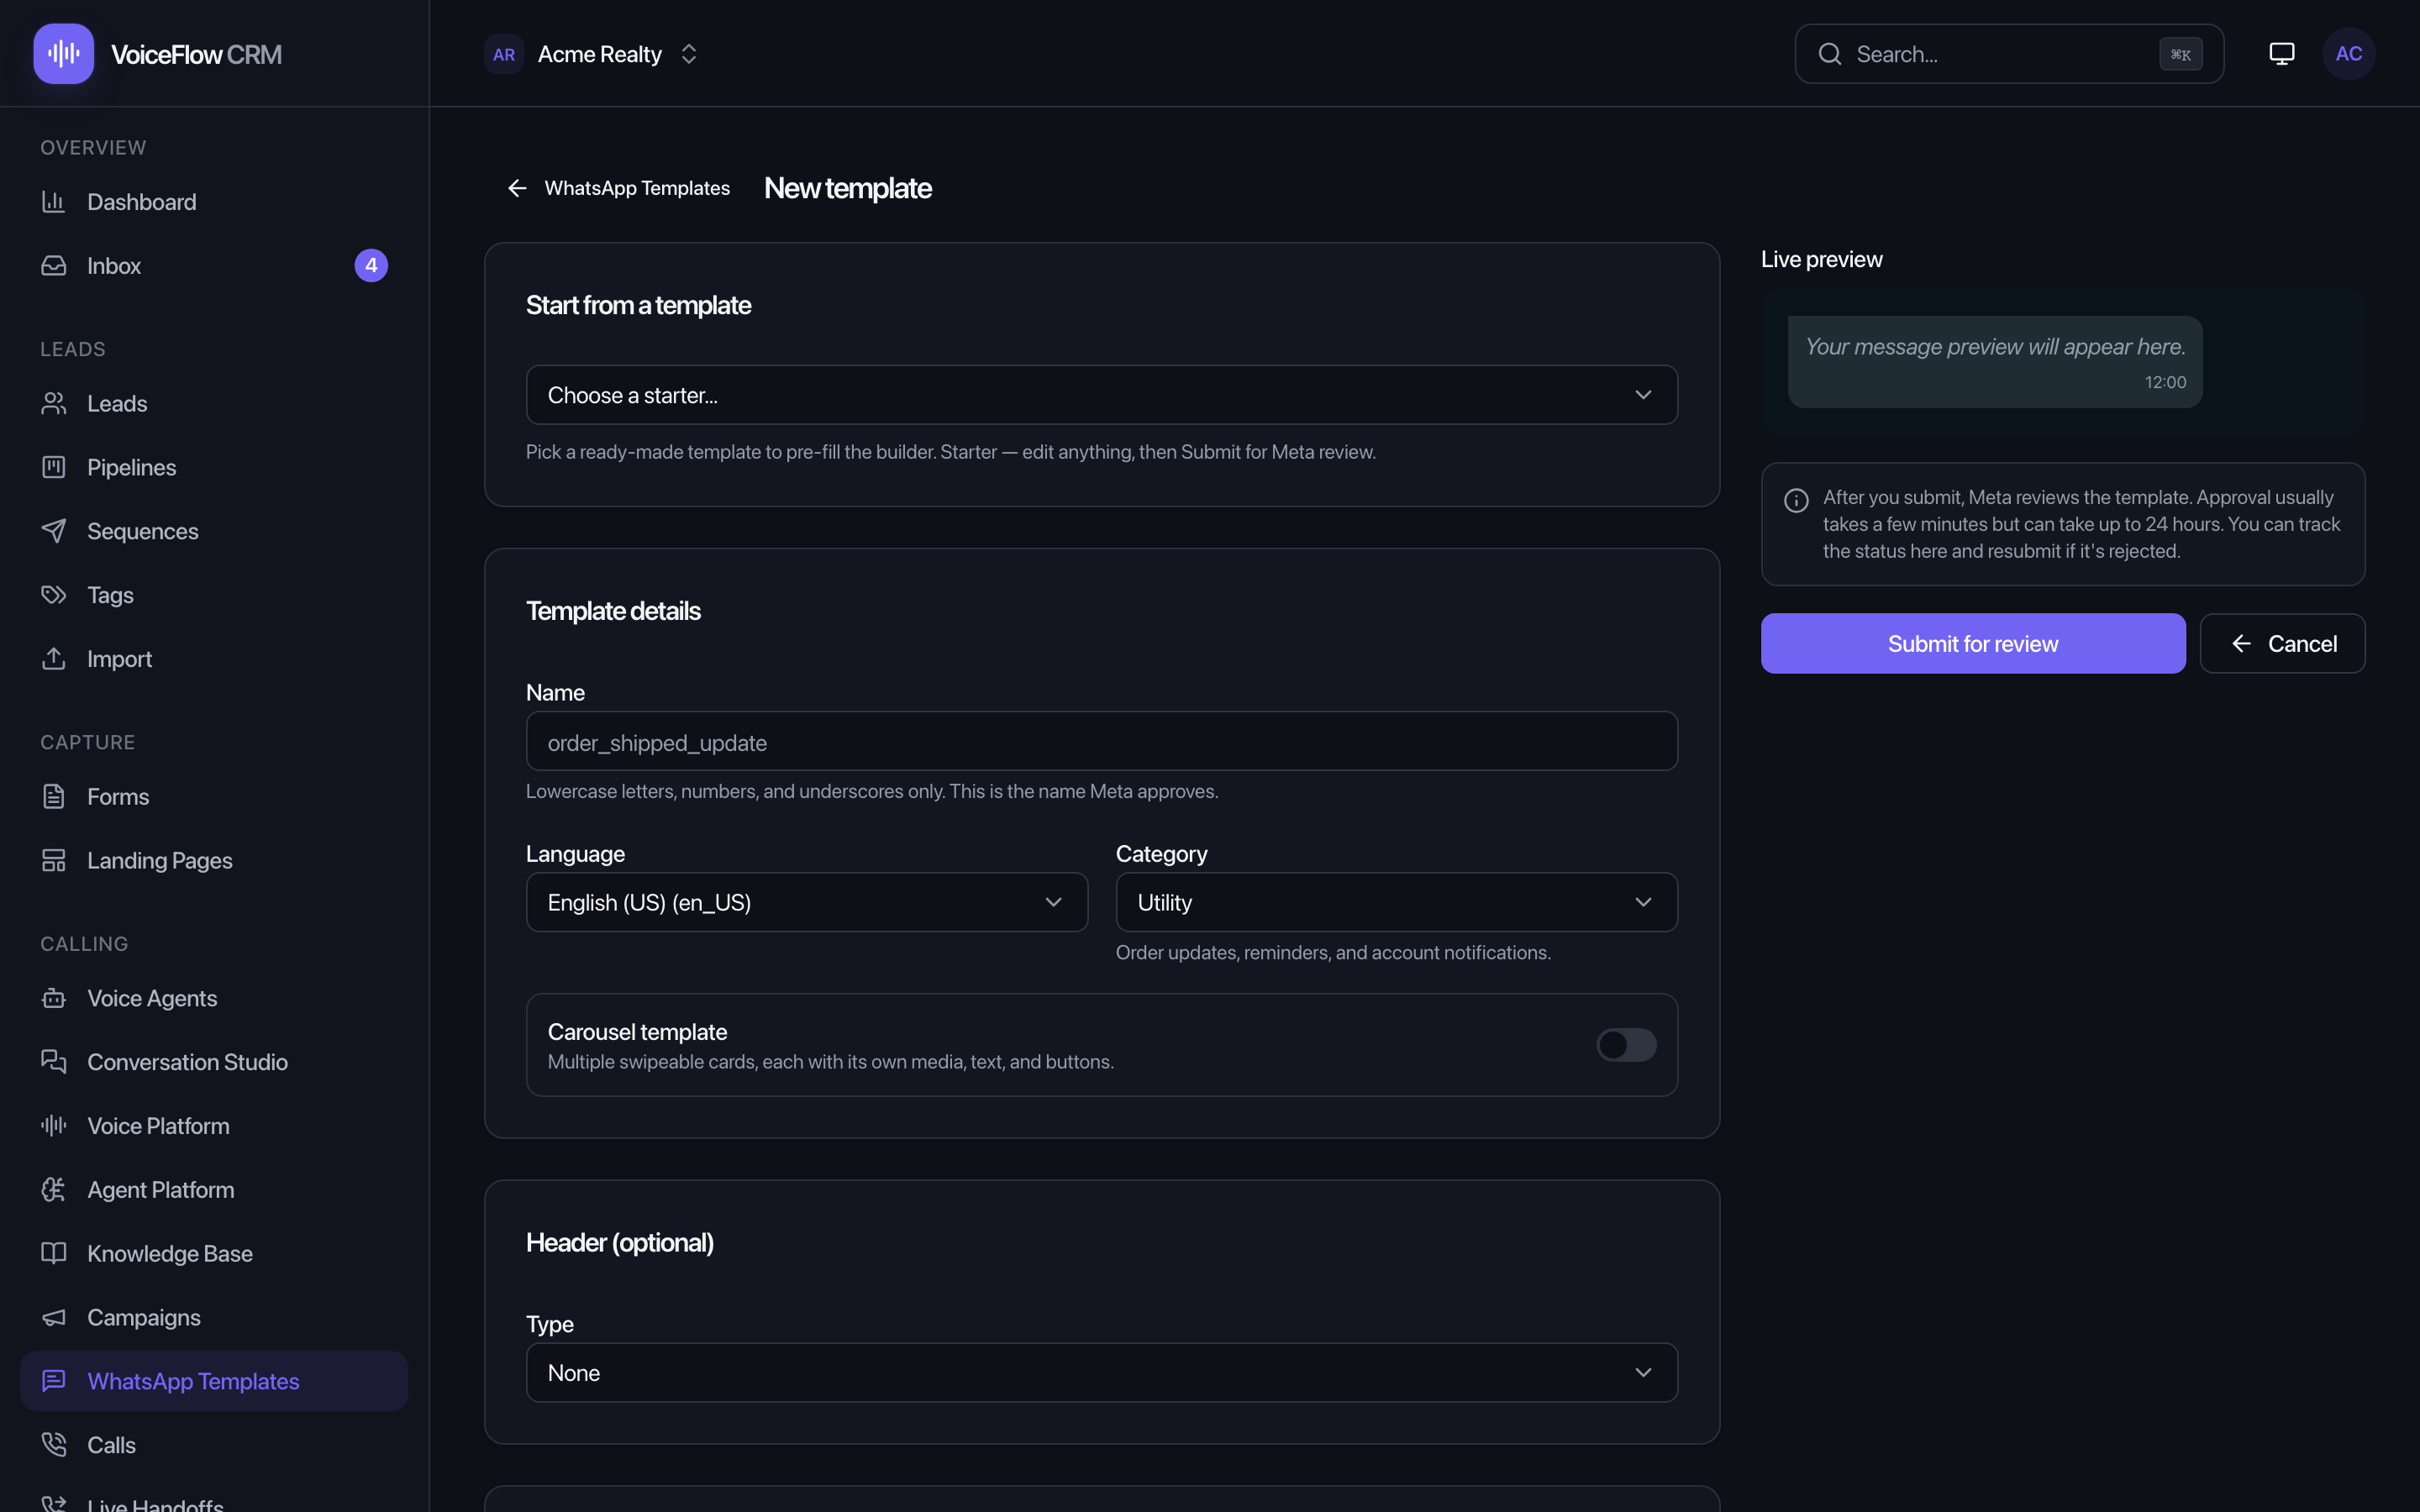
Open WhatsApp Templates (Pro mode / owner page). It's where you build, submit, and track templates.
Fifteen templates are already drafted for you
Your first visit shows 15 ready-made drafts: welcome greeting, appointment reminder, order confirmation, order shipped, OTP verification, payment reminder, feedback request, re-engagement offer, abandoned cart, lead follow-up, a product carousel (swipeable multi-card message), and the four-piece COD kit (Order received, Confirm with buttons, Confirmed, Cancelled). Pick one from "Choose a starter…" and the builder prefills its name, category, body, sample values, and buttons — you just review and submit. A draft lives only in your workspace until you submit.
Getting a template approved
- Connect WhatsApp via Meta Cloud API first (Route A or B in Connect a provider) — template management needs your WhatsApp Business Account linked.
- Open a starter or build your own with New template: the builder shows a live phone preview as you edit name, language, category, body, header, and buttons. Personalisation slots like
{{1}}are filled when you send. Click Submit for review. - Meta reviews it — usually minutes, sometimes up to 24 hours. The status updates as approved or rejected.
- Once approved, the template is sendable from the Inbox when the 24-hour window is closed, and usable in sequence and workflow steps.
Frozen wording vs. fillable variables
The key rule: fixed wording is frozen by Meta at approval; variables, images, and URL suffixes are per-send. So a carousel approved with fixed card text can't change that text per send — but its {{1}} variables, header image, and dynamic URL suffix all can.
Voice Agents — the AI that makes the calls
A voice agent is the caller: a qualification script (its prompt) plus a voice. Five are already written for you, so you can call in minutes without writing a word.
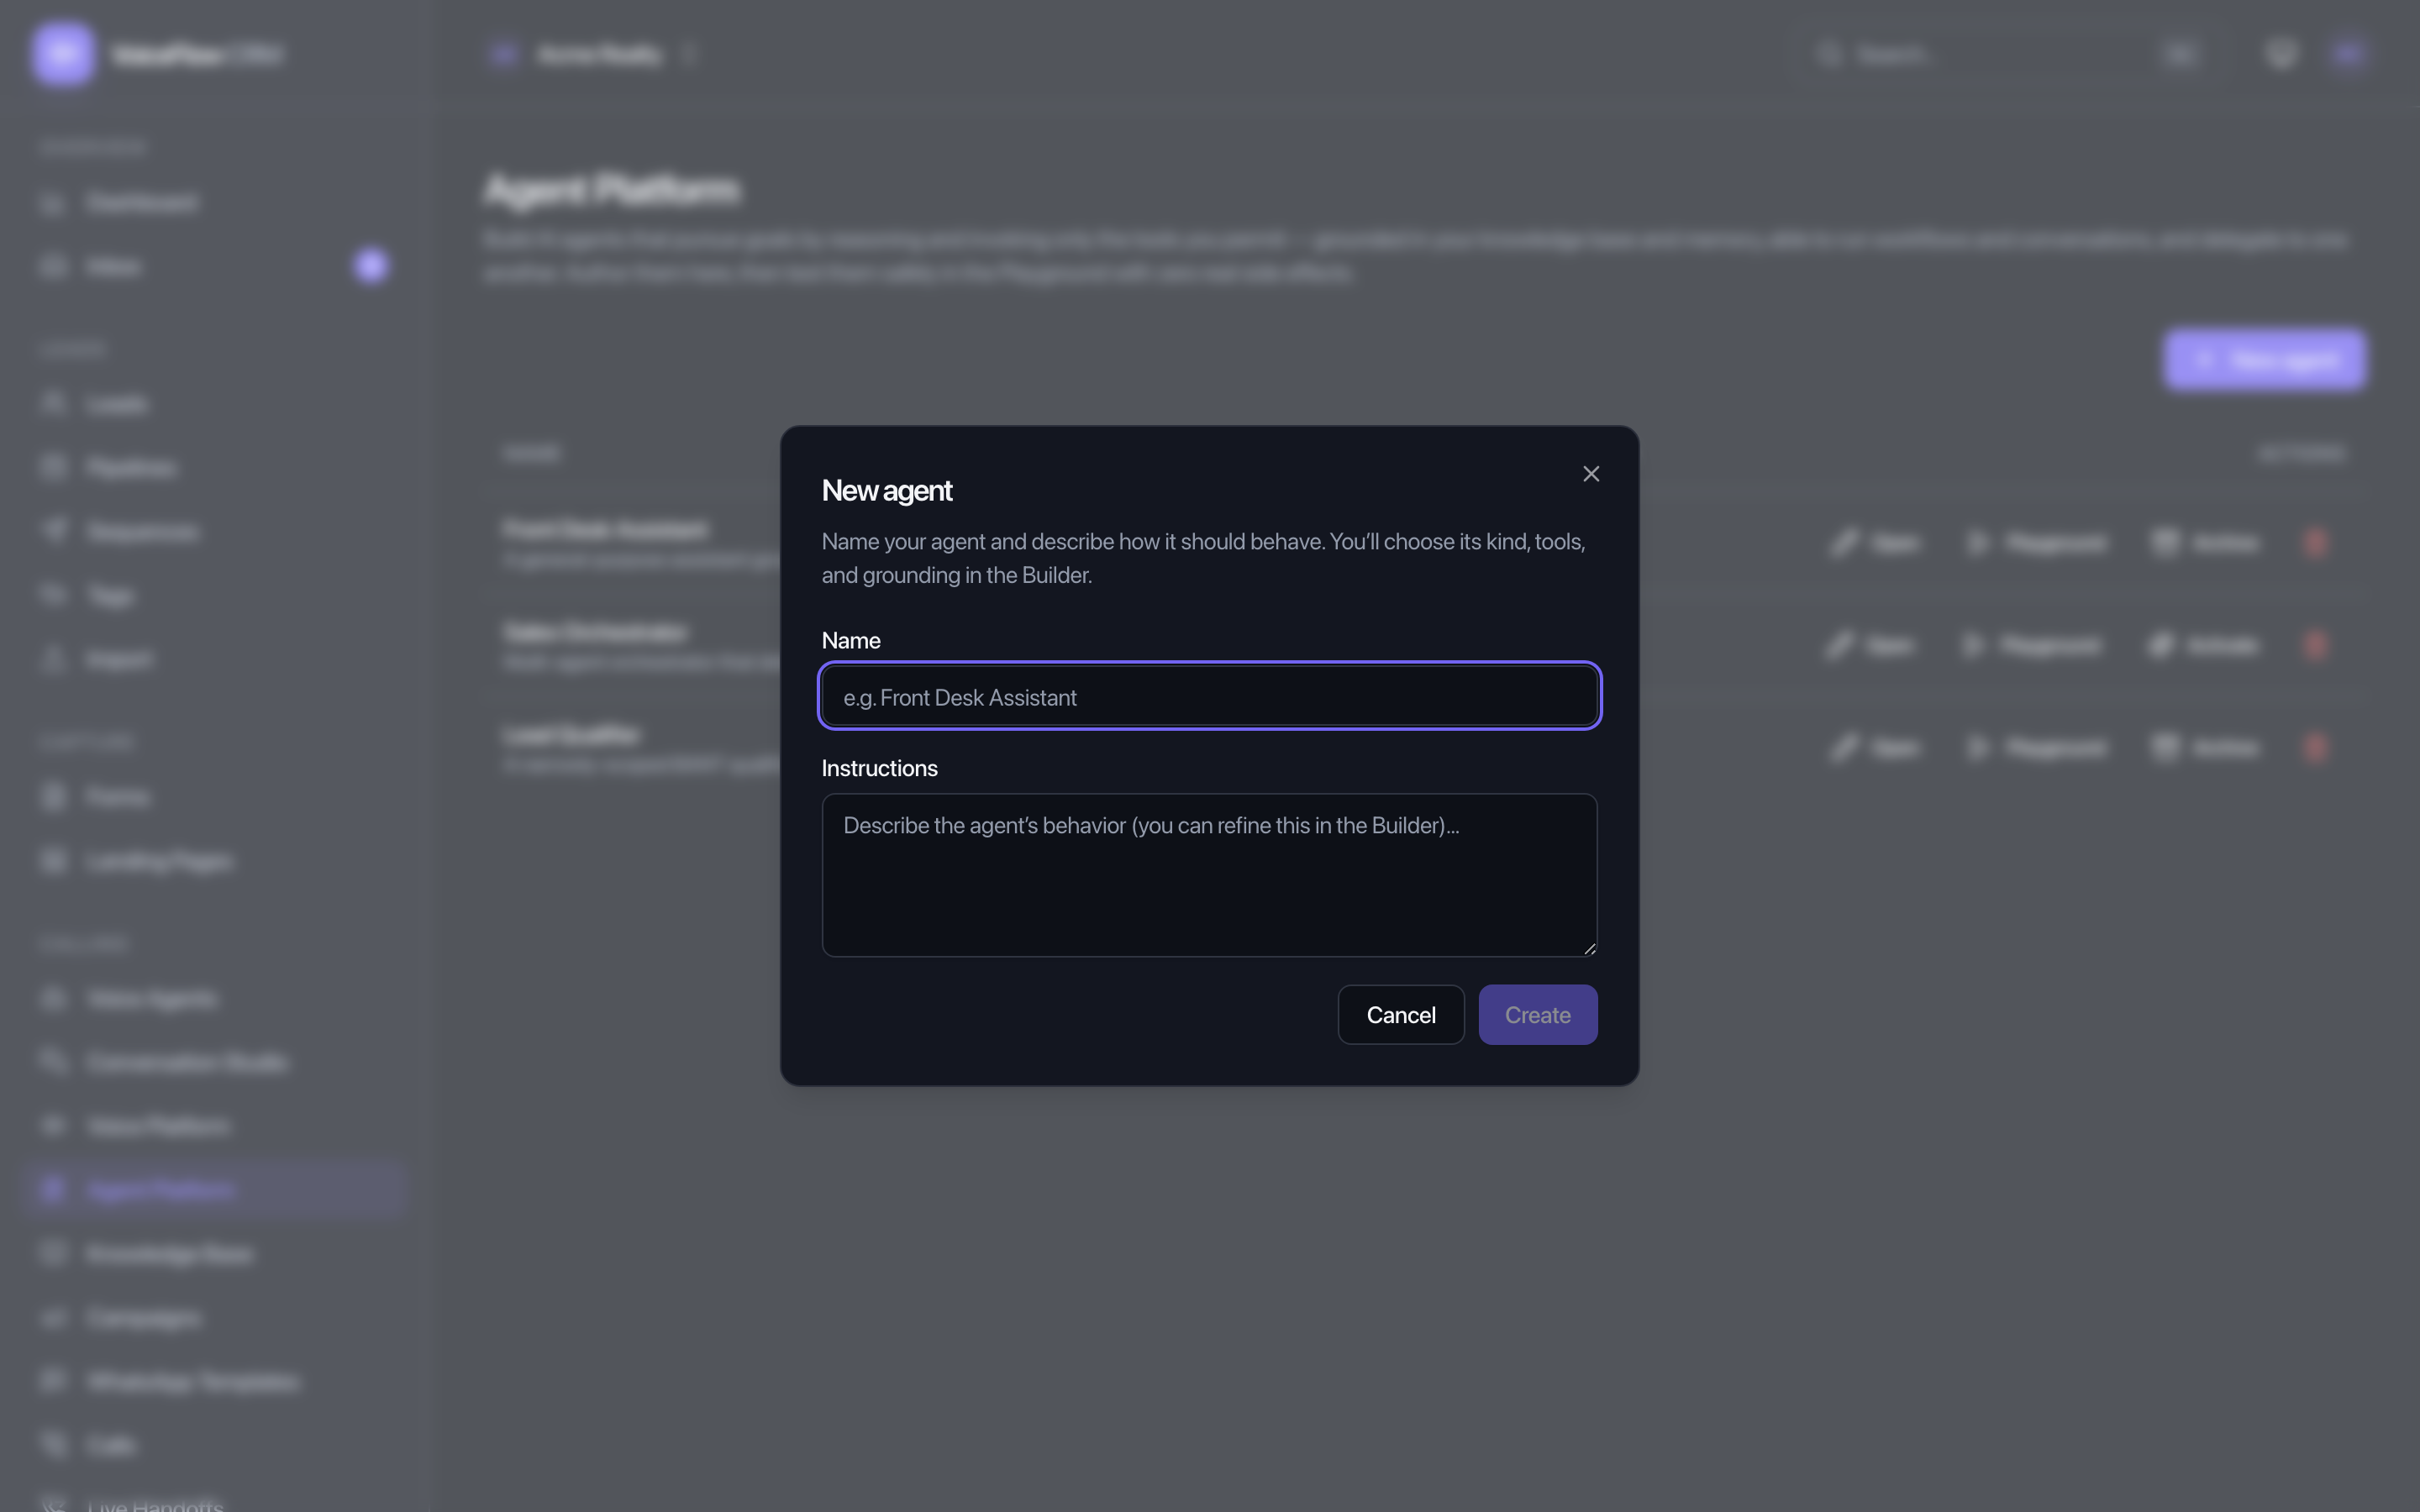
Open Voice Agents → New agent: give it a name, write its qualifying questions as a prompt, and configure its voice and language in the AI & voice card. Or use one of the five starters (Lead Qualifier, Appointment Setter, Real Estate Qualifier, Customer Win-back, Feedback & Review Collector).
The "AI & voice" card, field by field
- AI provider — OpenAI or Google Gemini (the brain that runs the conversation).
- TTS provider — Sarvam (Indian-native · Hindi/Bengali), ElevenLabs, or OpenAI (the voice engine).
- Voice — a gallery of persona cards: each shows a gradient avatar, the voice's name, a one-line description (e.g. "Male — warm, best Hindi"), and language/accent chips. Press the round ▶ on any card to hear a real sample — it uses the exact same speech engine as a live call. Pick the one you like.
- Voice profile — optionally override the voice with a saved profile from the Voice Platform (including a cloned voice). "None" uses the default voice above.
- Opening language — the language the agent opens the call in. Options: Auto (Hindi + English), हिन्दी, বাংলা, English (India), Español, العربية. Helper text: "The agent opens the call in this language and switches automatically if the caller speaks another."
Conversation Studio — design the call script
Where a plain prompt isn't enough, Conversation Studio (Conversation Flows) lets you design the exact branching script a voice agent follows on a call.
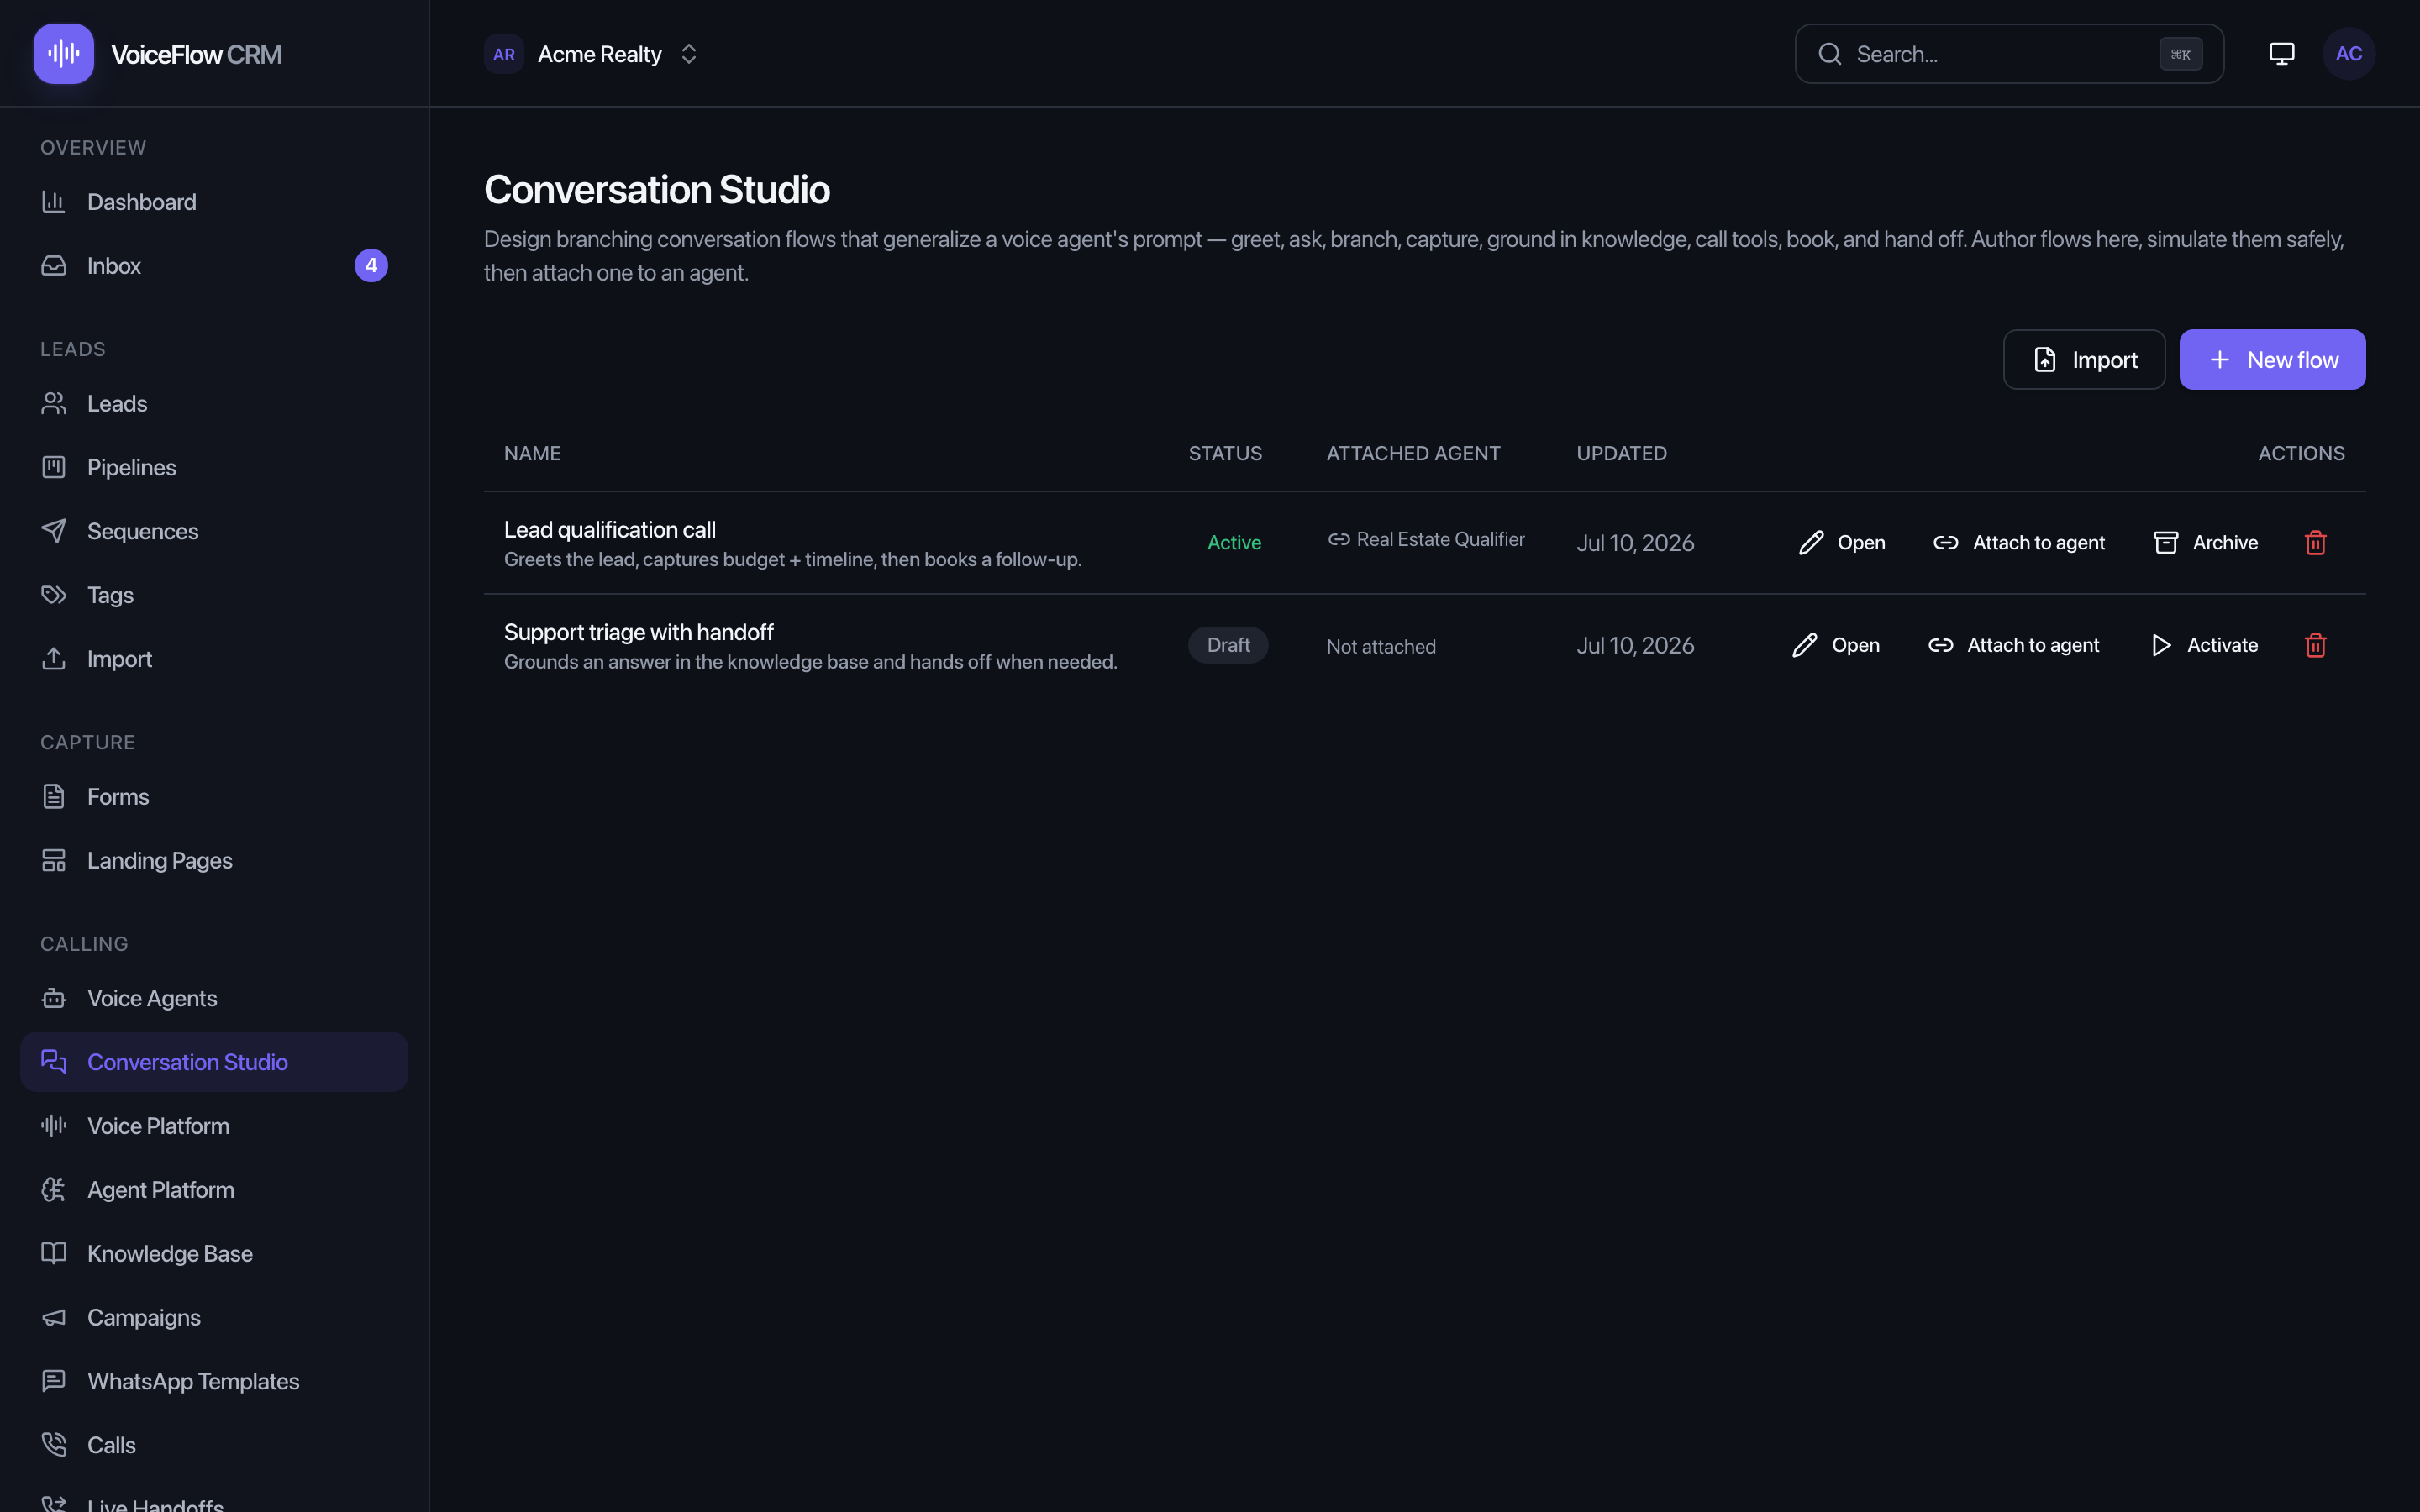
Open Conversation Studio (Pro mode). Build a flow on the canvas — greet, ask, branch on the answer, capture a field, look up knowledge, book a meeting, or hand off to a human. Then Simulate it safely (no real calls) and Attach it to an agent. When that agent calls, it follows your flow instead of improvising from a prompt alone.
Voice Platform — build & preview voices safely
A premium studio for building provider-agnostic voice profiles, previewing any voice, comparing them, and cloning your own — all without ever placing a call.
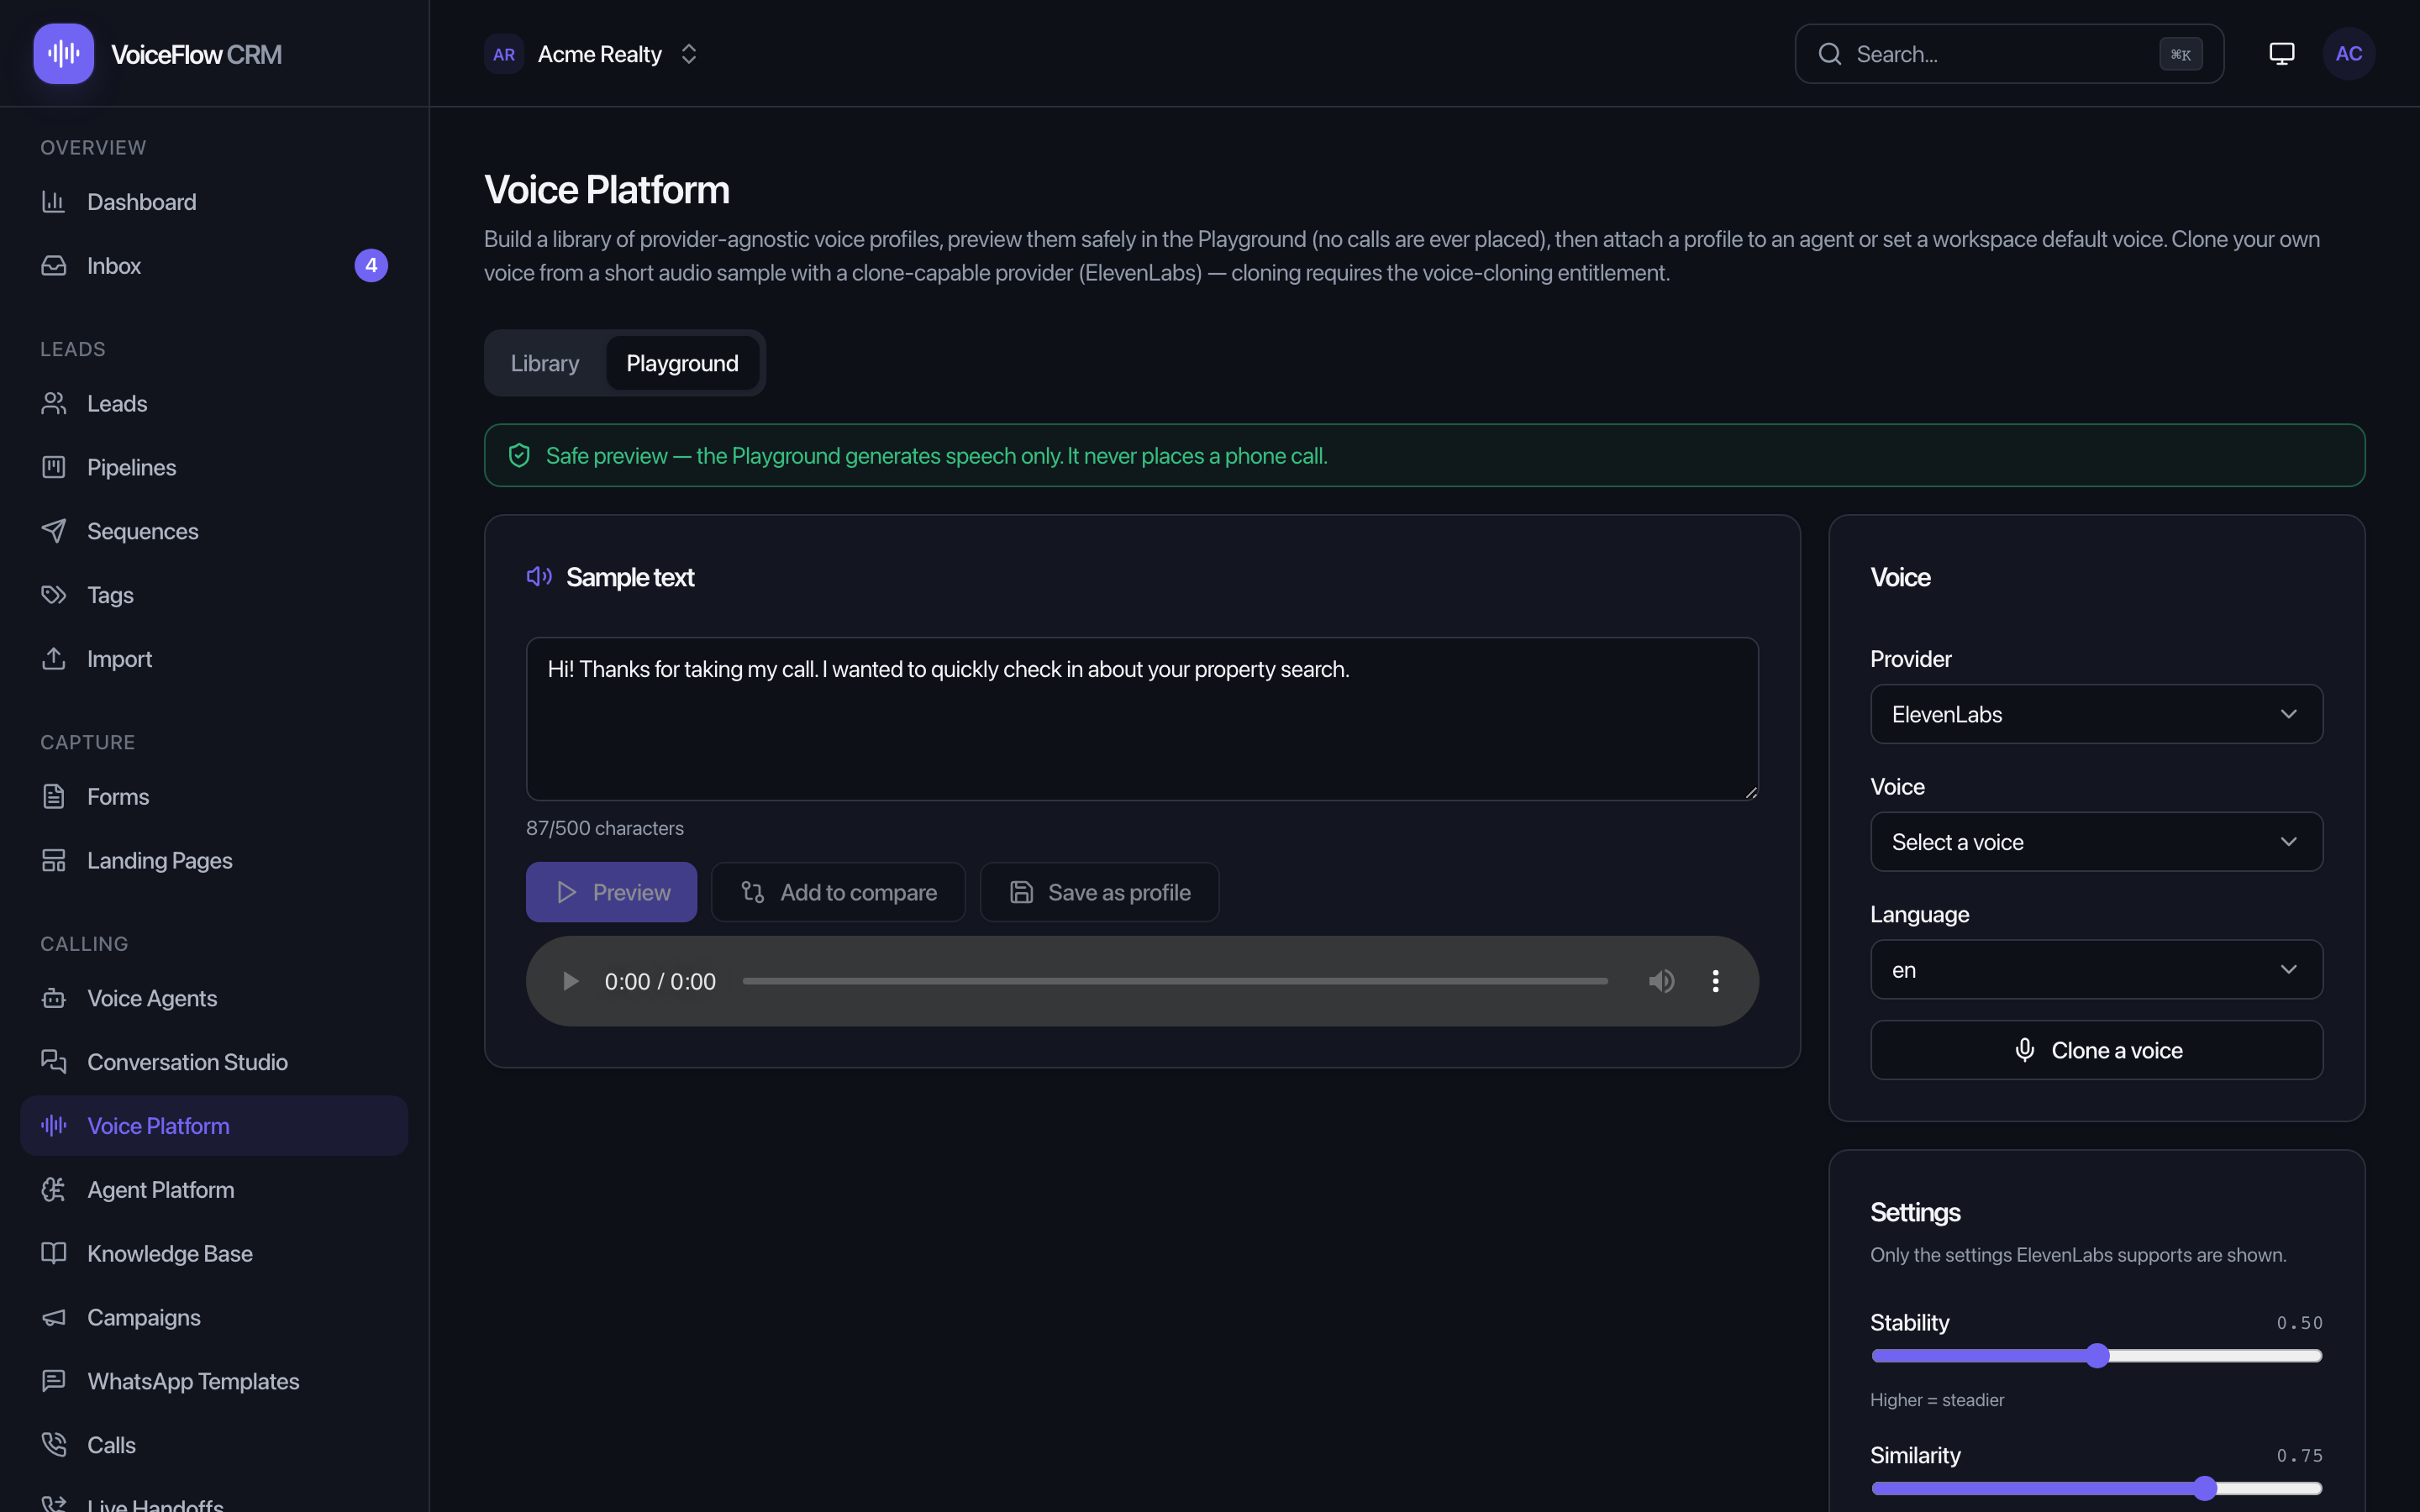
Open Voice Platform (Pro mode). It has two tabs:
Library
Your workspace's saved voice profiles — each a reusable "voice" (provider + voice + language + settings) you can attach to any agent. "Open in Playground" seeds a profile for editing.
Playground
Two panes. On the left: pick a Provider, a Voice, a Language, type Sample text, and tune the Settings the provider supports (only the relevant ones show). On the right: the preview "stage." Actions include Save profile, a side-by-side Compare, and Clone a voice.
Cloning your own voice
On a clone-capable provider (ElevenLabs) with the voice-cloning entitlement, click Clone a voice, record a ~30-second sample (or upload one), and the cloned voice lands in your Library ready to attach to an agent. If your plan doesn't include cloning, you'll see an upgrade note.
Agent Platform — goal-driven AI agents
Beyond voice-calling agents, the Agent Platform lets you build goal-driven AI agents with a limited, safe toolset, each testable in its own Playground.
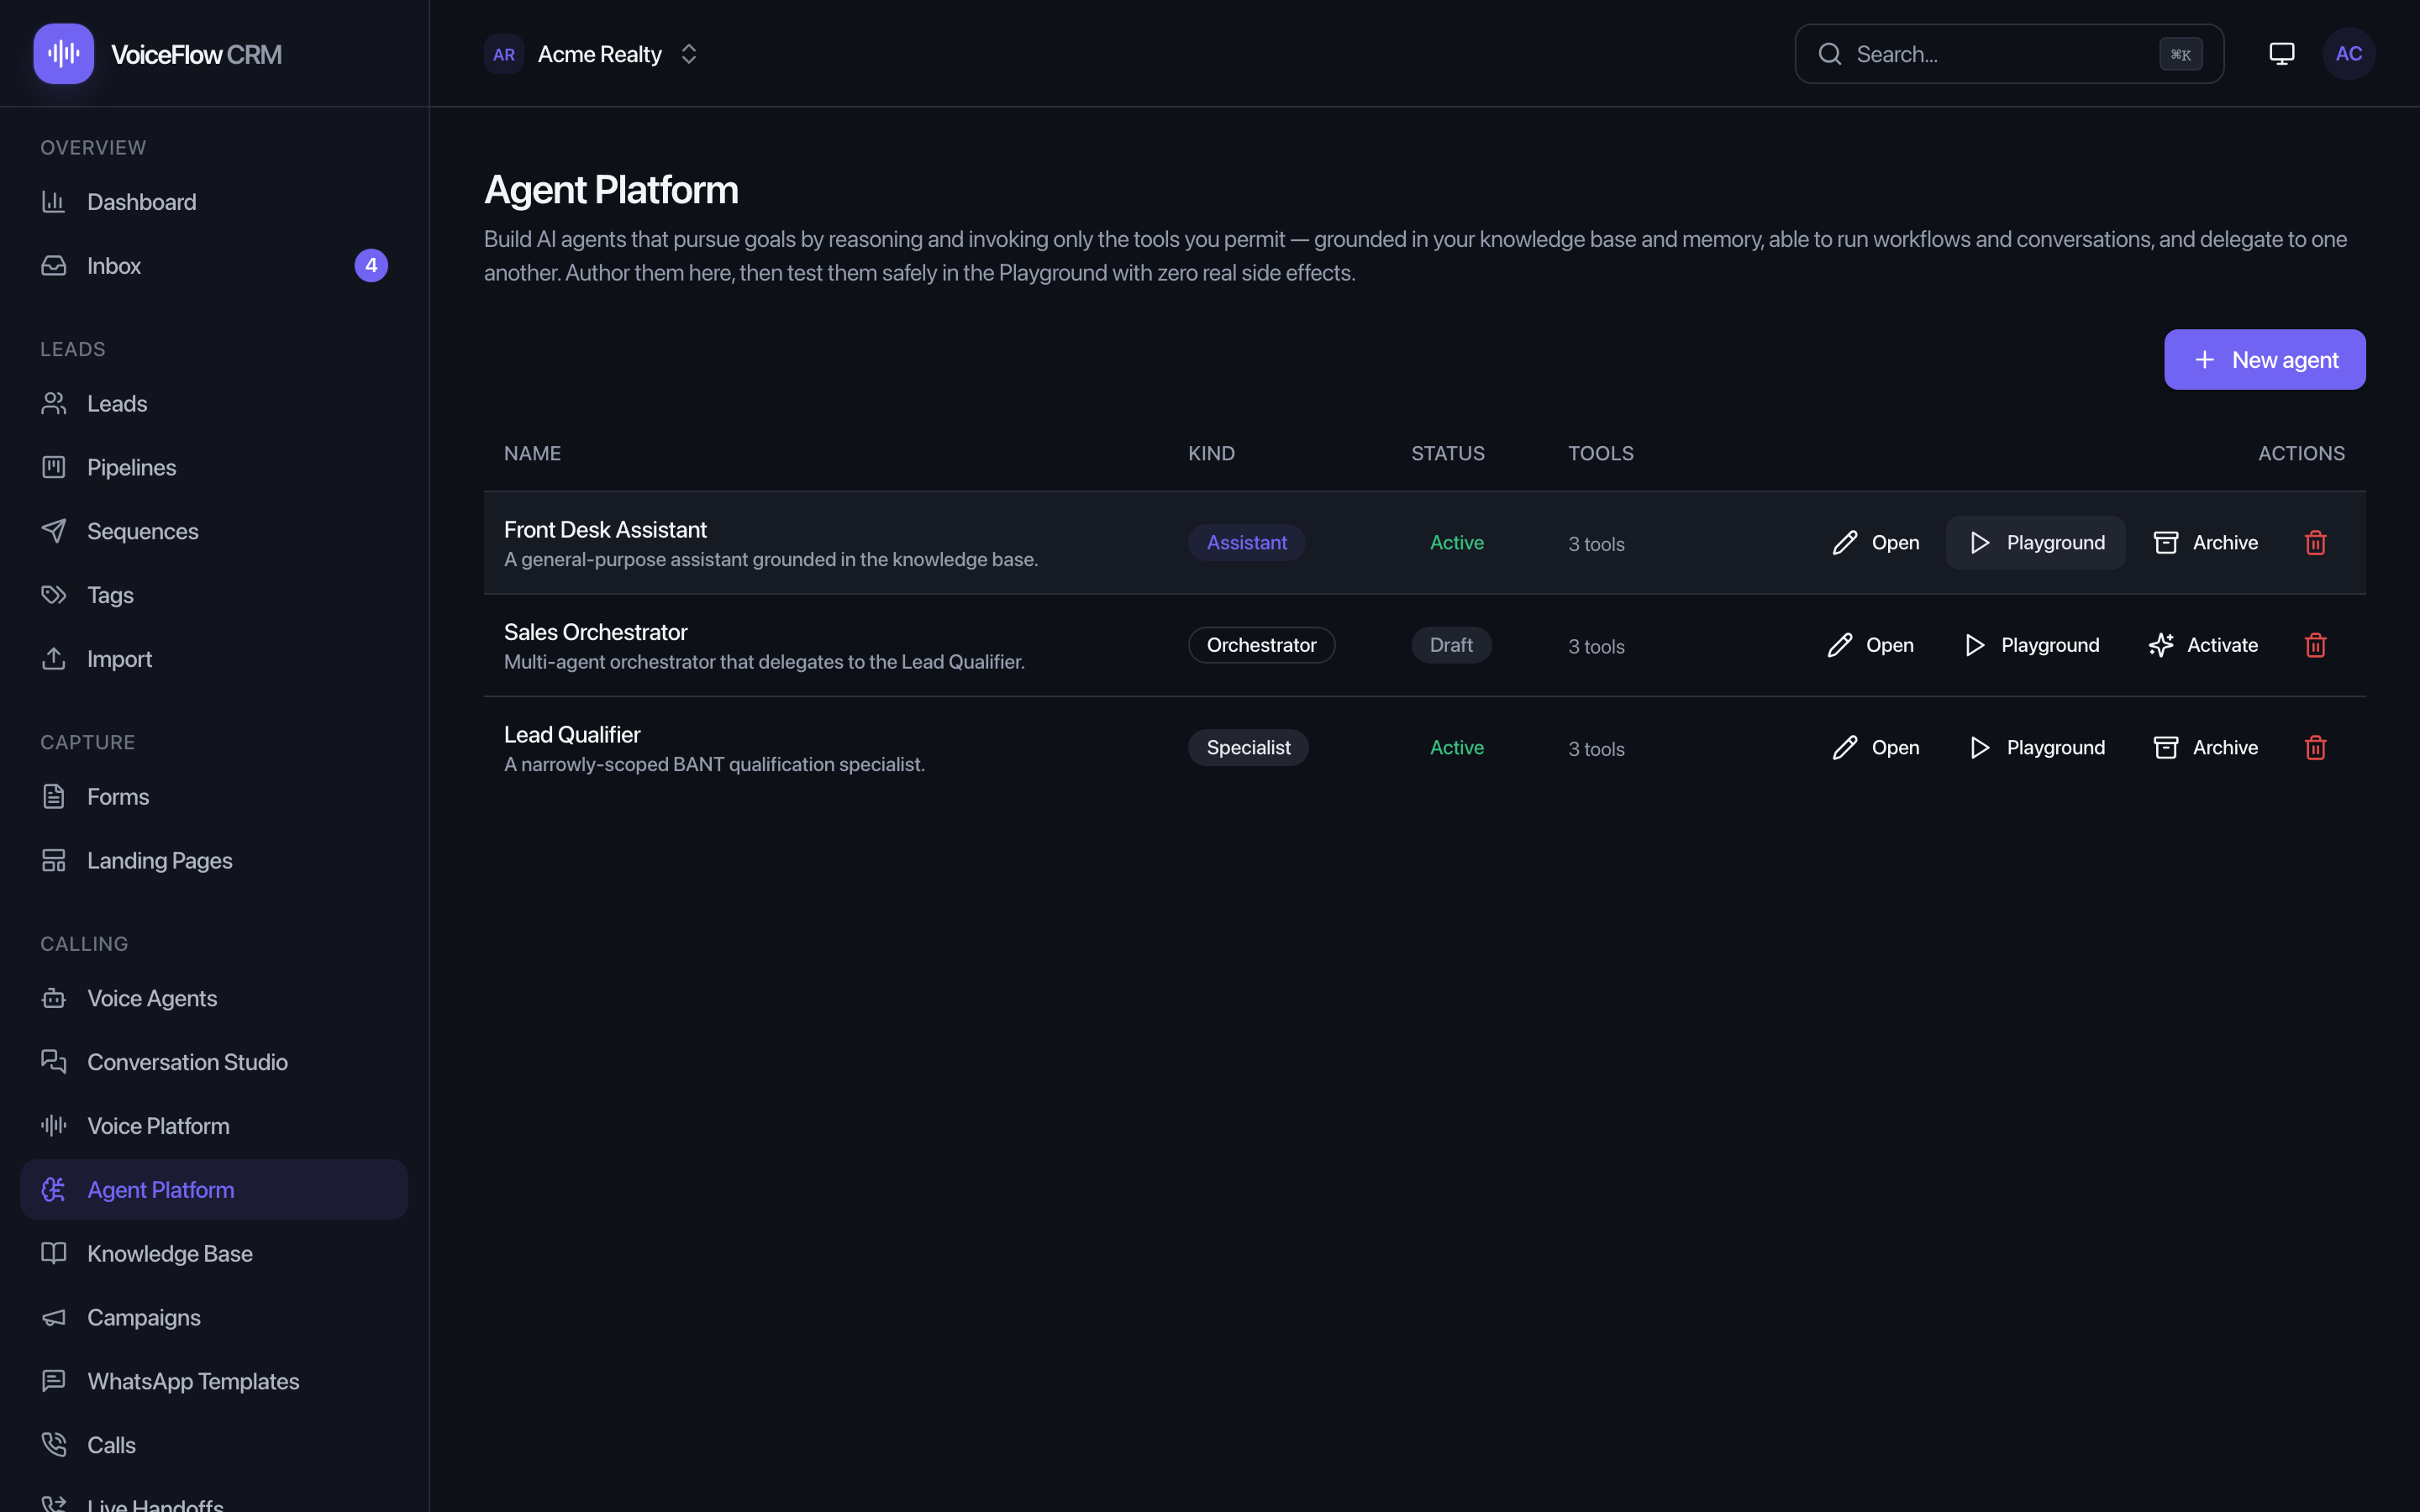
Open Agent Platform (Pro mode). Create an assistant, a specialist, or a multi-agent orchestrator, give it a goal and a bounded set of tools, and dry-run it in the Playground with zero real side effects. It's the toolkit for the AI helpers that power features like inbox reply suggestions and knowledge-grounded answers.
Knowledge Base & memory
Ground your AI in your own content so it answers accurately — on calls, in the inbox, and everywhere knowledge is used.
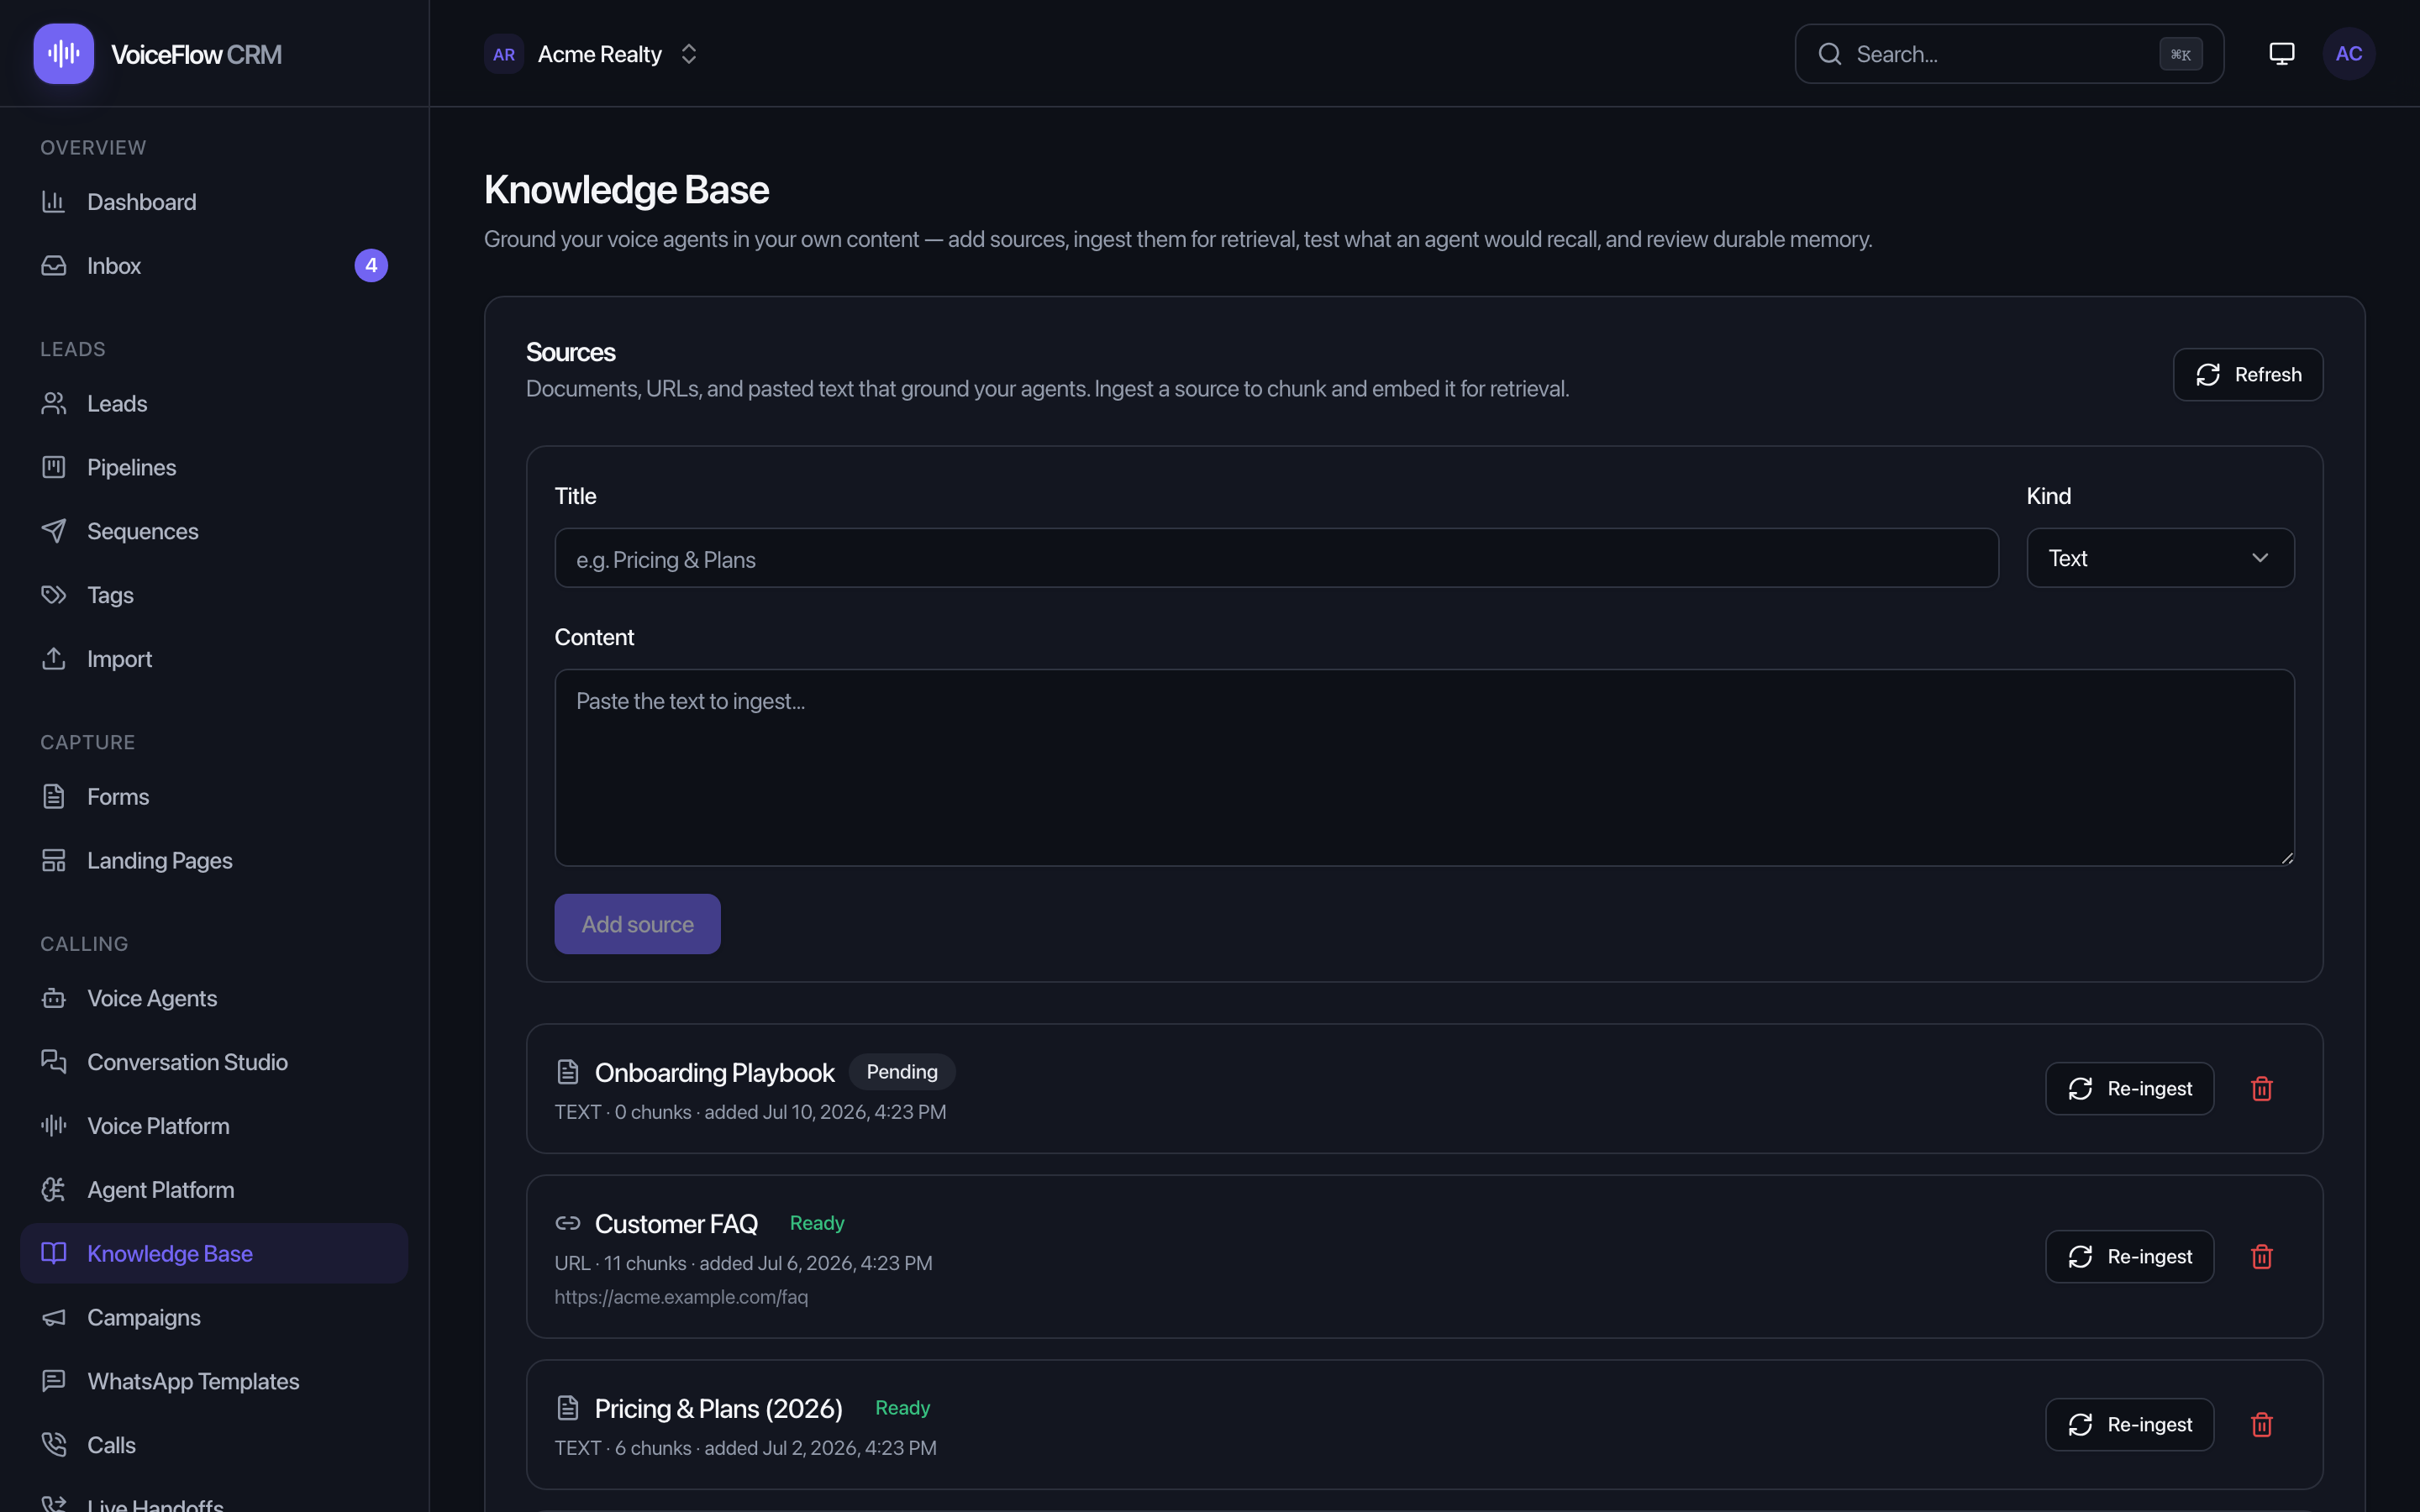
Open Knowledge Base (Pro/premium). Add Sources (paste text or add a URL) and ingest them so they can be retrieved. Use Test retrieval to preview what an agent would recall for a given question, and the Memory viewer to review durable facts agents remember across calls.
The fastest start: load the sample FAQ
On the empty page, click Load a sample FAQ. One click creates a source called "Sample: Business FAQ (edit me)" — ready-made Q&A covering hours, services, pricing, quotes, service area, refunds — and ingests it. Each answer has a clearly marked [replace with your real …] placeholder; swap in your details and your AI starts answering like it works for you.
Campaigns — call a batch of leads
A campaign runs your AI agent across a set of leads, with live progress you can pause and resume.
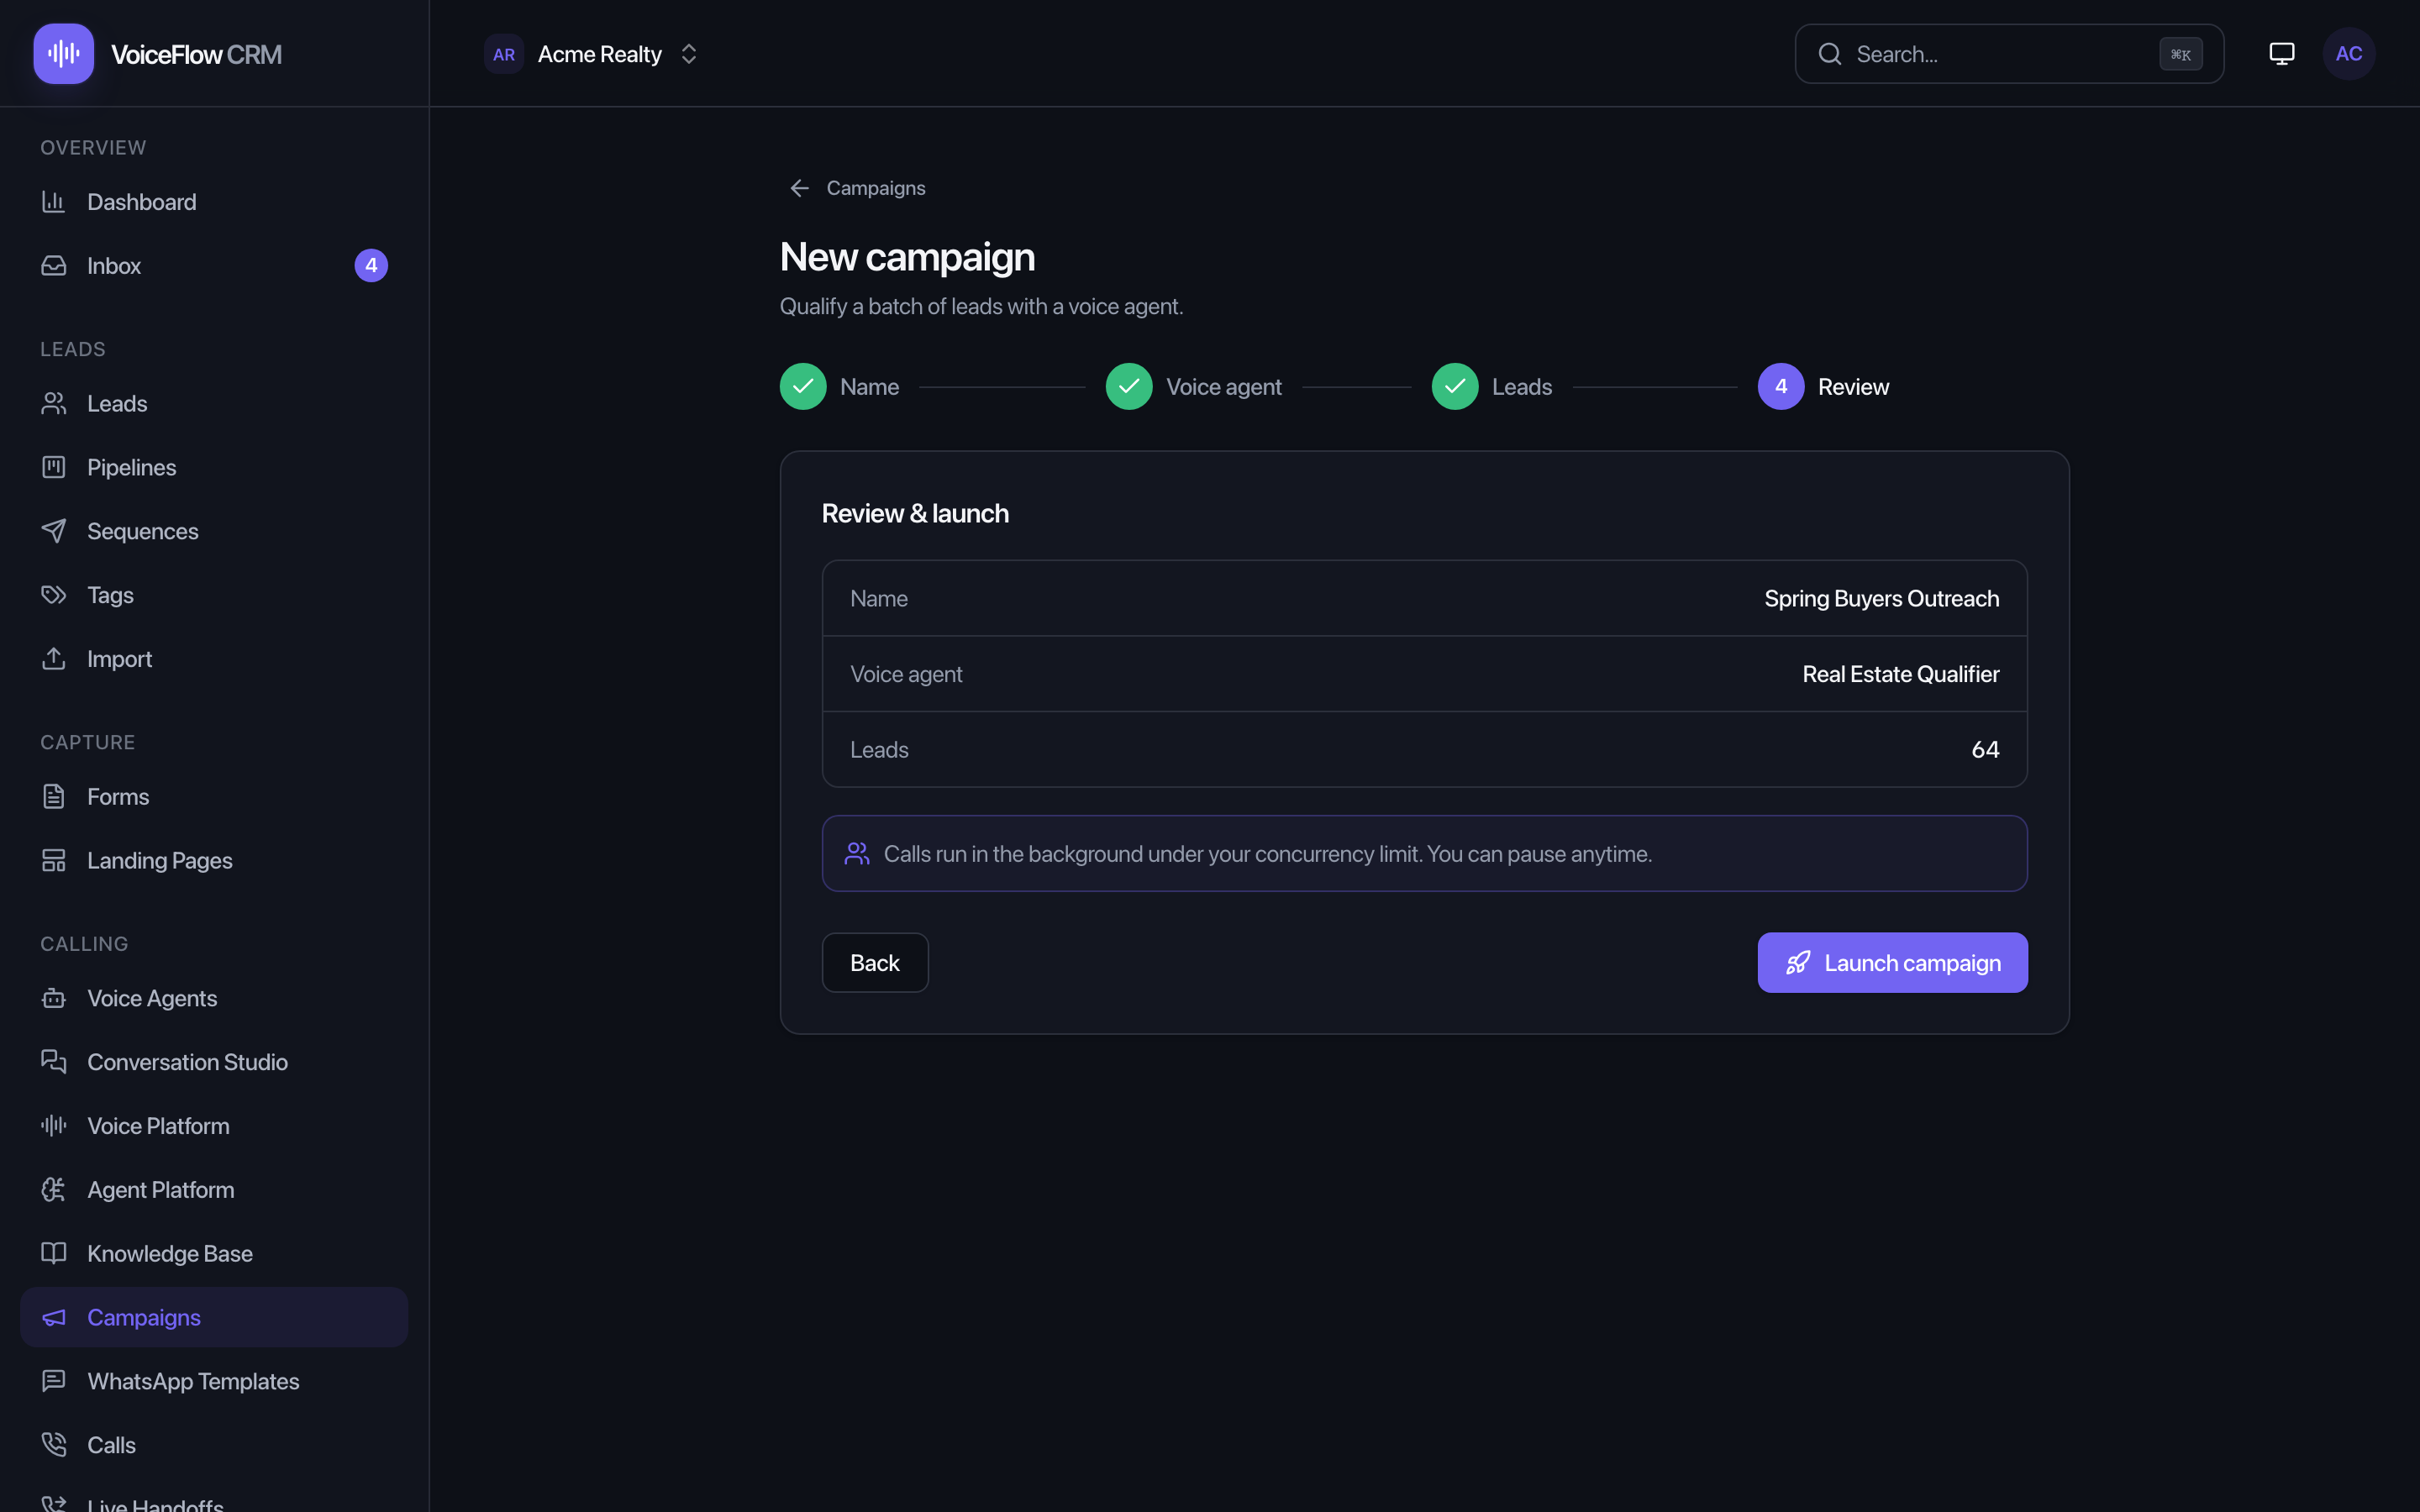
Open Campaigns → New campaign and follow four steps: Name it, pick the Voice agent, choose the Leads to call, then Review & launch. Once running, the page shows live progress (Total leads, Completed, Connected, Qualified) and lets you Pause, Resume, or Start. Calls run in the background under your concurrency limit — walk away and check back.
Calls — read every result
Every call attempt, its status and outcome — one click from the recording, transcript, and score.
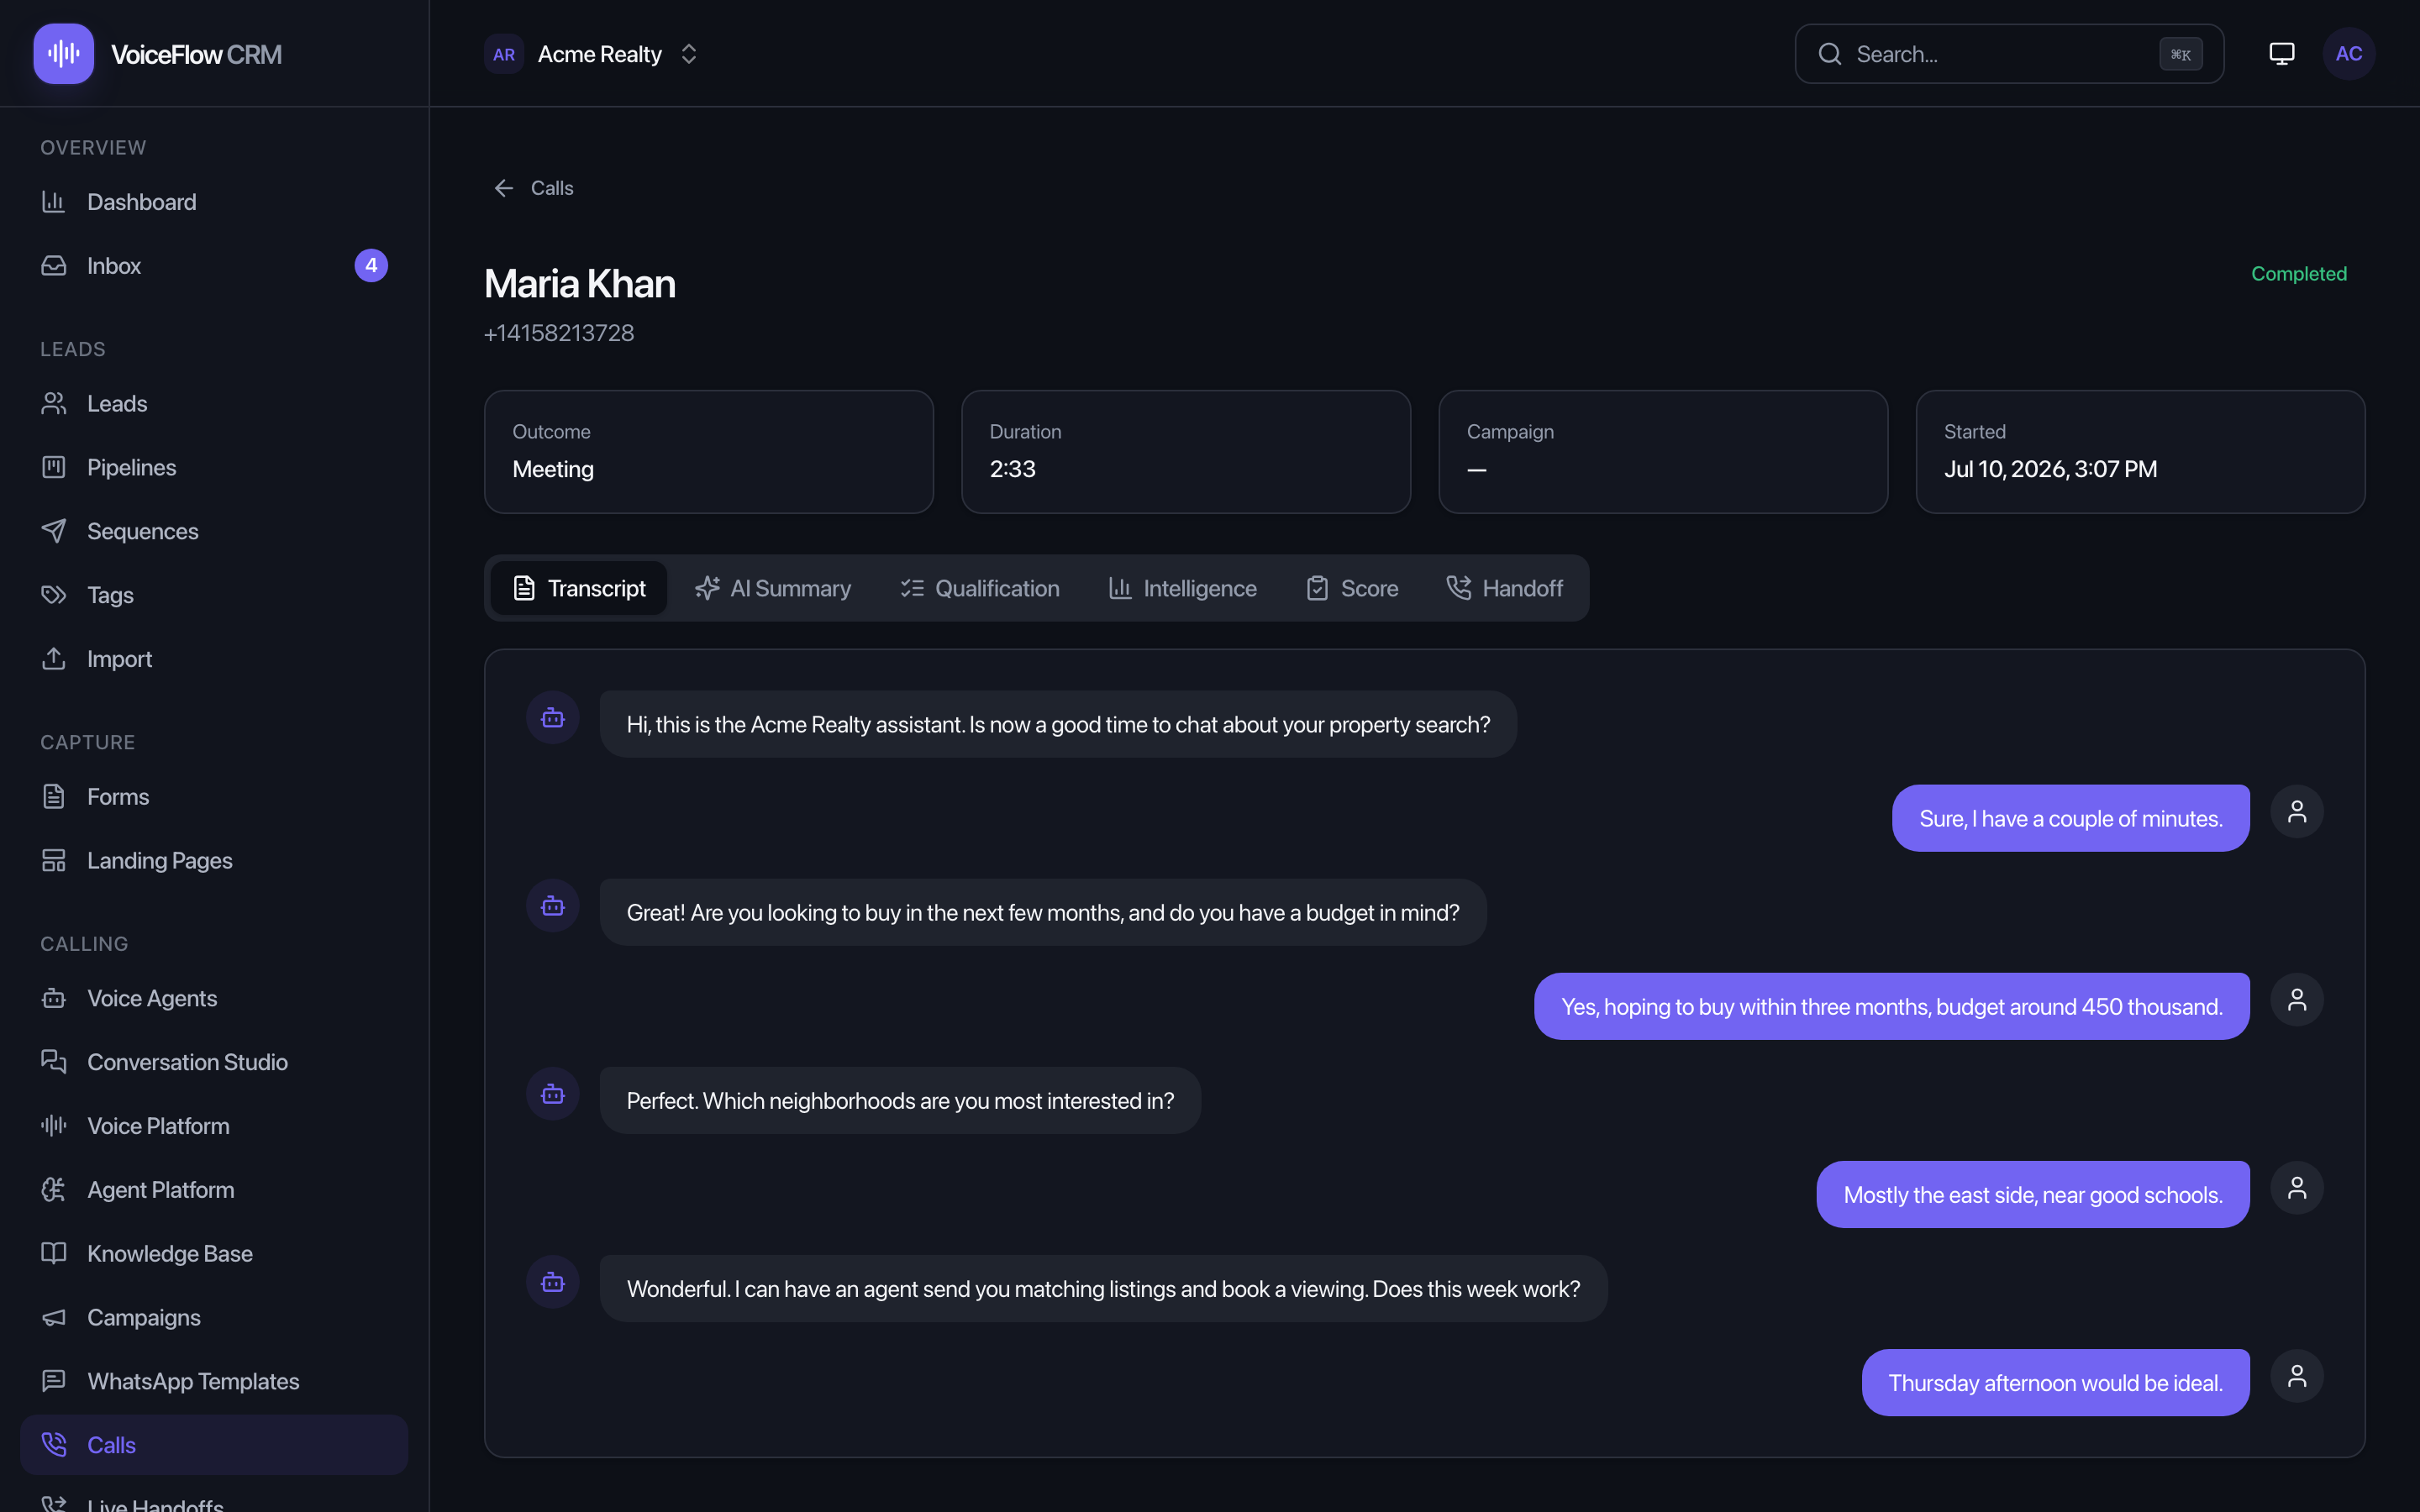
Open Calls to see every attempt, its status (Ringing, Completed, No answer…) and outcome (Qualified, Callback, Meeting…). Click any call to open its detail page. At the top is the recording player — play, scrub, switch speed (1x → 2x), or Download the audio (streamed securely through your own server, never a public link). Below it, six tabs:
- Transcript — the full conversation, turn by turn.
- AI Summary — a short plain-English recap.
- Qualification — the structured result: interest, budget, timeline, objections, meeting/callback requested, and an intent score.
- Intelligence — sentiment, talk-ratio, interruptions, topics, keywords, highlights, action items, and coaching insights.
- Score — the call graded against a scorecard; the default one scores automatically.
- Handoff — the timeline if the call was escalated to a human.
Two roll-ups: Transcript Search and Conversation Intelligence.
Live Handoffs
When an AI call needs a human, it escalates — and you take it live.
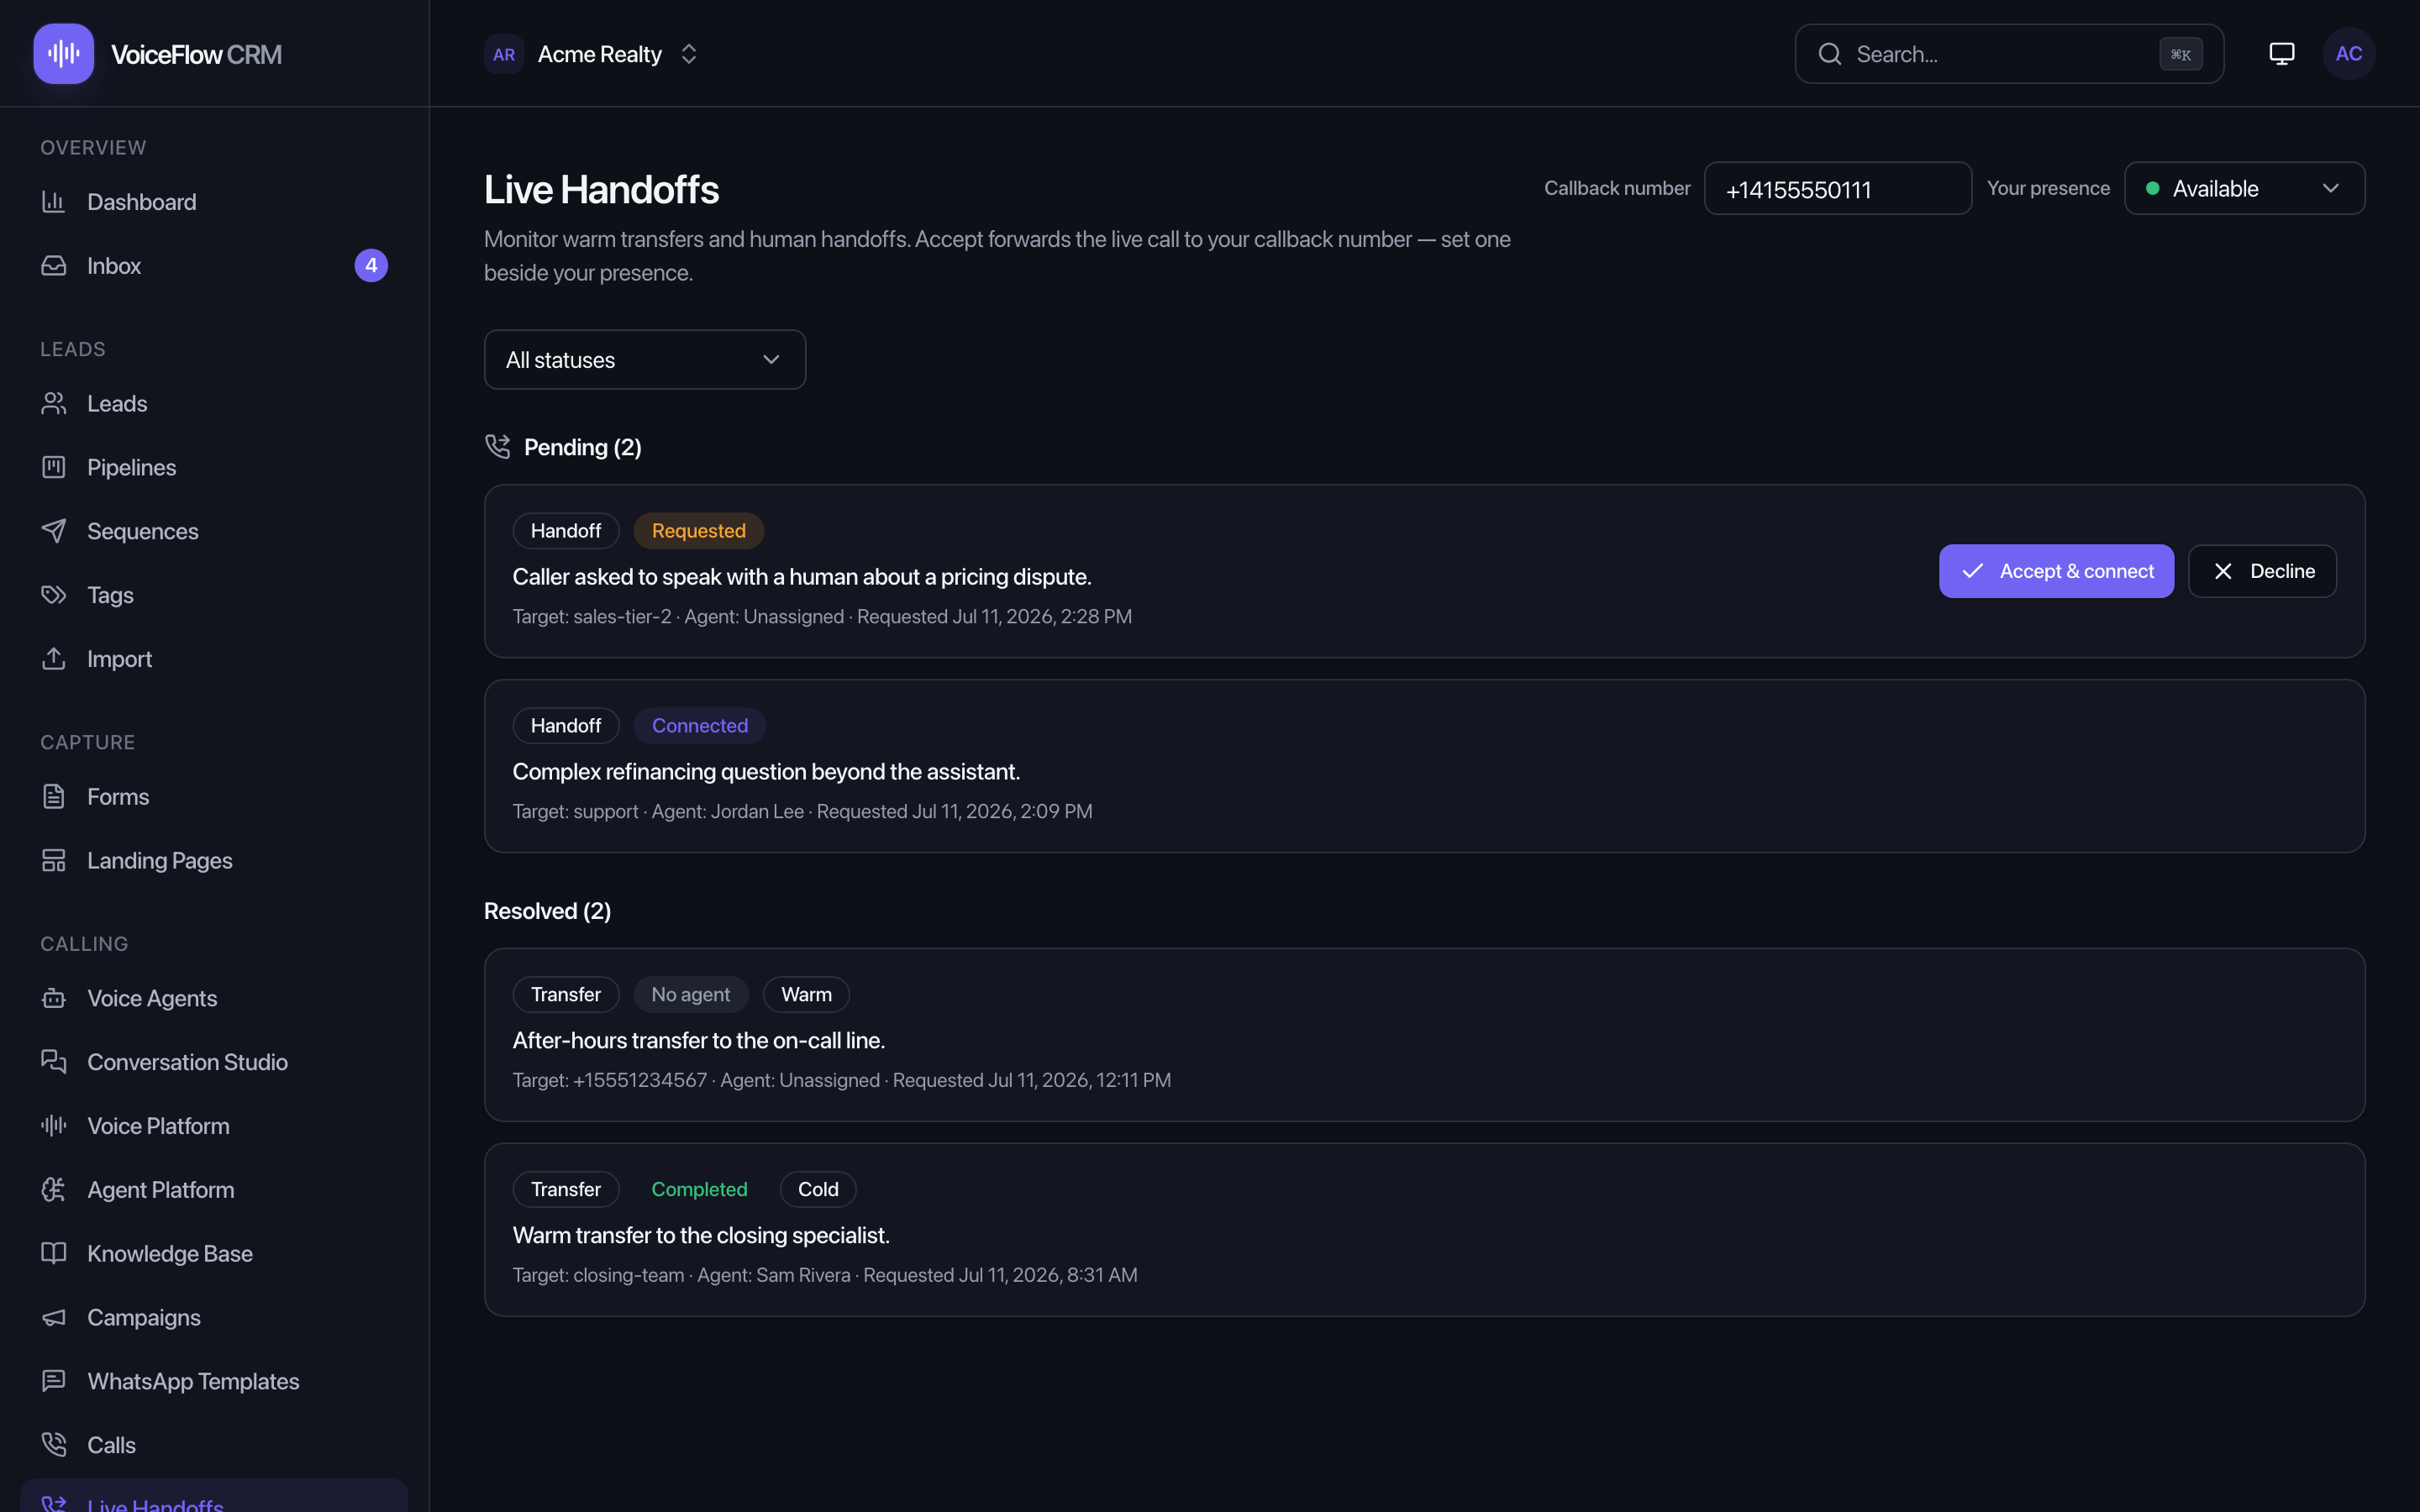
Open Live Handoffs (Pro mode) to monitor escalations in real time. Set your callback number and presence (Available/Away/Busy/Offline) in the header; when a handoff arrives, Accept & connect forwards the live call to your number, or Decline it. Each handoff shows its reason, target, and full timeline.
Conversation Intelligence
AI-derived performance across all your calls — not just one.
Open Conversation Intelligence (premium) for a rolled-up view of sentiment trends, common topics and keywords, talk-ratio, objections, and coaching insights across your whole call history. It's the same analysis that appears on each call's Intelligence tab, aggregated so you can spot patterns — which agents, scripts, and times convert best.
Transcript Search
Find every call where a word or phrase was said.
Open Transcript Search (premium), type a word or phrase, and get every call whose transcript contains it — jump straight to that call's detail page. Perfect for "who mentioned refund?", "which leads asked about pricing?", or auditing how a competitor's name came up.
Bookings & meetings
Schedule and track appointments with leads — no external calendar required (though you can connect Google or Outlook to also sync).
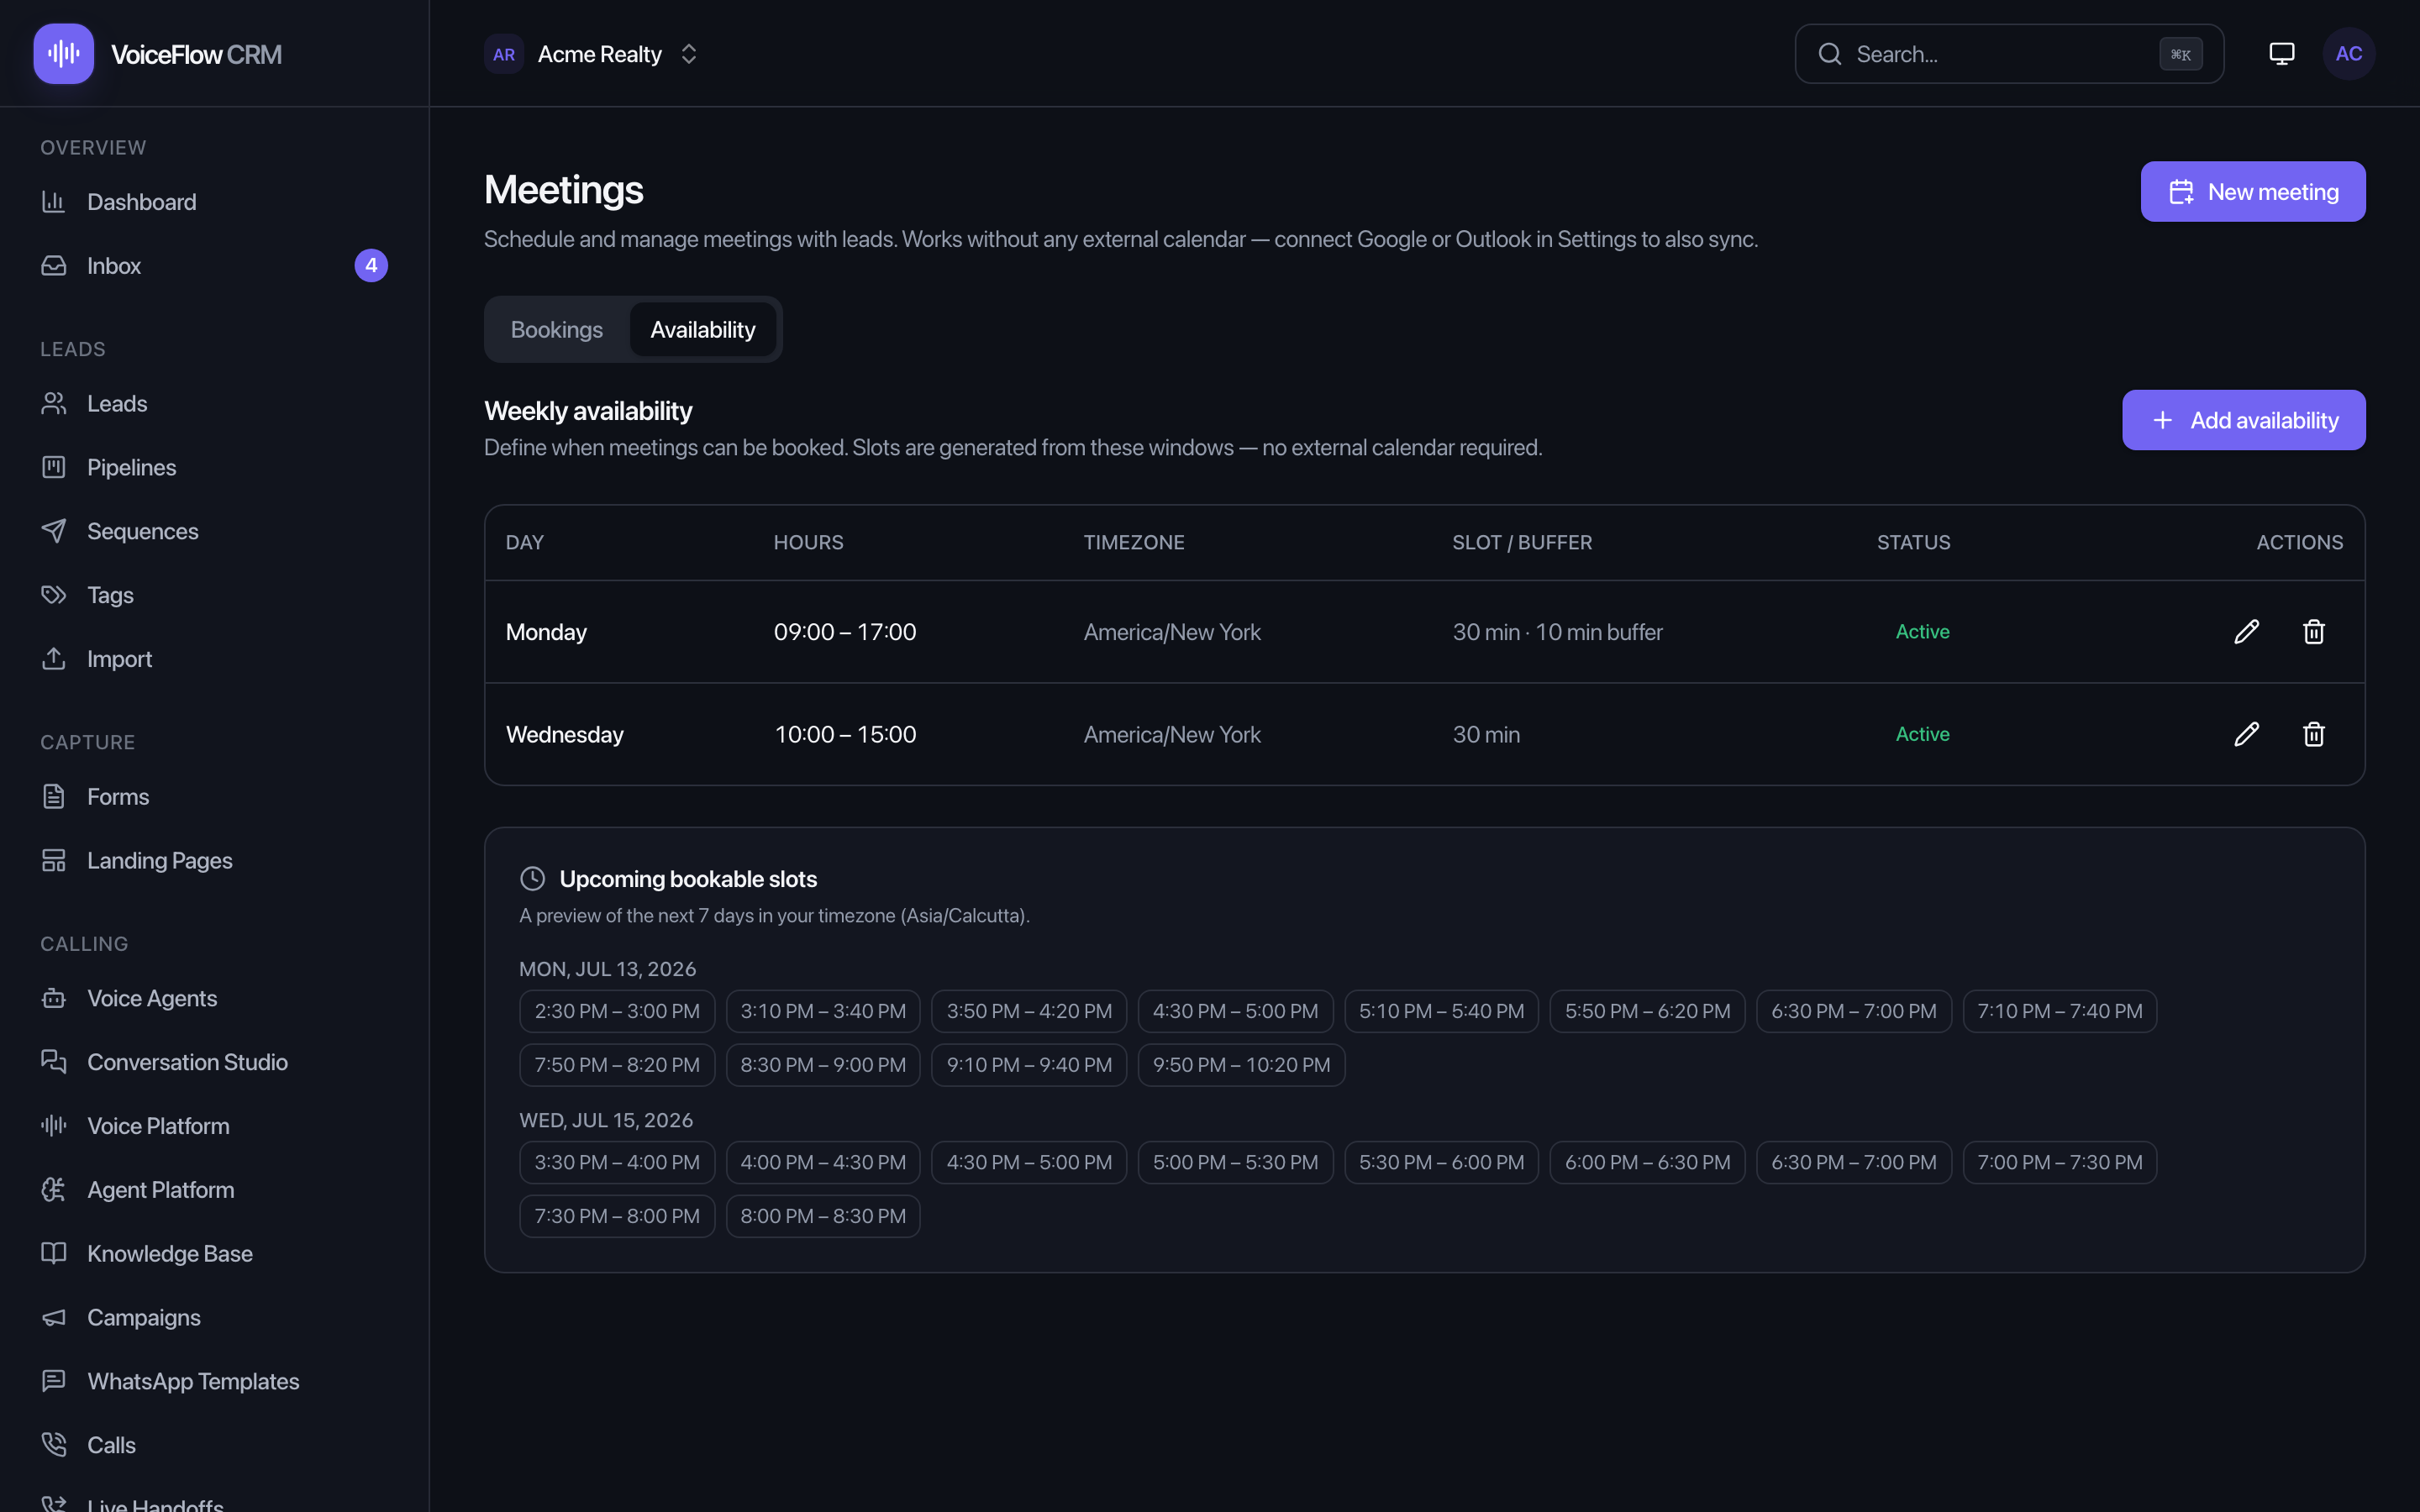
Set your bookable hours on the Availability tab (weekly windows generate slots), then create meetings by picking a slot, entering a manual time, or leaving them as a request. Each meeting moves through Requested → Scheduled → Completed / No-show / Cancelled.
The AI books meetings for you
When someone on an AI call agrees to a meeting — or asks for a callback — you don't lift a finger:
- A meeting titled "AI-requested meeting" appears automatically: Scheduled if the customer agreed a specific time, or a request for you to pick. The AI knows today's date, so "Tuesday at 11" lands on the right Tuesday.
- For a callback with an agreed time, the lead's status flips to Callback with that time stored — visible on the lead and in the call's Qualification tab.
So after each campaign, a glance at Meetings shows every appointment your AI set up overnight.
Workflows Studio — visual automation
Automate your CRM visually: when an event happens, do something — send a message, place an AI call, set a field, enroll a sequence, call a webhook. No code, but deep enough for serious flows.
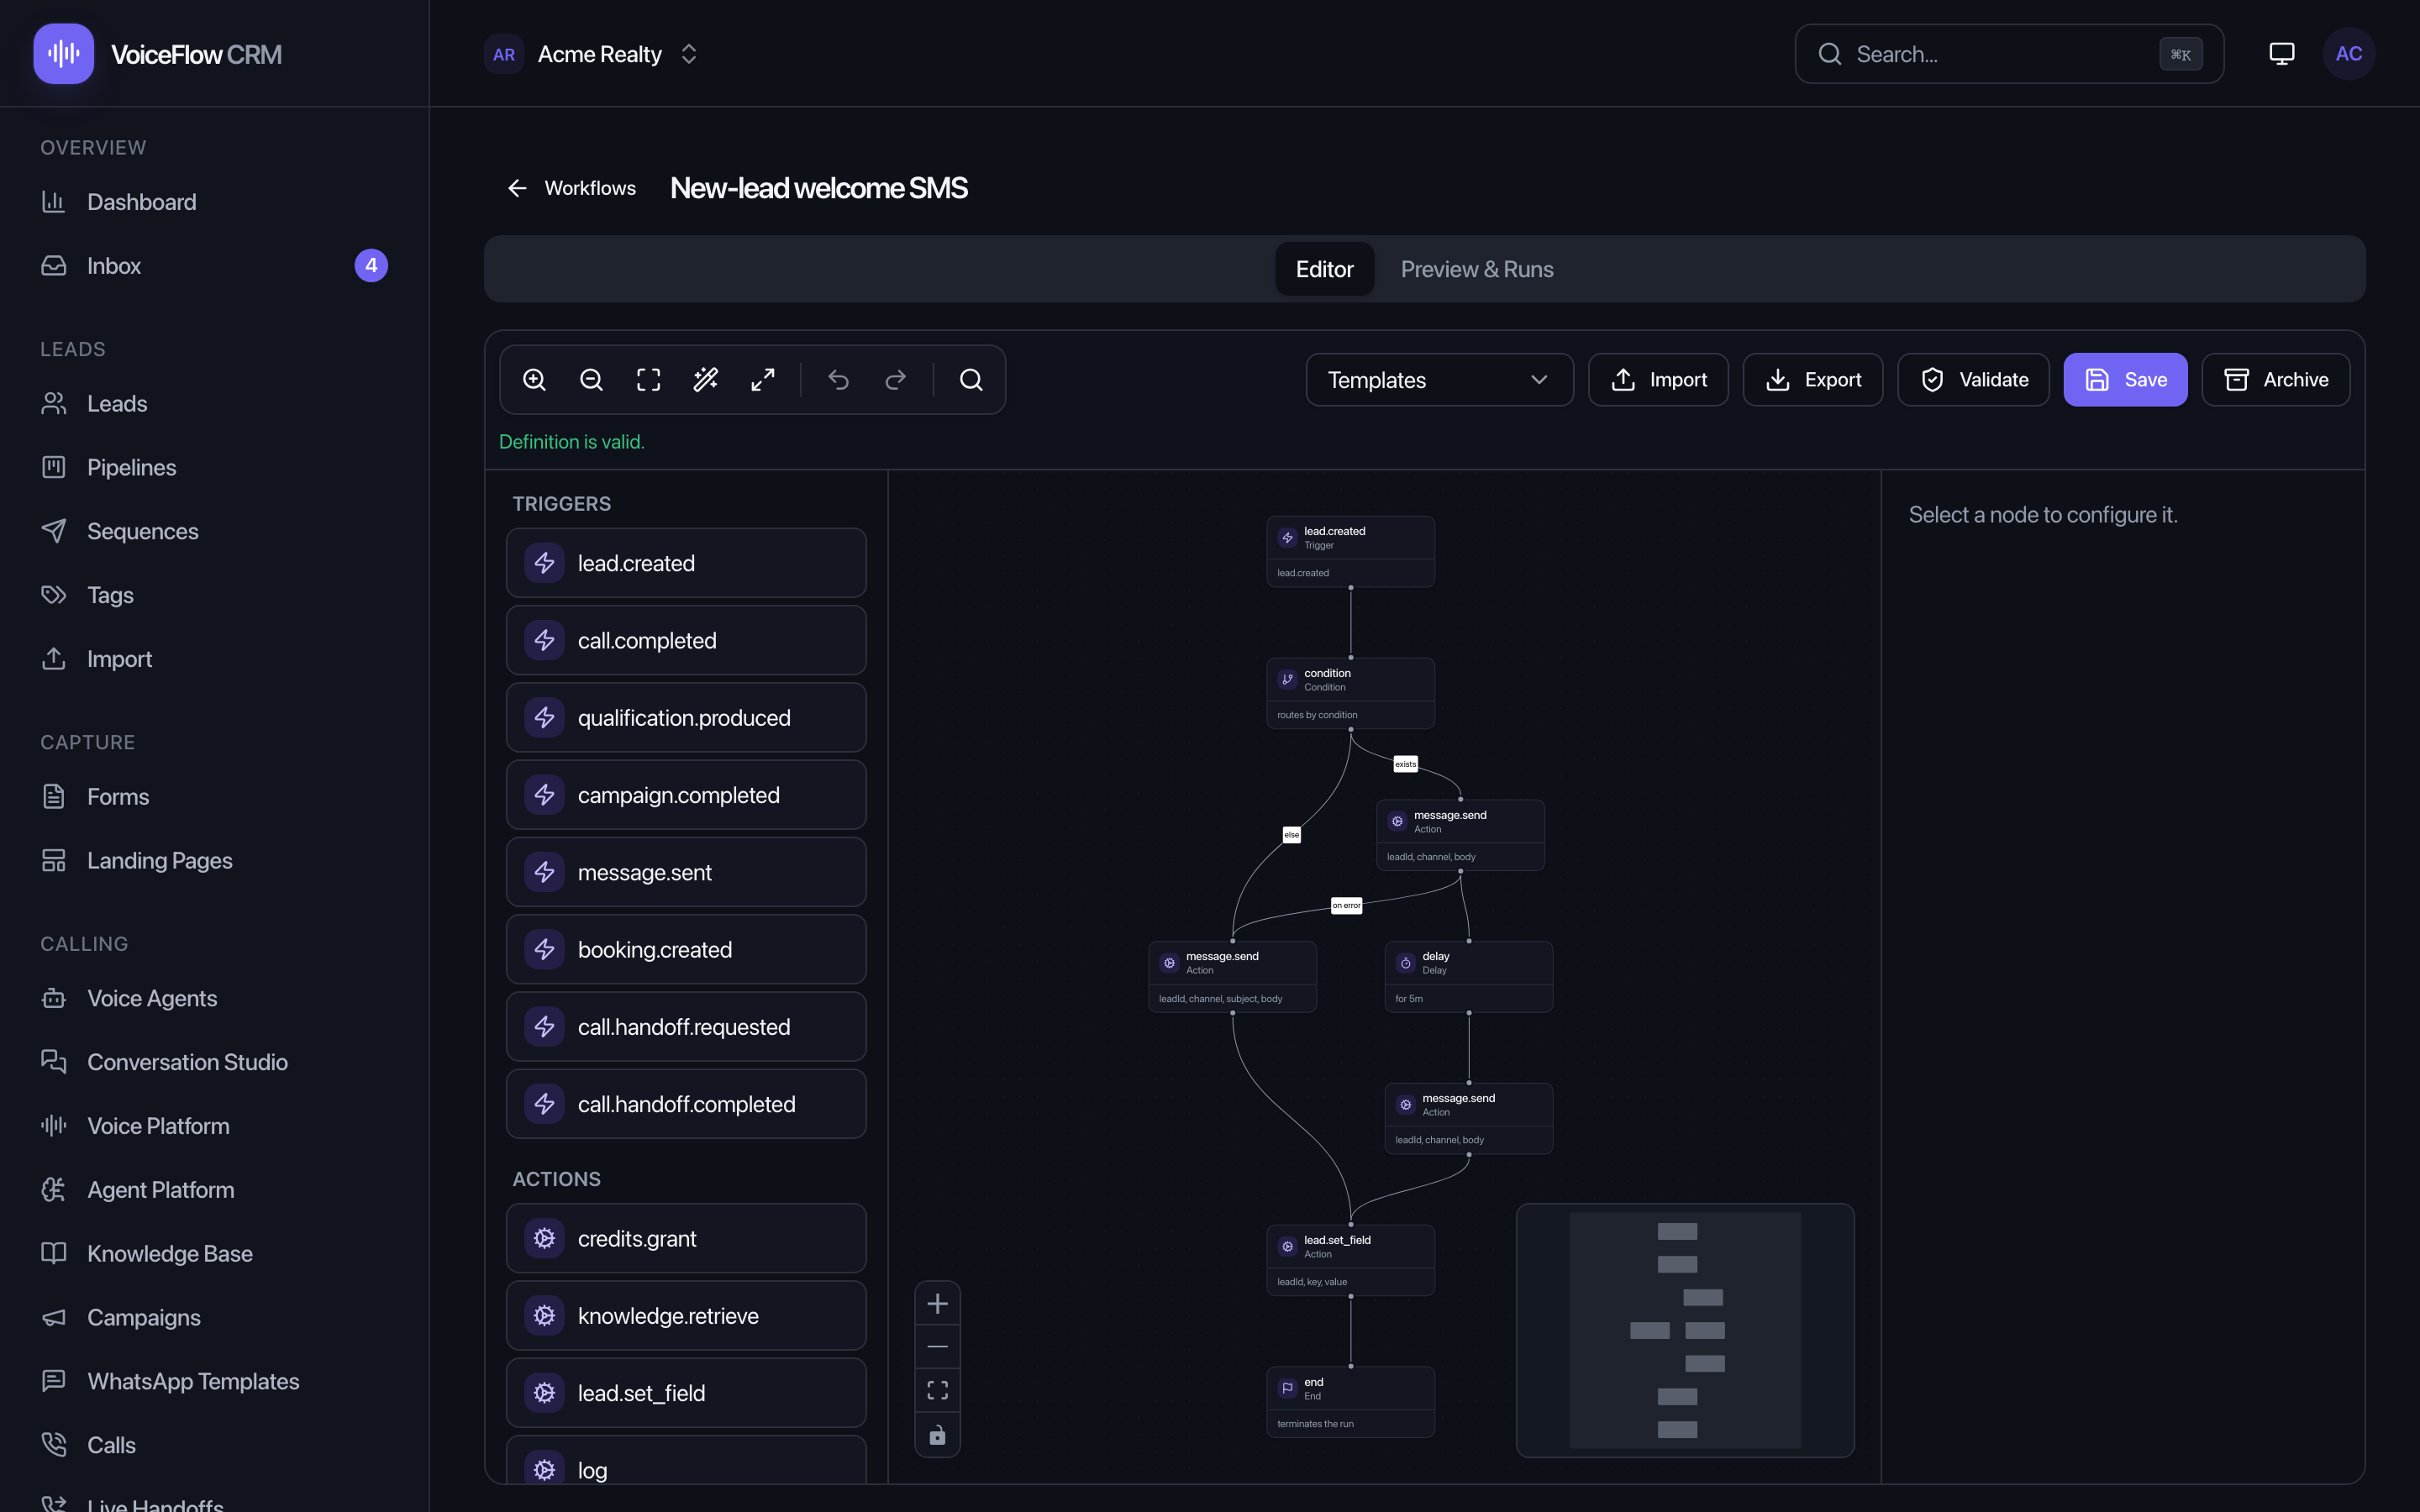
Open a workflow in the Studio. Every workflow has this shape: one trigger (an event) flows into actions (things to do), optionally routed by conditions (branches) and paced by control nodes (delay, wait-until, loop, set-variable, end). Click any node to configure it in the right-hand panel; "Definition is valid" confirms the graph before you activate it.
Triggers — what starts a workflow
| Trigger | Fires when… |
|---|---|
lead.created | A new lead is created in the workspace. |
lead.captured | An external source (API, WooCommerce) pushes a lead — for new and returning leads alike, so store automations cover repeat customers. |
call.completed | A call finished (connected or otherwise). |
qualification.produced | The AI produced a qualification result for a lead. |
cod.disposition.produced | The AI produced a COD confirmation outcome (confirmed / cancelled / unclear) — the seam that drives the post-call WhatsApp update. |
campaign.completed | A calling/messaging campaign finished. |
message.sent | An outbound message was dispatched. |
booking.created | A calendar booking/appointment was created. |
call.handoff.requested | A live call requested a human handoff. |
call.handoff.completed | A human handoff reached a terminal outcome. |
Actions — what a workflow can do
| Action | What it does |
|---|---|
message.send | Send a message to a lead on email/SMS/WhatsApp/Telegram (central suppression & opt-out preserved). Supports approved WhatsApp templates. |
call.place | Place an AI voice call to a lead; the transcript & summary land on the Calls page, and call credits/limits apply exactly like a manual call. |
sequence.enroll | Enroll a lead into an active nurture sequence. |
lead.set_field | Set a single custom field on a lead. |
lead.get_field | Read a lead's current custom-field value into the run variables — so you can branch on live lead state after a delay, not the frozen trigger event. |
knowledge.retrieve | Retrieve top-k knowledge chunks for a query (RAG). Needs the knowledge-base entitlement. |
credits.grant | Grant credits to the workspace ledger. |
webhook.send | POST a JSON payload to an outbound webhook URL. |
Conditions — branching logic
A condition node routes the flow down a true or false path (with optional else and onError edges). Fourteen operators are available: eq, neq, gt, gte, lt, lte, contains, matches (regex), exists, in, plus and, or, not to combine them. Operands are written in the workflow expression language.
Human-readable node labels
Every node has an optional Label field (placeholder "e.g. Confirmed → WhatsApp", hint "A friendly name shown on this node. Leave blank to use the default."). With a label, that friendly name becomes the card's title and the technical type is demoted to the subtitle (e.g. "message.send · Action"). This is why the ready-made recipes read like plain English on the canvas — "📲 Send Confirm / Cancel buttons", "⏲ Wait for reply (editable)", "📞 AI fallback call".
Filling template blanks — no codes to type
When a message.send node uses a WhatsApp template, you don't hand-write variable expressions. Pick the approved template, and a row appears for each blank labelled "Variable 1", "Variable 2"… — each a dropdown of human-labelled data:
| Dropdown label | Fills with |
|---|---|
| Customer name | the lead's name |
| Phone number | the lead's phone |
| Order number | the store order number |
| Products in the order | the item list (e.g. "2× T-shirt, 1× Mug") |
| Order total / Order status / Order link | the order's total, store status, or link |
| the lead's email | |
| COD outcome / COD reason | the confirmation result (COD call flows only) |
The intro reads: "Match each blank in your template to the data that should fill it. No codes to type — just pick from the list." A Custom… option at the bottom of any dropdown reveals a raw expression field for advanced cases — the power is never taken away, just tucked out of the way.
Ready-made recipes
You don't start from scratch. The "Insert a template" dropdown holds 14 recipes, COD-first:
- 🛒 COD Button-First Autopilot — the flagship store flow (see Sell on autopilot ▸ button-first flow).
- 🛒 WooCommerce Order Autopilot — instant order-received WhatsApp + tag on every order.
- 📞 COD Confirm by AI Call — call to confirm the moment an order lands.
- 📣 COD Result → WhatsApp Update — messages the confirmed/cancelled outcome.
- ⚡ Instant Speed-to-Lead · 🔥 Hot-Lead Alert with Email→SMS Failover · 📞 Missed-Call Rescue · 🎯 Post-Qualification 3-Way Nurture Split · 🩺 Booking Confirm + Day-Before Reminder · 🚨 Live Human Handoff SLA Safety-Net · 📊 Campaign Wrap-Up Report · 🛍️ D2C High-Intent VIP Offer · 🏡 Real Estate Instant Inquiry Blitz · 🏷️ New-Lead Tag, Enroll & Welcome.
Insert one, tweak its nodes, click Validate, then Activate. Every run is logged in the workflow's run history with a step-by-step trace.
Integrations & the Event Inspector
Two quieter pages you'll meet in the sidebar. Neither needs setup to use the rest of the product.
Integrations
A catalog of outside tools (calendars, CRMs, and more). Pick one, click Connect, and sign in or paste an API key. Once connected, your automations and AI agents can use that tool. Until you connect something, the page is just the catalog — your calendar or CRM is a great place to start.
Event Inspector
A running record of everything that happens in your workspace, written automatically: a lead created, a call ended, a form submitted. It's empty on day one because nothing has happened yet — come back after some activity and it becomes your "what exactly happened, and when?" page. To push events to your own tools, add a subscription here, or use webhooks.
Scorecards — grade every call
A scorecard is a rubric the AI uses to grade calls automatically, so you can measure quality at scale.
Find them under Settings → Scorecards (also in the sidebar in Pro mode). Three professionally written starters ship with every workspace — Lead Qualification QA, Appointment Setting QA, and Customer Service QA — and the default one scores each finished call by itself, with no setup. Build or edit rubrics (criteria + weights), and the grade appears on each call's Score tab.
Sell on WhatsApp autopilot (Store Autopilot)
If you run a cash-on-delivery (COD) store, this is the feature that pays for the product. A shopper checks out, and — with zero clicks from you — they get a WhatsApp message to confirm the order with a tap; anyone who doesn't tap gets an AI phone call; and the order status updates itself in WooCommerce. Fake orders drop, fulfilment gets faster, and your team does nothing.
The whole pipeline in one picture
Why it matters
Fewer fake orders
Unconfirmed COD orders are the #1 cost for online sellers. Every order is verified before you ship.
Zero manual work
No one calls, messages, or updates a spreadsheet. The whole loop runs itself.
Cheapest-first
A free WhatsApp button tap settles most orders; only silent ones cost a phone call.
What you'll set up (four pieces)
- Connect WooCommerce with the free plugin.
- Approve the COD message templates (a four-piece kit is pre-written).
- Turn on the button-first workflow — a ready-made recipe.
- Give your COD voice agent the right opening language.
Connect your WooCommerce store
Our free WordPress plugin turns every shopper into a lead in this CRM, hands abandoned checkouts to a recovery sequence, and lets the CRM write order statuses back after a COD confirmation. The current plugin is version 1.3.0.
What happens automatically once it's connected
- Someone places an order → a lead appears here. Their name and phone become a lead, and the order number, total, status, currency, items, email, and store URL ride along as custom fields.
- A repeat customer updates the same lead. An order from a phone already in the CRM updates that lead (upsert-by-phone) instead of being rejected as a duplicate — so store automations fire for returning buyers too.
- Someone starts checkout but doesn't pay → a recovery lead. A background scan every few minutes sends unpaid checkouts in tagged
event = abandoned_cart, ready for your Abandoned cart recovery sequence. - After a COD confirmation, the order moves itself. The CRM writes the result back: confirmed → Processing, cancelled → Cancelled.
Set it up in five minutes
- Create an API key. In this CRM, go to Settings → Developers and create a key with the leads:write scope. Copy it — it's shown only once (it looks like
vf_live_…). - Install the plugin. On your WordPress site, upload and activate VoiceFlow CRM for WooCommerce (Plugins → Add New → Upload Plugin). The zip ships in
integrations/dist/voiceflow-crm-woocommerce-1.3.0.zip. WooCommerce must be active. - Connect. Open WooCommerce → VoiceFlow CRM and enter your CRM base URL (no trailing slash, e.g.
https://crm.yourbrand.com) and the API key. Choose which order statuses create a lead and enable abandoned-cart recovery. Save. - Test. Click Send test lead, then check Leads here — a lead named "VoiceFlow Test Lead" should appear.
The test lead appears under Leads. Your store is connected.
- Turn on recovery (optional). Activate the Abandoned cart recovery starter sequence and add an automation that enrolls leads whose
eventisabandoned_cart.
The button-first COD flow
This is the heart of Store Autopilot. Before any call is placed, the customer gets WhatsApp buttons; a tap settles the order instantly at zero cost, and only silent orders escalate to an AI call. Both paths end the same way.
Turning it on
- Approve the WhatsApp templates from the COD messaging kit (especially the buttons template).
- Open Workflows → Insert a template → 🛒 COD Button-First Autopilot.
- On the send step, pick your approved buttons template and match its variables from the dropdowns (Customer name, Order number, Products).
- Paste your COD voice agent's id into the call step, and edit the ⏲ Delay if 15 minutes isn't what you want.
- Keep the 📣 COD Result → WhatsApp Update recipe active so customers hear the outcome either way. If you run button-first, disable the plain 📞 COD Confirm by AI Call recipe so you don't double-call.
- Validate, then Activate.
The COD messaging kit & wiring the recipes
Four ready-written WhatsApp templates cover the whole COD conversation. Find them at the top of the WhatsApp Templates "Choose a starter…" dropdown — pick each, review, and submit to Meta for approval.
| Starter | Body (variables in {{ }}) |
|---|---|
| 🛒 COD: Order received order_received | "Hi {{1}}, we received your order {{2}} — total {{3}}. Our assistant will call you shortly to confirm it, and we will message the result right here." |
| 🛒 COD: Confirm (buttons) cod_confirm_buttons | "Hi {{1}}, we received your cash-on-delivery order {{2}} for: {{3}}. Please confirm it below so we can ship right away." + two quick-reply buttons: ✅ Confirm order / ❌ Cancel order |
| 🛒 COD: Confirmed cod_confirmed | "Hi {{1}}, your order {{2}} is confirmed. We are preparing it now and will keep you posted right here. Thank you for shopping with us!" |
| 🛒 COD: Cancelled cod_cancelled | "Hi {{1}}, your order {{2}} has been cancelled as you requested. Nothing will be charged. Reply here anytime if you would like to reorder." |
order_received, cod_confirm_buttons, cod_confirmed, cod_cancelled) are exactly what the workflow recipes expect — so wiring them is just picking from a list.Wire each template into its workflow step
| Template | Goes into… |
|---|---|
cod_confirm_buttons | the 🛒 COD Button-First Autopilot send step — map its blanks to Customer name / Order number / Products. |
order_received | the 🛒 WooCommerce Order Autopilot first-touch message. |
cod_confirmed | the 📣 COD Result recipe's confirmed branch. |
cod_cancelled | the 📣 COD Result recipe's cancelled branch. |
Remember: matching a template's blanks is done from human-labelled dropdowns, not by typing expressions — see the fill-the-blanks mapper.
The Lead Order Card & COD badges
Every store lead gets a read-only Order card in its detail panel, so you can see the order and its confirmation status at a glance — no digging.
The card (subtitle "Placed in your connected store.") shows the Order number linked to your store, the Total, the Items, the Store status, and a COD confirmation badge with its reason. The badge colour tells you exactly where the order stands:
| Badge | Meaning |
|---|---|
| Awaiting WhatsApp reply | The Confirm/Cancel buttons went out; waiting for the customer to tap. |
| AI call placed | No tap in time — the AI confirmation call is out. |
| Confirmed | The customer confirmed (by tap or on the call). Order → Processing in the store. |
| Cancelled | The customer cancelled. Order → Cancelled in the store. |
| Call failed | The confirmation call couldn't complete — follow up manually. |
| Unclear | The AI couldn't tell yes from no — review the call and decide. |
Under the hood these map to the lead's cod_confirm field values (awaiting_reply, call_placed, confirmed, cancelled, call_failed, unclear), and the reason line comes from cod_confirm_reason. The card is fully localized (EN/ES/AR) and right-to-left safe.
Opening language for COD calls
COD confirmation calls work best when the agent opens in the customer's language. Set it once on your COD voice agent.
Open your COD agent under Voice Agents → the AI & voice card → Opening language. Choose the language your buyers speak — हिन्दी, বাংলা, English (India), Español, العربية, or Auto (Hindi + English). For Indian COD stores, pair it with the Sarvam (Indian-native · Hindi/Bengali) TTS provider for natural pronunciation.
Troubleshooting COD
| Symptom | Fix |
|---|---|
| Orders don't become leads | Check the plugin's CRM URL + API key (Send test lead), the key has leads:write, and the order has a billing phone (phone-less orders are skipped). |
| Buttons never send | The cod_confirm_buttons template must be approved by Meta and selected on the workflow send step, and the WhatsApp channel must be connected. |
| A call fires even when the customer tapped | Make sure only one COD recipe is active. If you run button-first, disable the plain 📞 COD Confirm by AI Call recipe. |
| Store status doesn't update after confirmation | Re-save the plugin settings (re-registers the write-back secret). Check WooCommerce → Status → Logs (source voiceflow-crm) for the write-back result. Only confirmed and cancelled change status — unclear never does. |
| Outcome shows "Unclear" | The call was ambiguous. Give the agent a clearer opening language; the buyer can also just tap a button on the follow-up. |
| Repeat customers rejected as duplicates | Ensure the plugin is 1.1.0 or newer (current: 1.3.0) — it upserts by phone so returning buyers update their existing lead. |
Sell it as your own SaaS
VoiceFlow CRM AI isn't just a product you use — it's a product you can sell as your own. The reseller (agency) model turns your copy into a white-label platform: you sign up your own clients, put your logo, colours, and domain on everything, set your prices, and keep the difference. Your clients never see the word "VoiceFlow."
This section is for you if you want to:
- Start an agency — run AI voice and messaging campaigns for a roster of clients.
- Launch your own SaaS — put a public marketing site live, let customers self-sign-up, and bill them on a plan.
How the money works, in one breath: you pay the platform a package fee for the right to resell (with a free trial). You then charge your clients whatever you like — a markup, flat price, revenue share, or your own plan. You buy platform usage credits at your tier's wholesale rate and resell that usage at your retail price. The margin is yours.
Becoming a reseller — register & run the wizard
About two minutes. You create an organization (your agency) and claim a free branded web address along the way.
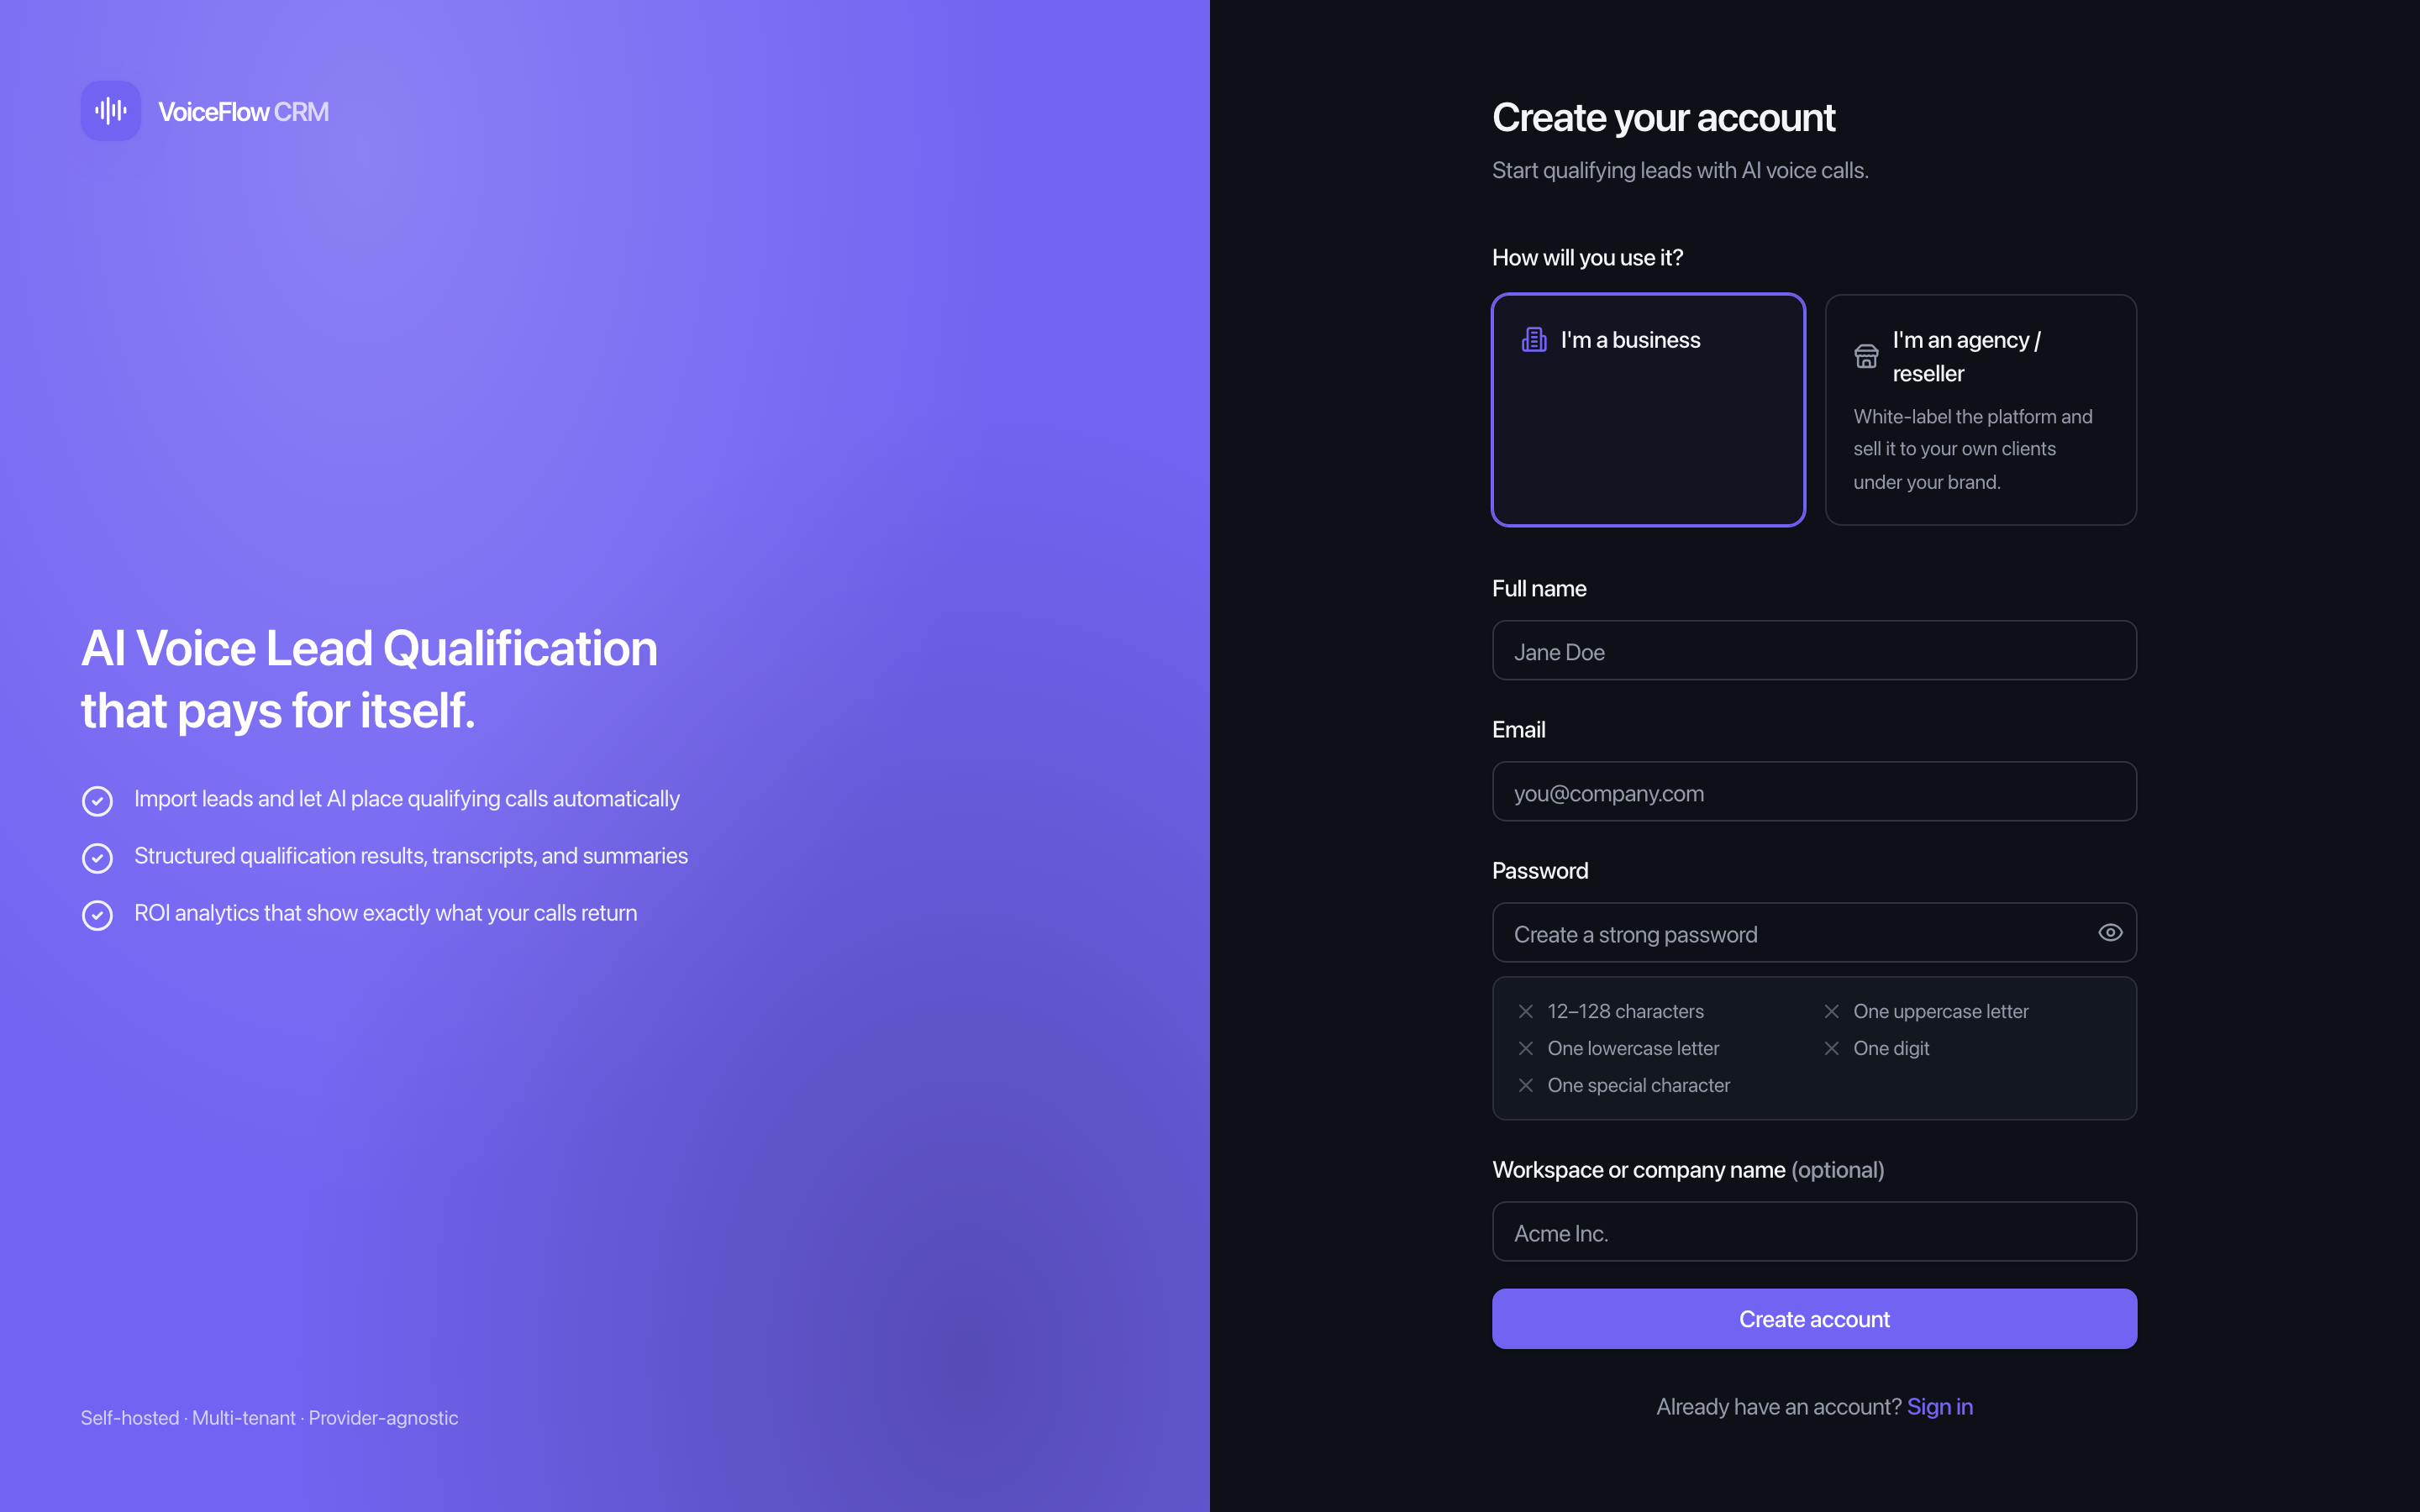
Register as an agency
- Go to the Register page.
- Pick the card titled "I'm an agency / reseller" — "White-label the platform and sell it to your own clients under your brand." (A link ending in
?as=resellerpre-selects this automatically.) - Enter your name, email, and password, then create your account.
Run the welcome wizard
On the welcome screen ("How will you use VoiceFlow?") choose My agency ("I manage campaigns for clients") or My SaaS ("I'm launching this platform for my own customers"), then Continue. This opens the four-step Reseller setup wizard: Name your agency → Add your brand → Choose a package → You're set up.
- On "Name your agency", fill in Agency name (or Platform name for SaaS) and optionally a Handle (a short slug like
acme) that becomes part of your free address. - Click Create organization — this starts your free reseller trial.
- Copy your free branded address (
your-handle.your-domain), live immediately with automatic HTTPS, then Continue.
White-label branding — make it look like yours
Branding is what makes VoiceFlow disappear and your brand appear. Whatever you set is inherited by every client workspace under your agency.
The two-minute quick-set
On the wizard's "Add your brand" step (the Brand quick-set card): paste a Logo URL (https://), pick a Primary color, and Save & continue (or Skip).
The full branding editor (anytime)
Open your organization → Branding tab (the Agency branding card), organised into five sections: Brand (product name, company name, logo, favicon — upload up to 2 MB or paste a URL), Colors & typography, Login page, Emails, and Footer & support. Click Save changes; Reset to default clears every override.
Choosing your reseller package
Your package is your agency's own plan with the platform — the wholesale deal that sets your limits and perks: how many clients you can take on, how many website templates you get, custom domains, whether clients can bring their own keys, and your wholesale credit rate.
Pick one on the wizard's "Choose a package" step (typically Starter, Growth, Unlimited) — click Select package, or I'll choose later. Change it anytime from your organization → Billing → the Your package card (your active one is marked Current, with Upgrade on the others).
What the tiers control
- Client limit — the maximum number of client workspaces you can run.
- Website templates — how many marketing-site designs you can use (basic = 2, pro = 4, all = 5). The top tier also unlocks Custom CSS.
- Custom domains — whether you can attach your own domains.
- Client keys — whether your clients may bring their own provider keys.
- Wholesale credit rate — your buy price for platform usage credits.
Building & publishing your reseller website
A public marketing site where customers learn about your service and sign themselves up — branded entirely as you.
- Pick a template — from your organization's website editor, choose one of the marketing-site designs your tier unlocks.
- Edit the sections — hero, features, stats, testimonials, FAQ, pricing, and call-to-action are all copy-level cards with a live preview.
- Publish and view it live — the site goes live at your branded address; use View site to preview.
Connecting a custom domain
Your free your-handle.your-domain address works from day one. When you're ready for your own domain (e.g. app.youragency.com), it's a few guided clicks.
- In your organization's domain settings, add your custom domain.
- Create the DNS record it shows you at your domain registrar (a CNAME pointing at the platform).
- The platform verifies the record and issues an HTTPS certificate automatically — no server work.
Bringing on clients
Each client is a workspace under your agency. You can provision it, invite the client in, and apply a template so they start ready to go.
- Provision a client workspace — from your organization, create a new client workspace (name it for the client). It inherits your agency branding.
- Invite the client in — send an invitation to their email; they set a password and land in their branded workspace.
- Apply a template — optionally seed the workspace with starter agents, sequences, and settings so the client isn't staring at a blank slate.
Pricing and billing your clients
You decide what each client pays and how. The platform keeps your agency-to-client billing separate from your agency's own bill.
Set the resale arrangement
For each client you can charge a flat monthly price, a markup on usage, a revenue share, or assign one of your own plans. Configure it from the client's billing settings inside your organization.
Send a payment link and issue invoices
Send the client a payment link (through your connected gateway) and issue branded invoices — they carry your company name and support details, never the platform's.
The credit wallet — buy wholesale, resell at your price
Usage (like call minutes) is metered in credits. You buy credits from the platform at your tier's wholesale rate and resell that usage to clients at whatever retail price you set.
Buy platform credits (wholesale)
From your organization's Billing / credits area, top up your agency's credit balance at your wholesale rate. This is the pool your clients draw from when they run on your platform keys.
Resell usage to your clients (retail)
Set your own Credits per minute retail rate for clients (via the plans you assign them). When a client places a call on your keys, their usage is metered at your retail rate — the difference between that and your wholesale cost is your margin.
Reports and supporting your clients
See what you're earning and help your clients — all from your organization view.
See what you're earning
Your organization shows subscription income plus credit-pack sales, and your usage against your package limits. The platform owner's Admin → Revenue tab rolls up per-reseller revenue too.
Support your clients
Because everything is white-labelled, your clients contact you. Set your own Support URL and Support email in branding so every screen and email points to your help channel. You can open any client workspace to see what they see and help them directly.
REST API
Everything in the product is backed by a clean REST API, so you can push leads in, read results out, and drive your own automations. This is a quick orientation; the full endpoint reference is in docs/04_API.md.
Base URL & format
The API is served under the /api/v1 prefix on your instance — JSON in, JSON out. Example: https://your-app.com/api/v1/leads. Check the version at GET /api/v1/version (returns { "version": "1.5.0", "channel": … }).
Authentication (session token)
Sign in once to get a session token, then send it as a Bearer token on every request. (For machine-to-machine integrations that only touch leads/calls, prefer a scoped API key — see External API & keys.)
# 1) Get a token
curl -X POST https://your-app.com/api/v1/auth/login \
  -H "Content-Type: application/json" \
  -d '{ "email": "you@example.com", "password": "••••••" }'
# → { "data": { "token": "vf_…", "expiresAt": "2026-…" } }

# 2) Send it on every request
curl https://your-app.com/api/v1/leads \
-H "Authorization: Bearer vf_…"Common resources
GET/POST/leads— list and create leads (bulk import at/leads/import).POST/campaigns— launch an AI qualification campaign.GET/calls,GET/calls/:id— call attempts plus each call's transcript, summary, qualification, and score.GET/dashboard— the workspace metrics behind the dashboard./settings/*— branding, providers, messaging, and webhook endpoints.
curl -X POST https://your-app.com/api/v1/leads \
  -H "Authorization: Bearer $TOKEN" \
  -H "Content-Type: application/json" \
-d '{ "name": "Priya", "phone": "+91...", "customFields": [] }'External API & API keys
The external API is the scoped, key-authenticated surface built for integrations like the WooCommerce plugin or your own systems. It's stable, rate-limited, and workspace-bound.
API keys
Create keys in Settings → Developers. Give the key a name, pick an environment, and select scopes; the secret (vf_<env>_…) is shown once. Keys are hashed at rest, bound to the workspace that issued them, and revocable. Scopes use a <resource>:<action> grammar and are exact-match — leads:read does not imply leads:write. Available scopes: leads:read, leads:write, calls:read, voice-agents:read, webhooks:read, webhooks:write.
Endpoints
All under /api/v1/external/*, authenticated with Authorization: Bearer vf_…. Every route enforces its scope, a per-key rate limit, and the API-access entitlement.
| Method & path | Purpose | Scope |
|---|---|---|
GET /external | Discovery index — version, resources, scope catalog | any valid key |
GET /external/leads | List leads (paginated) | leads:read |
GET /external/leads/:id | Fetch one lead | leads:read |
POST /external/leads | Create a lead (with opt-in upsert) | leads:write |
PATCH /external/leads/:id | Update a lead | leads:write |
POST /external/store-connection | Register the store order write-back secret (WooCommerce) | leads:write |
GET /external/calls | List call records (paginated) | calls:read |
GET /external/calls/:id | Fetch one call record | calls:read |
GET /external/voice-agents | List voice agents (paginated) | voice-agents:read |
GET /external/voice-agents/:id | Fetch one voice agent | voice-agents:read |
Upsert by phone
POST /external/leads accepts an optional "upsert": true. With it, a lead whose phone already exists is updated (and the lead.captured trigger fires for both new and returning leads) — this is how repeat store customers are handled without duplicate errors. Without it, a duplicate phone returns a conflict.
curl -X POST https://your-app.com/api/v1/external/leads \
  -H "Authorization: Bearer vf_live_…" \
  -H "Content-Type: application/json" \
  -d '{ "name": "Ekata", "phone": "+91...", "upsert": true,
"customFields": { "order_number": "#1042", "order_total": "250.00 USD" } }'Webhooks
Subscribe to events to drive your own automations from outside the product.
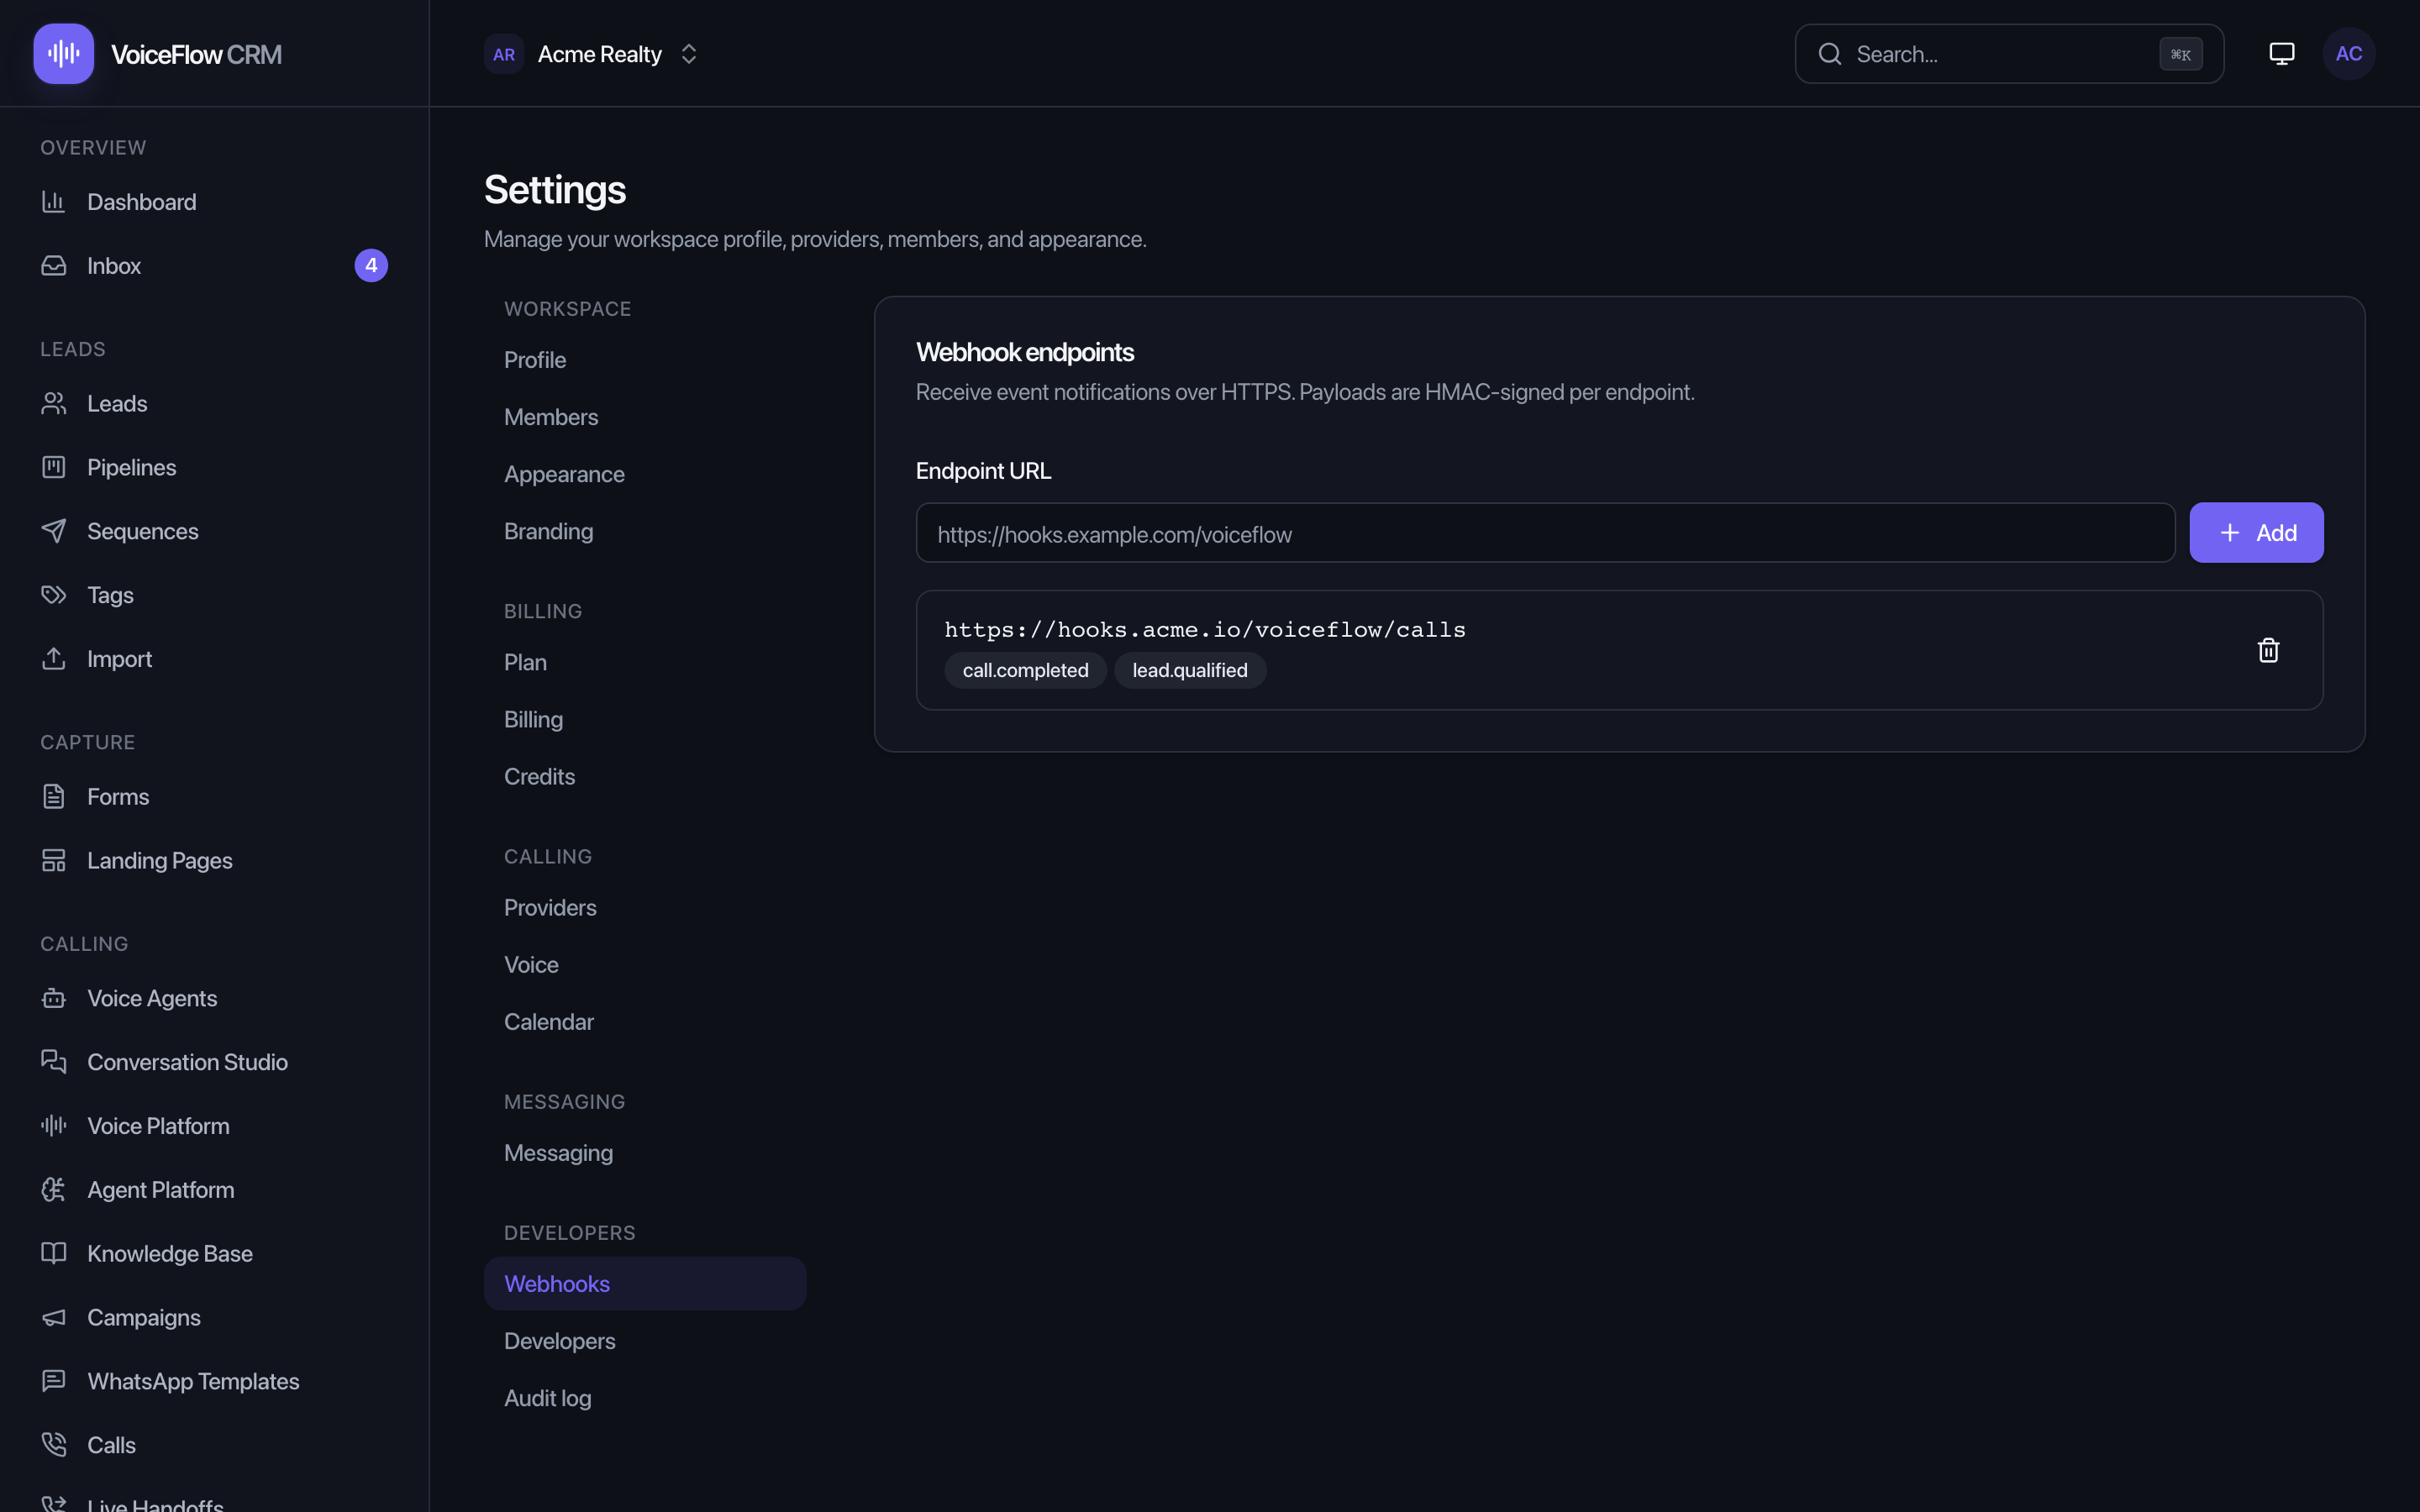
Add an endpoint under Settings → Webhooks (or POST /api/v1/settings/webhook-endpoints) and VoiceFlow POSTs a JSON payload to your URL whenever a subscribed event fires — for example a lead being created or a call being qualified.
Workflow expression language
Conditions, action arguments, and template parameters in Workflows are written in a small, safe expression language. Most users never see it — the fill-the-blanks mapper writes it for you — but here's the full reference for power users.
eval and no host access — a hand-written parser + interpreter evaluate expressions with prototype-pollution guards and strict length/token/depth limits. Missing paths return undefined rather than erroring, so optional fields degrade gracefully.Accessing data
The event that triggered the workflow is available as event (e.g. event.payload.name, event.payload.customFields.order_number). Run variables set earlier are available by name and under vars. Path access supports dot properties and [index].
event.payload.name
event.payload.customFields.order_number
vars.retrievedAnswer
Operators
Precedence low → high: ||, &&, equality (== != === !==), comparison (< <= > >=), additive (+ -), multiplicative (* / %), unary (!, -). &&/|| short-circuit; + concatenates if either side is a string, else adds.
Values & array literals
Numbers, quoted strings (with \n \t \\ \' \" escapes), true/false/null, and array literals [a, b, c]. Array literals are how a WhatsApp template's ordered parameters are written — e.g. the button-first recipe's [event.payload.name, event.payload.customFields.order_number, event.payload.customFields.order_items].
Functions
Only these are callable: now(), lower(s), upper(s), len(x) (string/array length or object key count), and default(a, b) (returns b when a is null/undefined).
String interpolation
In message bodies and other string fields, ${ … } substitutes an expression's value; null/undefined become empty, objects/arrays become compact JSON. Escape a literal with \${.
Hi ${event.payload.name}, your order ${default(event.payload.customFields.order_number, "your order")} is confirmed.Entitlements reference
Entitlements are the build-defined switches and limits that gate premium features. Owners set their values through plans and feature packs; the code enforces them server-side.
How the layer cake works
- Entitlement keys are defined in the build — booleans (a feature on/off) or numbers (a cap). You can't create or rename them, only set their values.
- Feature packs bundle a set of entitlement values you can reuse across plans.
- Plans grant entitlement values directly and via attached packs. A workspace's effective entitlements are the merge of its plan + packs.
Browse every key, its type, default, and which plans/packs grant it under Admin → Entitlements. Representative keys include messaging.inbox, messaging.whatsapp_templates, ai.voice_profiles, ai.agents, ai.knowledge_base, automation.workflows, integrations.connectors, integrations.events, calls.recording, agency.mode, whitelabel.branding, whitelabel.custom_domain, and the platform-keys/credits and public-API entitlements.
Architecture overview
A high-level map of how the pieces fit together. All of it runs inside your Docker stack.
- Caddy terminates HTTPS and routes to the web and api services.
- web (Next.js) serves the UI and proxies API calls; api (NestJS) is the REST backend.
- worker processes background jobs from Redis-backed BullMQ queues: placing calls, running AI results, sending sequences, firing workflows, and scanning abandoned carts.
- PostgreSQL (with pgvector) stores all data and embeddings; Redis holds sessions, cache, and the queues.
- Providers are external services you connect with your own keys; calls to them are the only time data leaves your server.
docs/01_ARCHITECTURE.md, docs/02_MODULE_MAP.md, and docs/03_DATABASE.md.Installation (deep dive)
The product ships as a single Docker Compose stack. The one-command installer is the easy path; this page also documents the manual path and what every service does, so you can run it confidently on any Docker host.
What runs in the stack
| Service | What it is |
|---|---|
proxy | Caddy 2 reverse proxy with automatic HTTPS (via SITE_ADDRESS / ACME_EMAIL). |
web | The Next.js front-end (port 3000). |
api | The NestJS REST API (port 4000). |
worker | Background jobs: calls, AI results, sequences, workflows, scans. |
migrate | One-shot: applies database migrations, optionally seeds demo data, bootstraps the admin — then exits. |
postgres | PostgreSQL 16 with pgvector (leads, calls, recordings-metadata, billing, embeddings). |
redis | Sessions, cache, and the BullMQ job queues. |
backup optional | A scheduled pg_dump sidecar (enabled with the backup compose profile). |
Data lives in named Docker volumes: pgdata, redisdata, recordings, uploads, backups, and Caddy's cert store.
Path A — the one-command installer (recommended)
- Copy the product files to your server and open a terminal there.
- Run
It checks Docker + Compose v2, asks for your public address and admin login (and whether to load demo data), auto-generates secrets (encryption key, database password), writes a complete./install.sh.envfrom.env.example(backing up any existing one to.env.bak), builds the images, and runsdocker compose up -d --build. - The
migratestep applies migrations, optionally seeds demo data, and bootstraps the admin. When health checks pass, the installer prints your login URL.
--yes and set VF_HOST, VF_ACME_EMAIL, VF_ADMIN_EMAIL, VF_ADMIN_PASSWORD, and VF_SEED_DEMO as environment variables for a fully non-interactive install. On Windows, run inside WSL2.Path B — by hand
- Copy the example environment file:
cp .env.example .env - Edit
.envand set at least the required keys (see Environment reference):DATABASE_URL,REDIS_URL,APP_ENCRYPTION_KEY,PUBLIC_BASE_URL, and your Postgres credentials. - Bring the stack up:
Migrations run automatically via thedocker compose up -d --buildmigrateservice. - Open your address and sign in. If you didn't set a bootstrap admin, the first account you register becomes the system admin.
GET /api/v1/version returns { "version": "1.5.0" }.docs/15_DEPLOYMENT.md.Environment reference
Configuration lives in a single .env file in your install folder. The installer writes it for you; this is what the most important keys do. The complete list, with placeholders, is in .env.example and docs/17_ENV_REFERENCE.md.
.env It holds your secrets. Keep APP_ENCRYPTION_KEY stable — it decrypts every provider secret you've saved; changing it makes stored credentials unreadable.Core (required)
| Variable | Purpose |
|---|---|
DATABASE_URL | PostgreSQL connection string. Boot fails without it. |
REDIS_URL | Redis for sessions, cache, and BullMQ job queues. |
APP_ENCRYPTION_KEY | 256-bit master key for AES-256-GCM encryption of all provider secrets. Keep it stable. |
PUBLIC_BASE_URL | The public, internet-reachable origin. Required for live voice (Twilio callbacks + the media WebSocket). |
APP_ORIGIN | The allowed browser origin for CORS (your web app's URL). |
First-run & proxy
| Variable | Purpose |
|---|---|
BOOTSTRAP_ADMIN_EMAIL / BOOTSTRAP_ADMIN_PASSWORD | First-boot system admin. Optional — if unset, the first registered account becomes admin. |
SITE_ADDRESS / ACME_EMAIL | Caddy proxy hostname + email for automatic TLS certificates. |
API_BASE_URL | The upstream API URL the web BFF proxies to (in Compose: http://api:4000). |
NEXT_PUBLIC_API_MODE | live (proxy to the real API) or mock (in-memory fixtures for demos). Docker builds use live. |
POSTGRES_USER / POSTGRES_PASSWORD / POSTGRES_DB | Postgres service and backup credentials. Use a strong password in production. |
Optional integrations
SMTP (SMTP_*) — usually set from Admin → Platform keys instead. Provider seed keys (OPENAI_API_KEY, DEEPGRAM_API_KEY, TWILIO_ACCOUNT_SID/TWILIO_AUTH_TOKEN, …) — usually entered in the app instead. UPDATE_MANIFEST_URL and SELF_UPDATE_ENABLED — enable one-click updates. GITHUB_UPDATE_TOKEN — read-only PAT for private-repo updates. LOG_LEVEL, NODE_ENV, PORT.
.env You almost never need to put provider keys in .env. Enter them in Settings → Providers or Admin → Platform keys, where they're encrypted, validated, and swappable without a restart.Updating your instance
You never lose data on an update, and the database is always backed up first. There are three ways to update, and the admin sees a banner when a newer version exists (Admin → Updates).
Option A — from CodeCanyon (default)
- Download the new version from your CodeCanyon Downloads page.
- Extract it over your install folder (replacing the source).
- Run
It checks Docker and./update.sh.env, writes a database backup into./backups/, runsdocker compose up -d --build(migrations apply automatically), waits for health, and prints the running version. It never touches.env, your secrets, or uploaded data.
Option B — one-click from the admin console
If you set an update source (UPDATE_MANIFEST_URL, and SELF_UPDATE_ENABLED=true), Admin → Updates shows an "update available" banner and an Update now button that backs up the database, installs the new version, and restarts with live progress. Nothing is ever applied automatically — you always click.
Option C — fully hands-off (private GitHub repo)
If you keep your source in a private GitHub repo, set a read-only GITHUB_UPDATE_TOKEN and point the update manifest at your release tarball. Then Update now downloads and applies the new version automatically. Full details in docs/28_UPDATING.md.
./backups/ first. If an update misbehaves, restore that dump — see Backup & restore.Backup & restore
All your data lives in PostgreSQL and a few Docker volumes on your own server. Backing up is a database dump plus (optionally) the media volumes.
What to back up
- The database — leads, calls, transcripts, billing, settings, everything. This is the essential one.
- Media volumes —
recordings(call audio) anduploads(logos, attachments), if you want playback and files preserved. - Your
.env— keep a safe copy; it holdsAPP_ENCRYPTION_KEY, without which saved secrets can't be decrypted.
Take a database backup
docker compose exec postgres pg_dump -U "$POSTGRES_USER" "$POSTGRES_DB" > backup-$(date +%F).sqlOr enable the built-in backup sidecar (the backup compose profile) for scheduled dumps into the backups volume. Every ./update.sh and one-click update also writes a pre-update dump into ./backups/ automatically.
Restore
cat backup-2026-07-24.sql | docker compose exec -T postgres psql -U "$POSTGRES_USER" "$POSTGRES_DB"docs/16_BACKUP_AND_RESTORE.md.Troubleshooting matrix
The most common "why isn't this working?" situations and their fixes. For everyday feature questions, see the FAQ.
| Symptom | Likely cause & fix |
|---|---|
| A page says "offline" or a provider won't validate | A credential is missing or wrong. Re-enter the key in Settings → Providers (or Admin → Platform keys) and press Validate. |
| Calls aren't being placed | Check: (1) a telephony provider is connected and validated, (2) an AI provider is connected, (3) the campaign is started (not paused) and its leads aren't opted out. Also confirm PUBLIC_BASE_URL is publicly reachable. |
| WhatsApp sends but replies never arrive | Two switches: the instance webhook (Admin → Platform keys → WhatsApp → Webhook, pasted into Meta → WhatsApp → Configuration, subscribe to messages), and your number's subscription (open the WhatsApp credential and click Validate to re-subscribe). Note: localhost can't receive webhooks — you need a public domain. |
| Password-reset / invite emails never arrive | SMTP isn't configured. Set it in Admin → Platform keys → Email (SMTP) and click Send test email. |
| A feature isn't in the sidebar | Switch to Pro mode (advanced items are hidden in simple mode). Premium features may need a plan entitlement. |
| I changed a file and the dev server broke | Production Docker builds are unaffected. In local dev, Next may corrupt .next caches on edits — rm -rf .next and restart. |
| Where are the server logs? | docker compose logs -f api (or web / worker). Each call also carries its own transcript, summary, and score on its detail page. |
docs/18_TROUBLESHOOTING.md.Security & data
Everything runs on your own server and database. Here's how your data is protected and where it lives.
- Self-hosted: leads, recordings, transcripts, and billing all live in your PostgreSQL database on your infrastructure.
- Secrets are sealed: provider keys are stored encrypted (AES-256-GCM via
APP_ENCRYPTION_KEY) and never shown back in plain text — the UI only ever displays a masked value. - Roles & access: the system admin/owner has full control; team members and agency clients only see what their role (Owner / Admin / Agent / Viewer) and plan allow. The REST API respects the same roles.
- Signed webhooks: every outbound webhook is HMAC-signed; inbound provider webhooks (Twilio, Meta X-Hub-Signature-256, Telegram secret token) are signature-verified before any state change.
- Backups: take regular database backups (one is made automatically before every update). See Backup & restore.
- Legal pages built in: your instance ships white-label
/privacyand/termspages that carry your product and company name — ready for Meta, Twilio, or any provider that asks. Review and adapt them to your jurisdiction. - Data only leaves when you connect a provider: a third party sees your data only when you connect it (your AI or telephony vendor) to perform a task you asked for.
Requirements
Everything you need to run VoiceFlow CRM AI, in one place.
Server
- A Linux server (cloud VPS is ideal) with Docker Engine 24+ and the Docker Compose v2 plugin.
- 2 vCPU / 4 GB RAM minimum; 4 vCPU / 8 GB comfortable. ~10 GB disk to start (call recordings grow over time).
- Outbound internet access to your chosen providers. A public domain + DNS for HTTPS and inbound webhooks (optional for local testing).
- Windows users: run inside WSL2.
Nothing else to install
PostgreSQL, Redis, the reverse proxy, and the app all run inside the Docker stack. You do not install Node, a database, or a web server on the host yourself.
Provider accounts (only for the features you use)
| Feature | Provider options |
|---|---|
| Phone calls | Twilio |
| AI (summaries, qualification) | OpenAI or Google Gemini |
| Speech-to-Text | Deepgram or OpenAI |
| Text-to-Speech | Sarvam, ElevenLabs, or OpenAI |
| Meta Cloud API or Twilio WhatsApp | |
| Telegram | A BotFather bot token |
| Any SMTP provider (Brevo, Gmail, Amazon SES, …) | |
| Payments (to charge customers) | Stripe, Razorpay, or PayPal |
Changelog
Highlights by version. The current release is v1.5.0 (verify at GET /api/v1/version). The full engineering changelog is in the in-repo CHANGELOG.md.
Platform
| Version | Highlights |
|---|---|
| 1.5.0 | WhatsApp-class inbox: link-preview cards, file attachments (WhatsApp + Telegram), a dependency-free emoji picker, voice notes, and both composers at parity. |
| 1.4.0 | Pre-release hardening: security headers, rate limiting, webhook signature enforcement, KPI polish, and a buyer-facing docs pass. |
| 1.3.x | Call recording with a secure in-app player; ready-made starter voice agents; owner-bypass everywhere; conversation intelligence on live calls. |
| 1.2.x | Full WhatsApp suite: rich template builder (media, carousel, buttons, live preview) + a two-way team inbox with assignment, notes, labels, and AI-suggested replies. |
| 1.0–1.1 | Core CRM, AI voice calling & qualification, campaigns, sequences, workflows, conversation studio, pipelines, forms & landing pages, multi-tenant billing, and the reseller model. |
Recent feature additions in the current line include the WooCommerce Store Autopilot (button-first COD confirmation, order write-back), the template variable "fill-the-blanks" mapper, voice persona-card galleries with live previews, per-agent opening language, human-readable workflow node labels, and full EN / ES / AR + RTL localization.
WooCommerce plugin
| Version | Changes |
|---|---|
| 1.3.0 | Button-first COD confirmation support; richer order_items (multibyte-safe); works with the Studio's button-first recipe and lead.get_field. |
| 1.2.0 | Automatic COD order write-back: after the AI confirmation call, orders move themselves (confirmed → Processing, cancelled → Cancelled). Per-store secret auto-registered on Save. |
| 1.1.0 | Repeat customers sync correctly — an order from a known phone updates that lead instead of being rejected as a duplicate. |
| 1.0.0 | Initial release: order → lead sync, abandoned-checkout recovery scan, settings page with a test button, HPOS-compatible. |
Credits & licenses
VoiceFlow CRM AI is built on excellent open-source software. This page credits the major components and explains your CodeCanyon license.
Your license
Your purchase is governed by the Envato / CodeCanyon license you bought:
- Regular License — use in a single end product that end users are not charged for. Suitable for running the CRM for your own business.
- Extended License — use in a single end product that end users can be charged for. Required if you resell access as a SaaS or agency (the reseller model).
The official terms are on your CodeCanyon download page. In the app, Admin → License lets you activate a commercial edition key; with no key, the platform runs the free community edition.
Major open-source components
| Component | Role | License |
|---|---|---|
| Next.js & React | Web front-end | MIT |
| NestJS | API & worker framework | MIT |
| PostgreSQL + pgvector | Database & embeddings | PostgreSQL License / OSI |
| Redis | Cache, sessions, job queue | BSD / RSAL |
| BullMQ | Background job processing | MIT |
| Caddy | Reverse proxy & automatic HTTPS | Apache-2.0 |
| Prisma | Database toolkit | Apache-2.0 |
| React Flow | Workflow & conversation canvases | MIT |
| Tailwind CSS | Styling system | MIT |
| Docker & Docker Compose | Packaging & orchestration | Apache-2.0 |
Support policy
How to get help, what's covered, and where to look first.
Before you reach out
- Search this documentation (press /) — most questions are answered here.
- Check the Troubleshooting matrix and the FAQ.
- Confirm your providers show a green Verified badge under Settings → Providers.
- Check server logs:
docker compose logs -f api.
What support covers
- Help getting the item installed and running as documented.
- Answering questions about the item's built-in features and how to use them.
- Fixing confirmed bugs in the item.
What it doesn't cover
- Customization, new features, or third-party integrations beyond what ships.
- Problems caused by your provider accounts (billing, suspended keys, Meta template rejections) — those are handled in each provider's own dashboard.
- Server administration unrelated to the item.
FAQ & troubleshooting
Do I have to use every feature?
No. The product works with just the pieces you turn on. Connect an AI + telephony provider for calls; add a WhatsApp number for the inbox; leave the rest for later. Unconfigured features stay quiet — they never error.
Is my data private?
Yes — everything runs on your own server and database. Data only reaches a third party when you connect that provider to perform a task you asked for.
Can I brand it as my own?
Fully. Product name, company name, logo, favicon, colors, fonts, login page, emails, and the public marketing site are all editable. See Branding.
Can my customers use it without their own API keys?
Yes — configure Platform keys and sell credits. Customers call and message on your keys; usage is metered against a balance you top up. See Your keys vs platform keys.
Does it support languages other than English?
The interface is available in English, Spanish, and Arabic (Arabic with full right-to-left). AI voice calls handle many spoken languages, with native-quality Hindi and Bengali via Sarvam. See Voice Platform and Voice Agents.
WhatsApp replies aren't showing up in the Inbox
Two switches must be on: the instance webhook (Admin → Platform keys → WhatsApp → Webhook, pasted into Meta → WhatsApp → Configuration, subscribed to messages), and your number's subscription (open the WhatsApp credential → Validate). Note that localhost can't receive webhooks — you need a public domain.
Where are my logs?
Every call has a transcript, summary, qualification, and score on its detail page. For server logs, docker compose logs -f api. More in Troubleshooting.